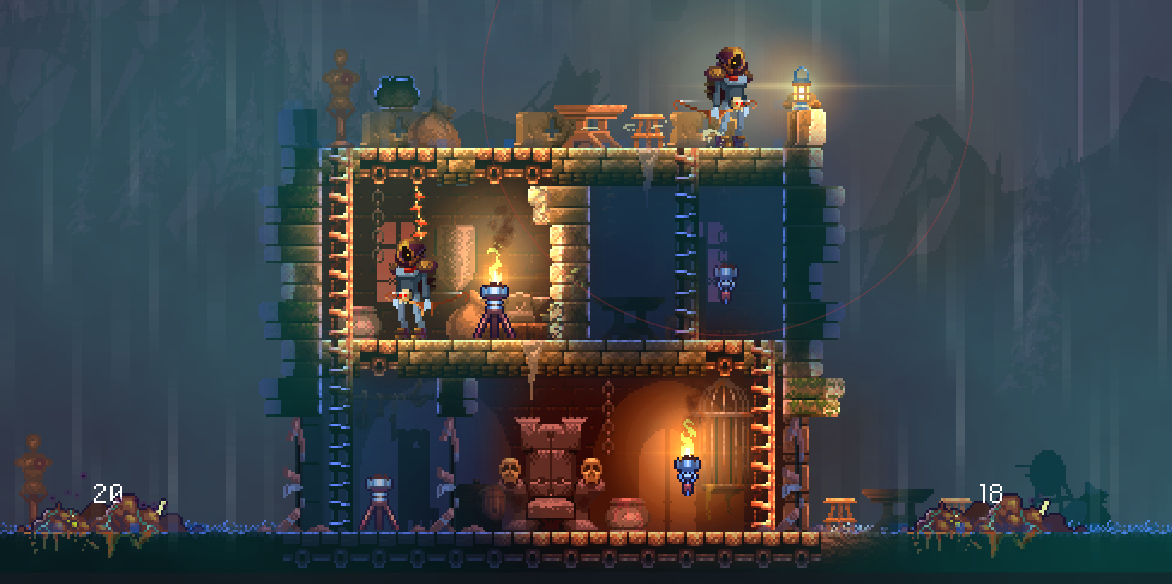
Please keep in mind that Tenjutsu is currently veeeery different from this old prototype. I provided it because I just thought it would be nice to see the evolution of the game.
Tenjutsu is set in a sprawling open Japanese city where you punch and kick your way through gangs in any order. But it wasn’t always like that. It began life as a small, focused brawler. An extended version of my 48-hour Ludum Dare game.
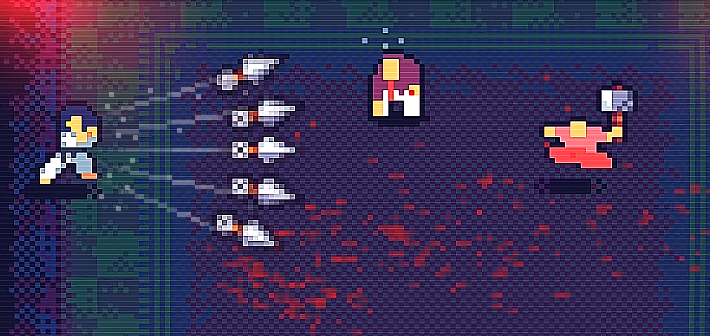
In that first version, you had to hit enemies until their stamina was depleted. But unlike most games, this didn’t kill them or knock them down. Instead, you had to trigger a special finishing move that eliminated all depleted enemies in one go.
The mechanic was pretty fun, mainly because it came with a scoring system. The more enemies you took out in a single Finishing Move, the bigger your reward. It was way riskier than taking them out one by one, because depleted enemies kept fighting until you finished them. So going for the all-at-once kill meant you were surrounded by a bunch of angry and still-dangerous thugs.
A little kunai
The problem with the concept at that time was that it only really worked because of the score/reward system. It felt a bit artificial. It pushed you into chasing the perfect run, like stealth games that reward the flawless ghost approach. It made other playstyles feel less satisfying.
The direct consequence was that I found it difficult to add variety or new levels to that original game. The reason was obvious: its combat design was too narrow. The game basically only had one way to play it right, and therefore, the recipe for good level design was kind of repetitive.
Then, at some point, I had an idea – What if I added a special, powerful weapon that you could only use from time to time? Basically, my plan was to insert random opportunities during combat to add variety in players’ approach.
Enter the Kunai! A simple throwing blade that could one-shot any enemy, but was only usable once per level. It worked pretty well, as players had a new free Joker card to use in all levels to take down the most annoying enemy easily.
That tiny addition blew the doors wide open. A Pandora’s box for me, if you will.
Adding that tiny new weapon led me to the kind-of expected slippery slope. Maybe I should add more items? Like, different weapons that affect gameplay significantly. Oh, and maybe these weapons could drop randomly to make each playthrough a bit different? You can probably guess where that led.
After Dead Cells, I promised myself I wouldn’t make another rogue.
Yet here I was, again.
Going rogue
This new version started with three core concepts taken from that initial experiments, some of which I also learned during my time working on Dead Cells. I knew they were crucial for creating something memorable.
Embrace Variety – Each weapon should feel unique and play differently.
Master the Feel – The game should feel great, controls must be tight, and it should never be the game’s fault. If you die, that’s because you miscalculated some risk.
One vs Many – The thrill comes from being outnumbered. Battles should pit you against overwhelming odds, forcing you to outthink, outmaneuver, and outfight the swarm.
That was it. The plan was in place. All I needed now was to push the legacy of Dead Cells forward. How could its current combat design be developed into something new? Easy, right?
Obviously, it wasn’t that simple. But we’ll go down that rabbit hole next time.
A link to the past
I thought it would be nice to share how the pre-rogue version of Tenjutsu actually played. Please keep in mind that the game is now veeeery different from these old prototypes, but they definitely paved the way for the current gameplay:
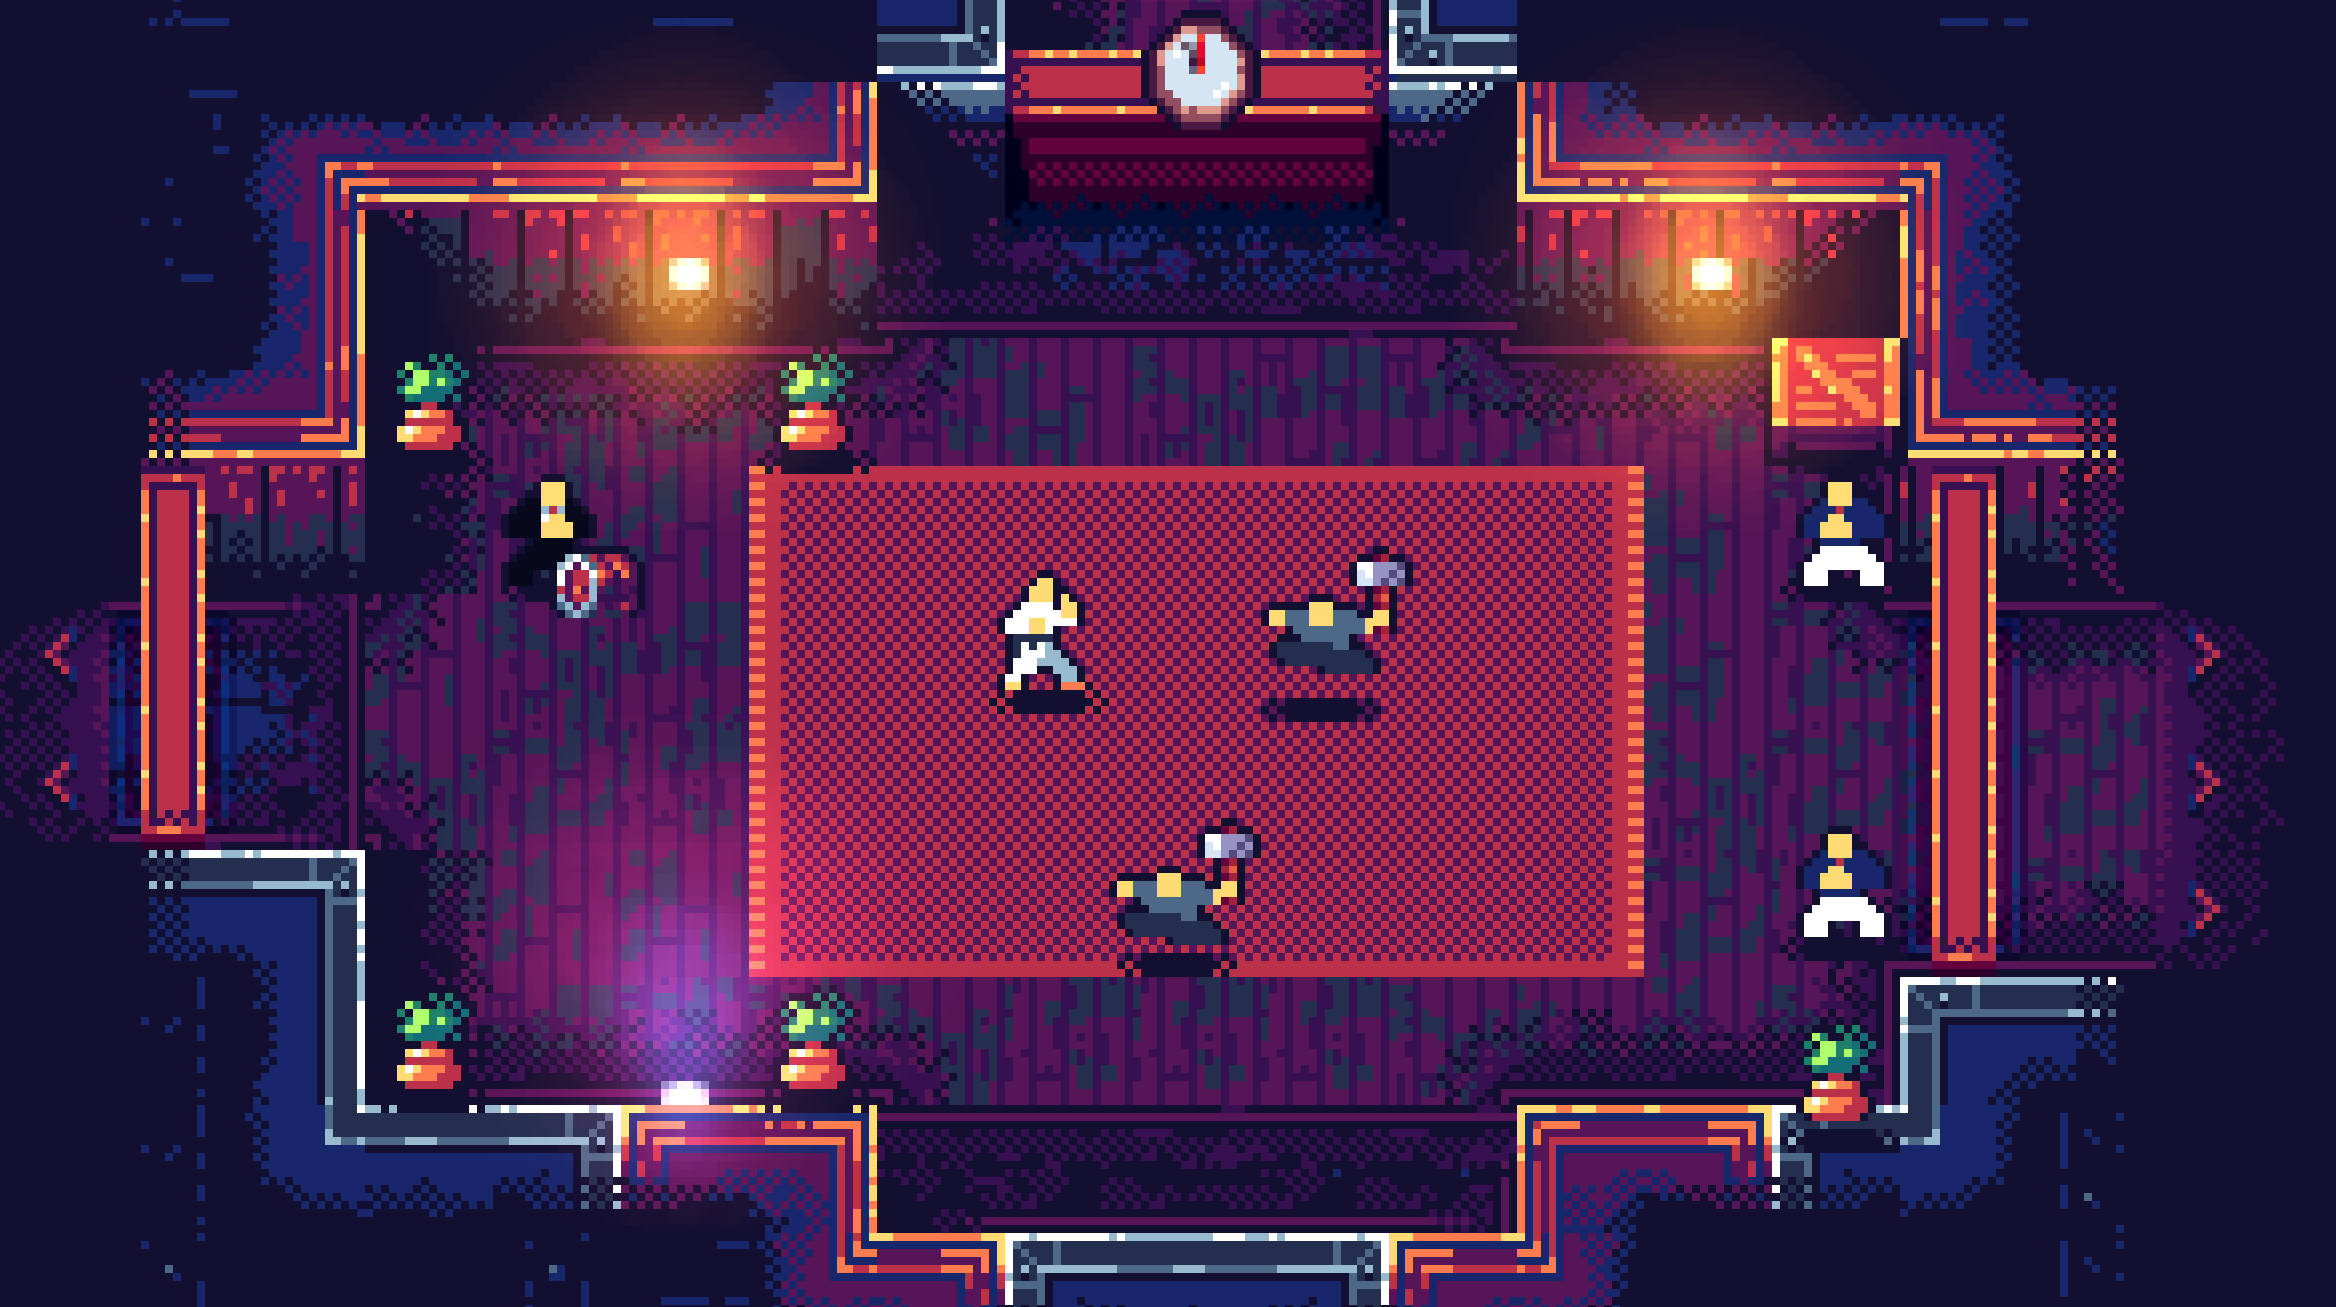
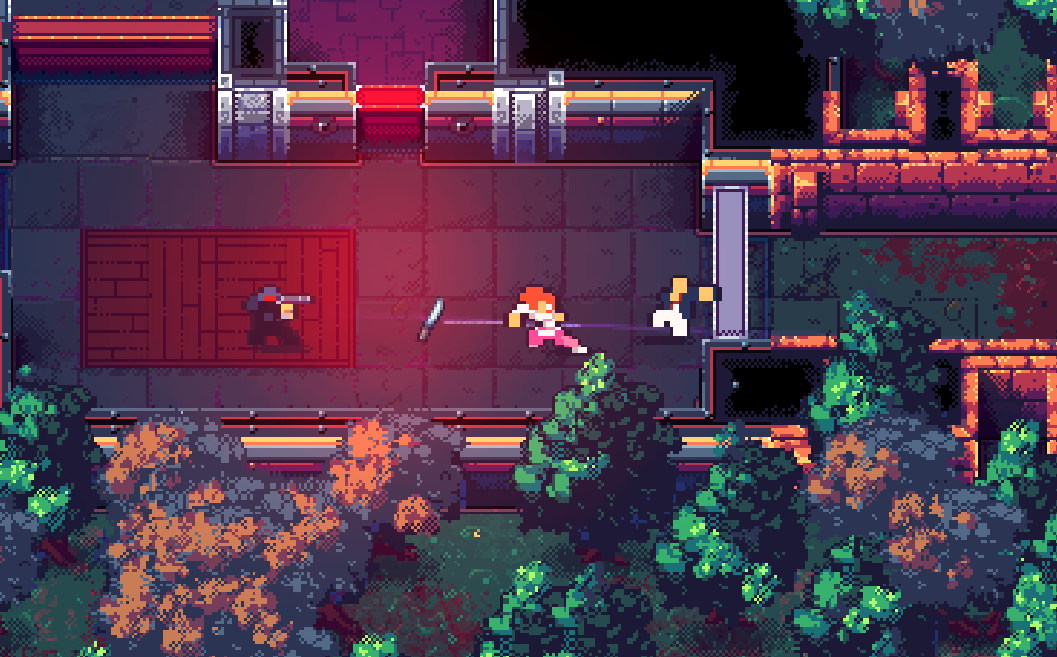
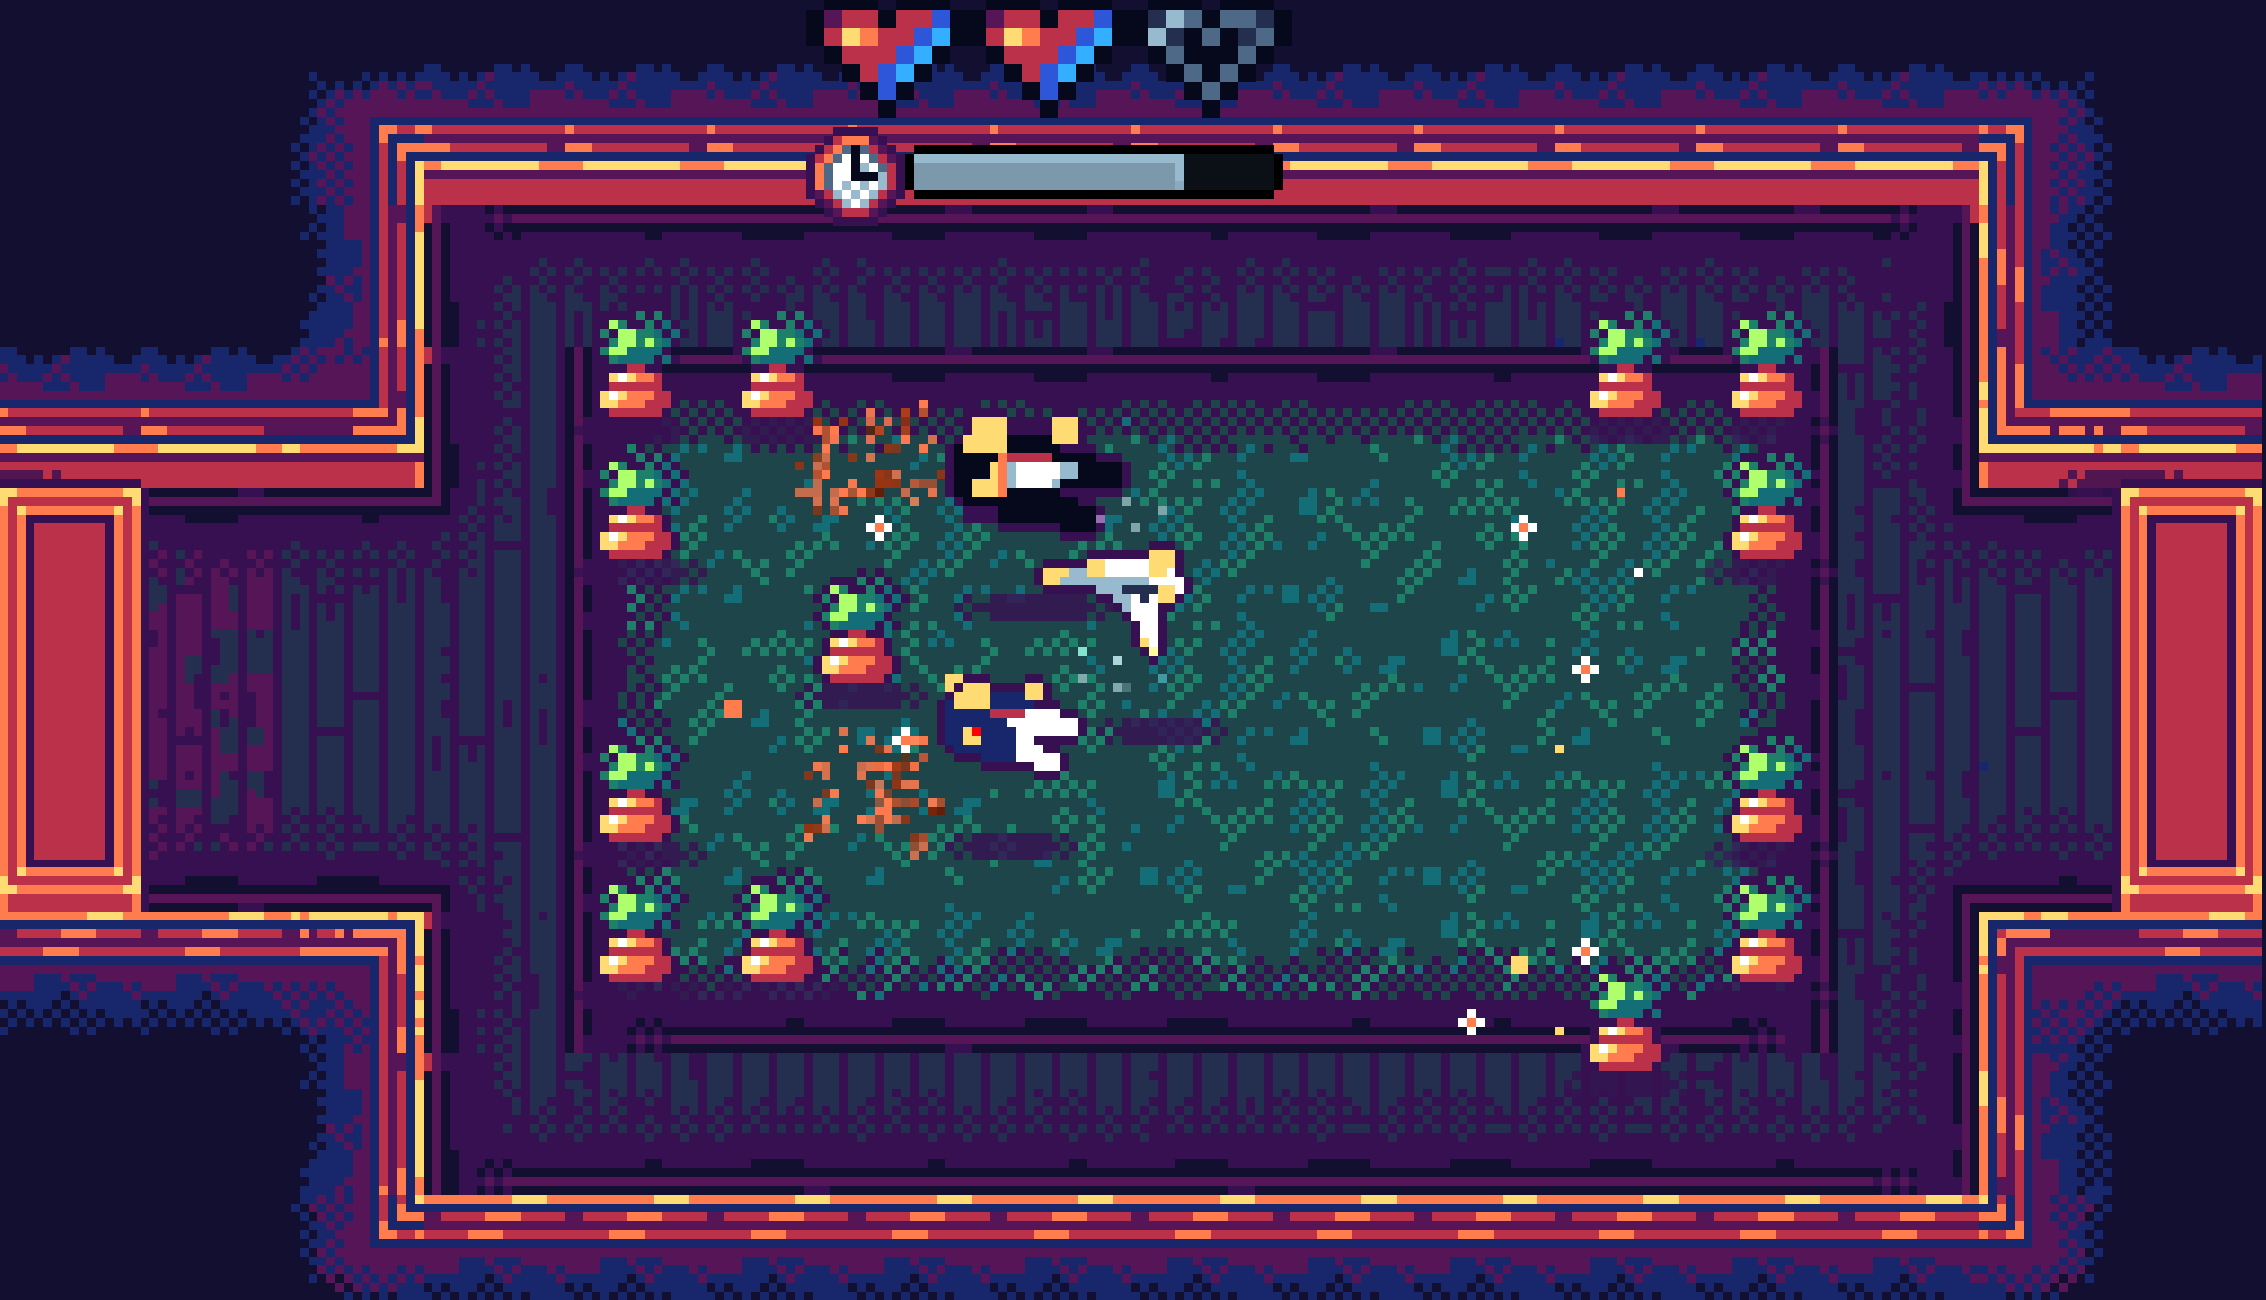
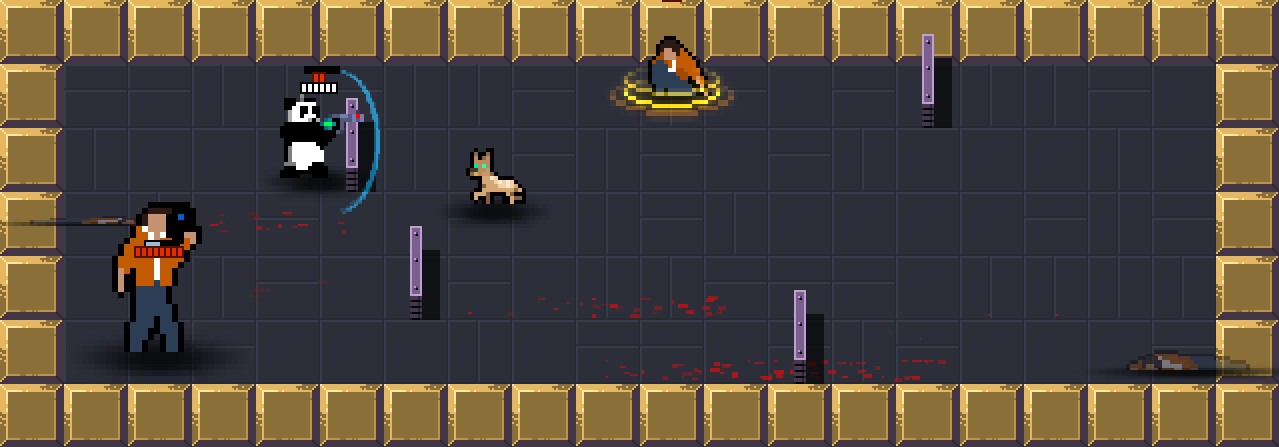
Pre-rogue version (Web version) : the last Finisher-based gameplay with a linear level design. After that one, Tenjutsu became an open world-ish roguelite.
Original game jam version (Web version): made in 48h, this build is the one that made me wish to make another action game.
It’s been a while since I last posted new content here. As you may already know, I’m hard at work on my second solo-dev title, Tenjutsu.
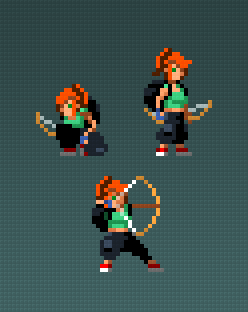
Well, not so solo actually, as I’m working with Daniel aka Dnilox, who helps me with the character animations and in-game chara-design, and with Devolver Digital, who take care of most of the marketing stunt work.
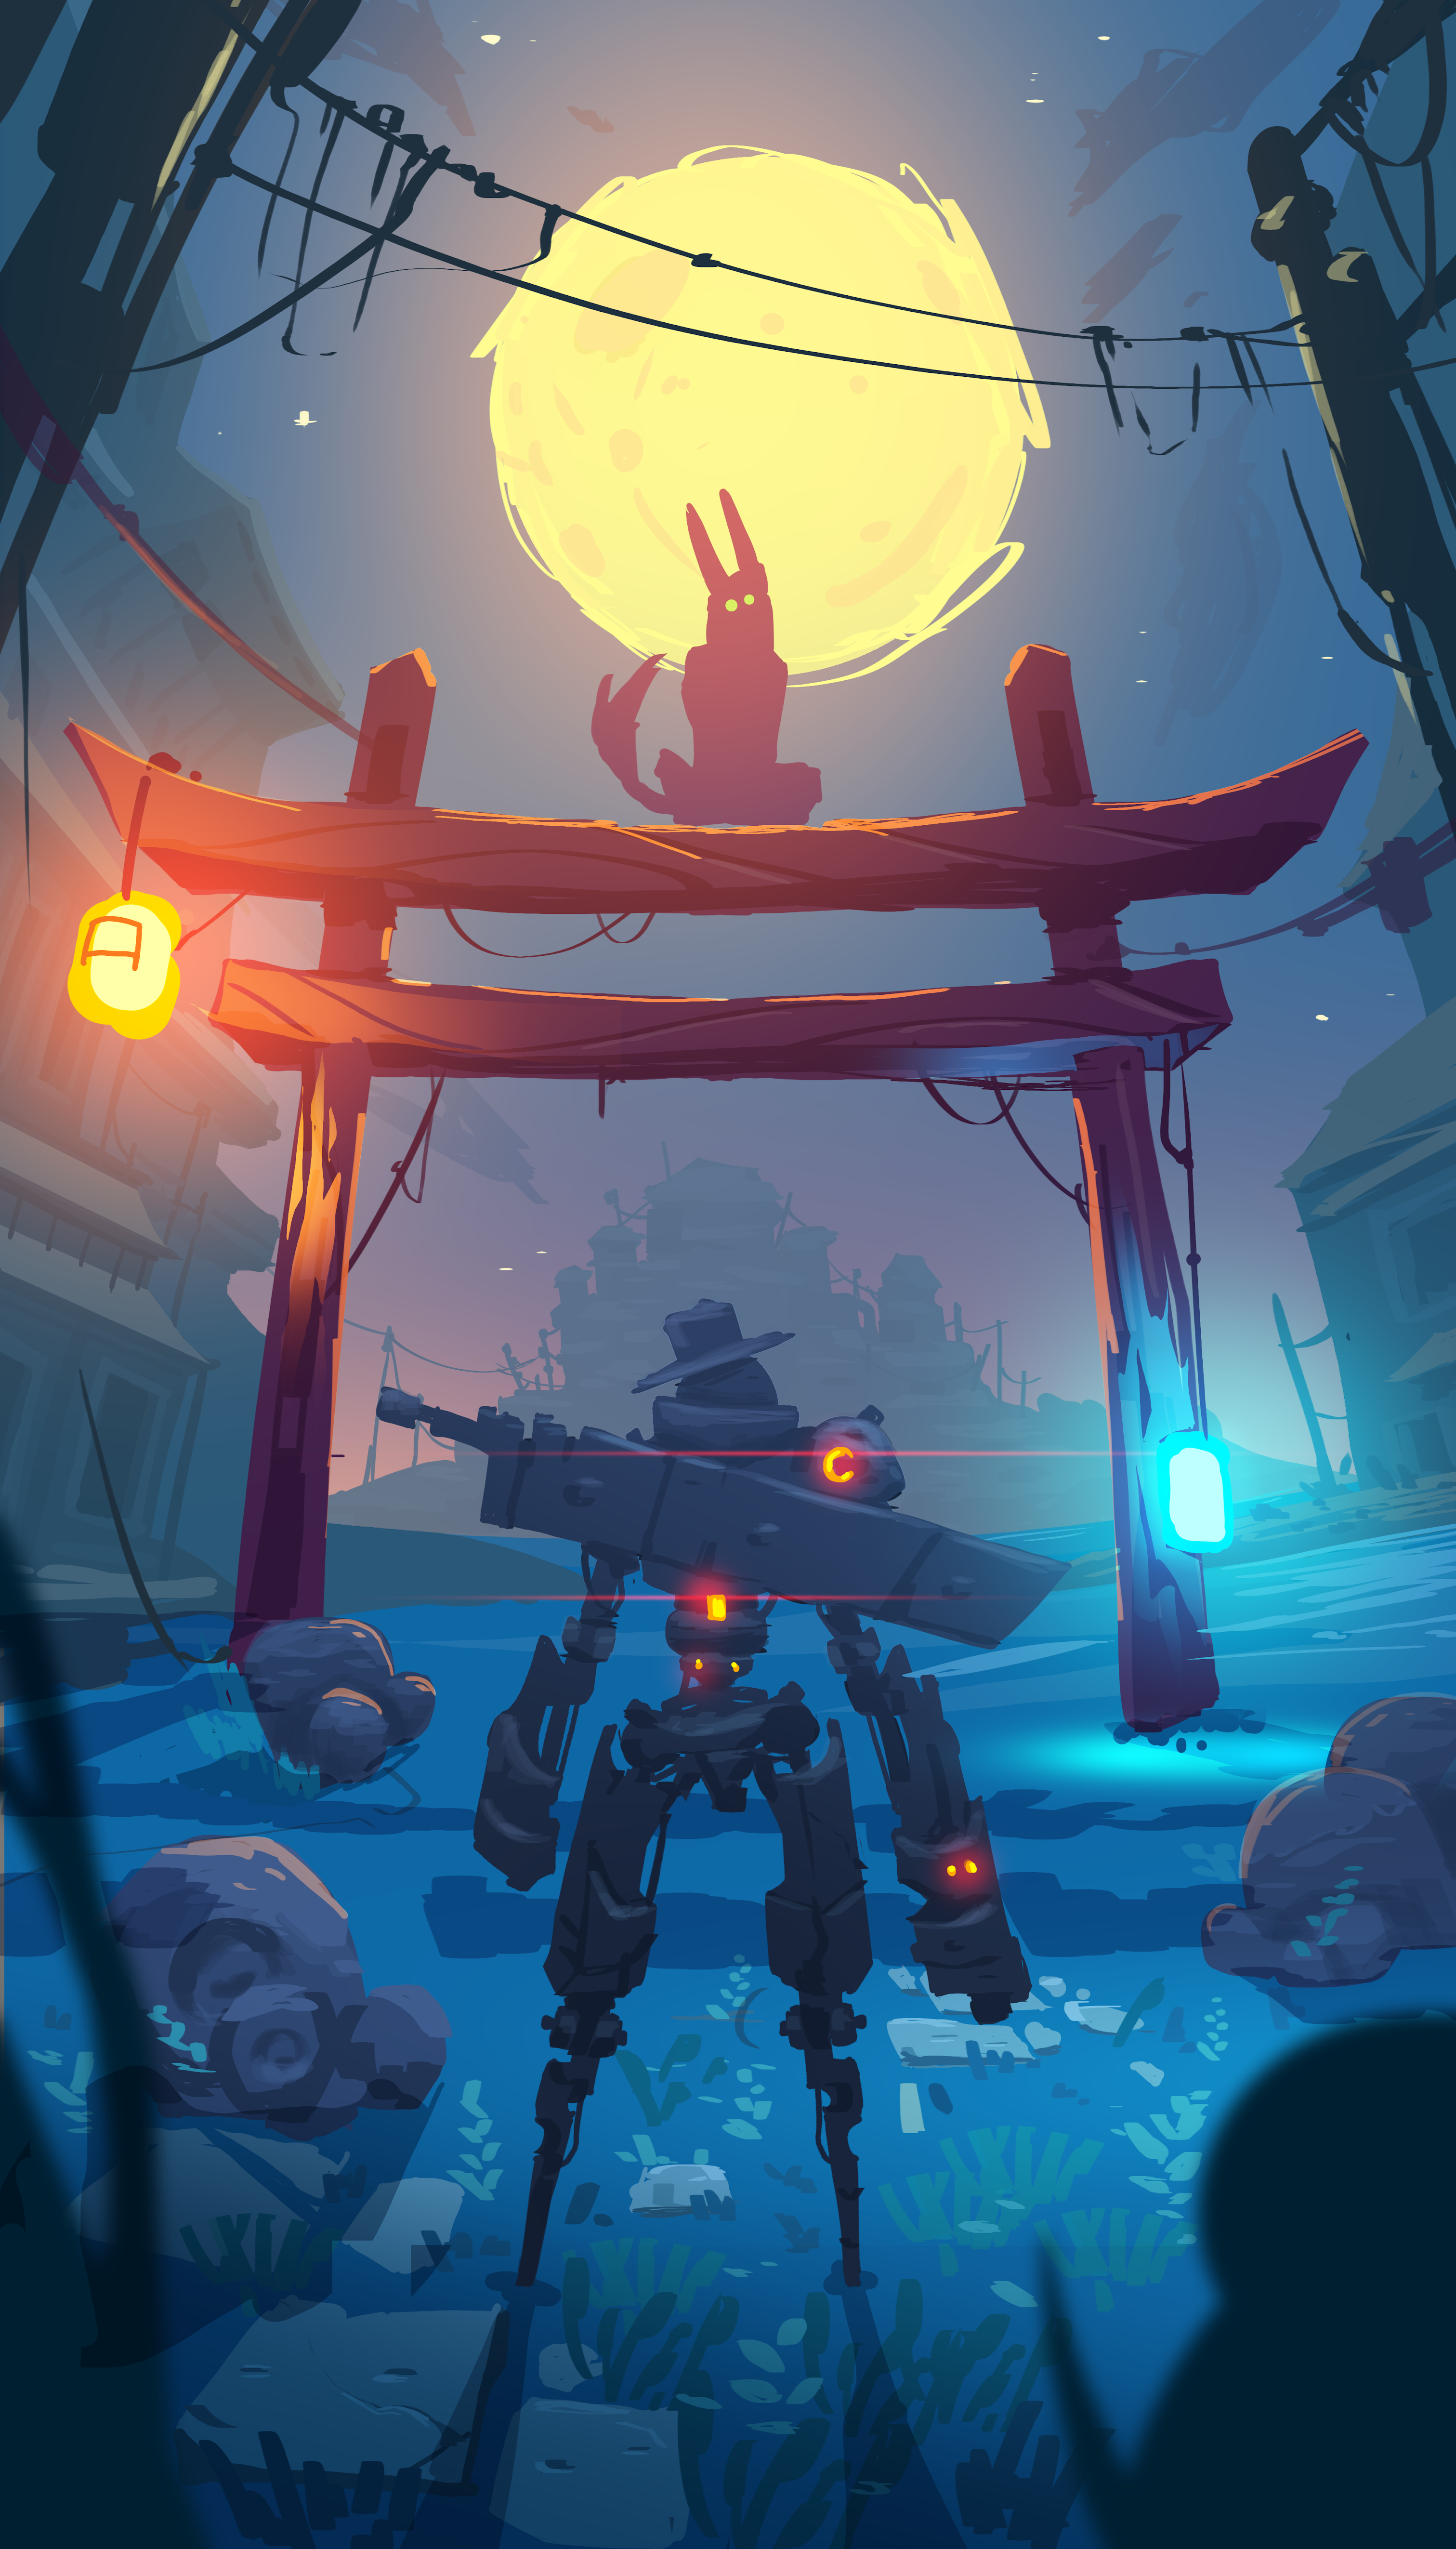
To sum it up, I like to call my game a rogue-fu. A mix of smooth martial arts combat in a roguelite structure, that takes place in a vast open Japanese city.
Like many indie developers, my game began as a game-jam entry in Ludum Dare. You know, those weird events that feel like 2000s LAN-parties, where a bunch (thousands, actually!) of people “gather” to create games in a super limited amount of time, with a theme constraint. It usually happens over the course of a weekend. It’s both super fun and super challenging. You promise yourself you’ll never do it again, then you do another one.
Anyway, long story short, the jam went great. I got lots of very positive feedback, and it encouraged me to push the concept a little bit further. You know, let’s make a short project, I mean the game’s already there right, what could possibly go wrong with a 6 months project? That was 3 years ago.
So Tenjutsu started as a linear beat-em up with a 10-second loop constraint, but it naturally evolved to a rogue as I added more weapons and some randomness to the mix.
That’s kind of surprising, as after working on Dead Cells, I basically thought I was done with this type of game… So I guess, never say never?
Core pillars
If you’ve heard about game design before, there’s this general rule of thumb that says: define your game “pillars” early, print them on paper, and put them on display in front of you, so you never forget them. Pillars are 2-3 core concepts that really define a game. They can be anything, from a few words (eg. “Thrill of the Unknown” in Subnautica) or a piece of music that conveys a particular feeling.
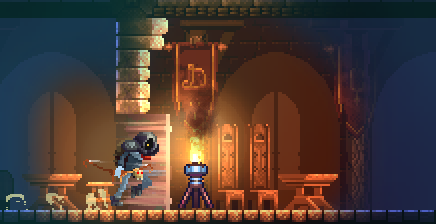
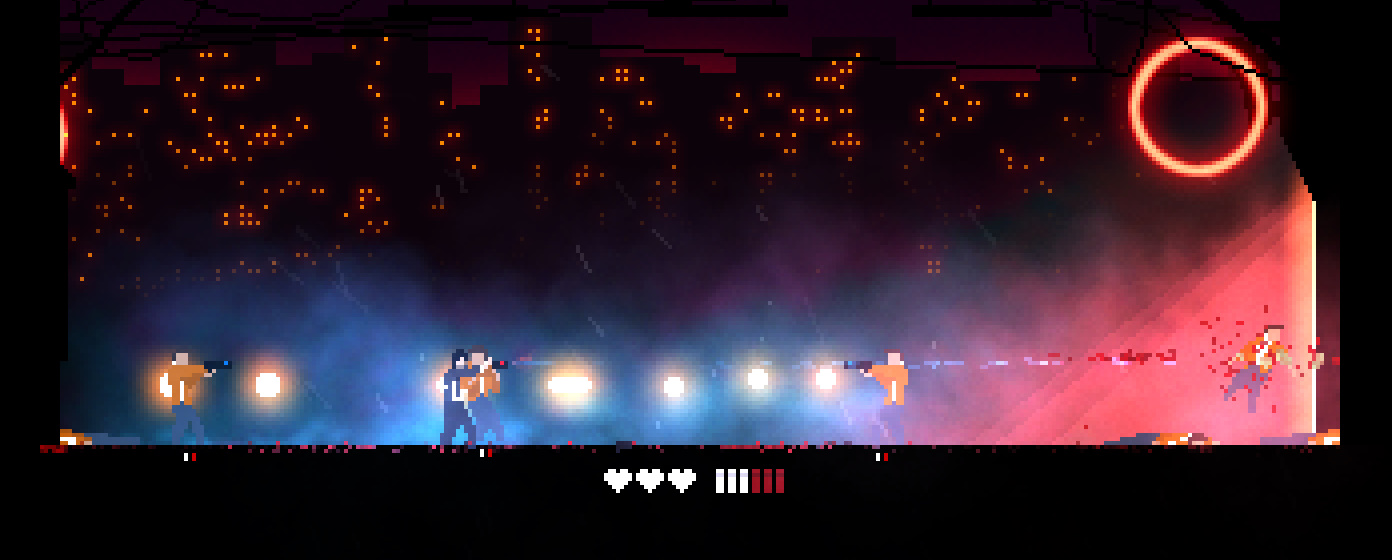
In my case, it was a few scenes from the John Wick movies, and specifically the museum combat in John Wick 3: Parabellum.
TRIGGER WARNING: violence & blood
These scenes really captured what Tenjutsu is about:
Organic combat with opportunity as a key mechanic,
Dancing around instead of focusing on one foe,
A good variety of player actions again, based on opportunities and threats during combat.
I usually sum up that pillar with the “one-vs-many combat” concept.
How it actual plays
Unforeseen consequences
Of course, these ideas all came with an awful lot of specific challenges:
How do you create an AI that creates such dynamic encounters in a procedural setting? I mean, that’s a thing to carefully design combat in a fixed setup (eg. Sifu, love that game) and that’s another topic to generate random encounters that are both interesting and non-repetitive.
How do you make a “one-vs-many” combat readable while being intense? Things can happen from any direction, and not all players share the same attention or split-second reflexes.
How do you let players progress in such a game? Should they level up and become more powerful through stats, or obtain new weapons and techniques, or just git-gud? And then, how do you keep the early game interesting once players have tasted more “advanced” combat situations?
That’s a lot of questions, right?
There are definitely many things to share, so please stay tuned as I reveal more about the behind-the-scenes stories that made my gamedev life a total nightmare.
Today, I’m proud to officially announce the existence of Tenjutsu, a new addition to the roguelite world, with the help of the incredibly nice people at Devolver Digital.
Tenjutsu is born from a Ludum Dare game jam and the ashes of Dead Cells, despite my desire to NOT make another rogue. Guess what, I’m doing another one :)
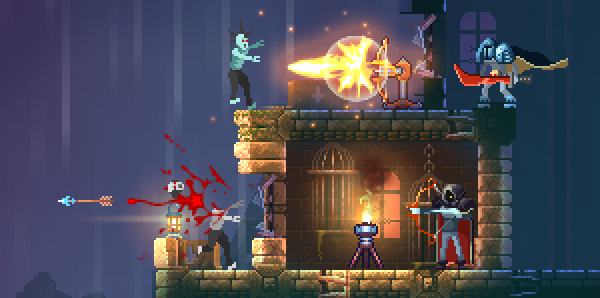
To sum it up, Tenjutsu is what John Wick or Jackie Chan would be if they were a combat roguelite. An action-packed melee combat system, where you face multiple enemies at the same time, filled with split-second battle opportunities.
Picture this: you enter a room with 3 thugs, one has a gun and the other two only have their fists. You start chaining kicks and punches the first melee guy, then send a violent elbow kick to his friend attacking you from behind, and proceed to finish the first melee thug. Suddenly, the gun guy starts to aim at you. You throw a knife at him, killing him instantly. You then roll behind the remaining thug (still stunned, he surely has lost a few teeth), and dash-kick him into a nearby wall.
Bam. Everyone is down in about 4 seconds.
My idea was just this: make the combat way more dynamic than in Dead Cells by adding opportunities, combat space management and crowd control to create true “one vs many” situations.
But wait, there’s more!
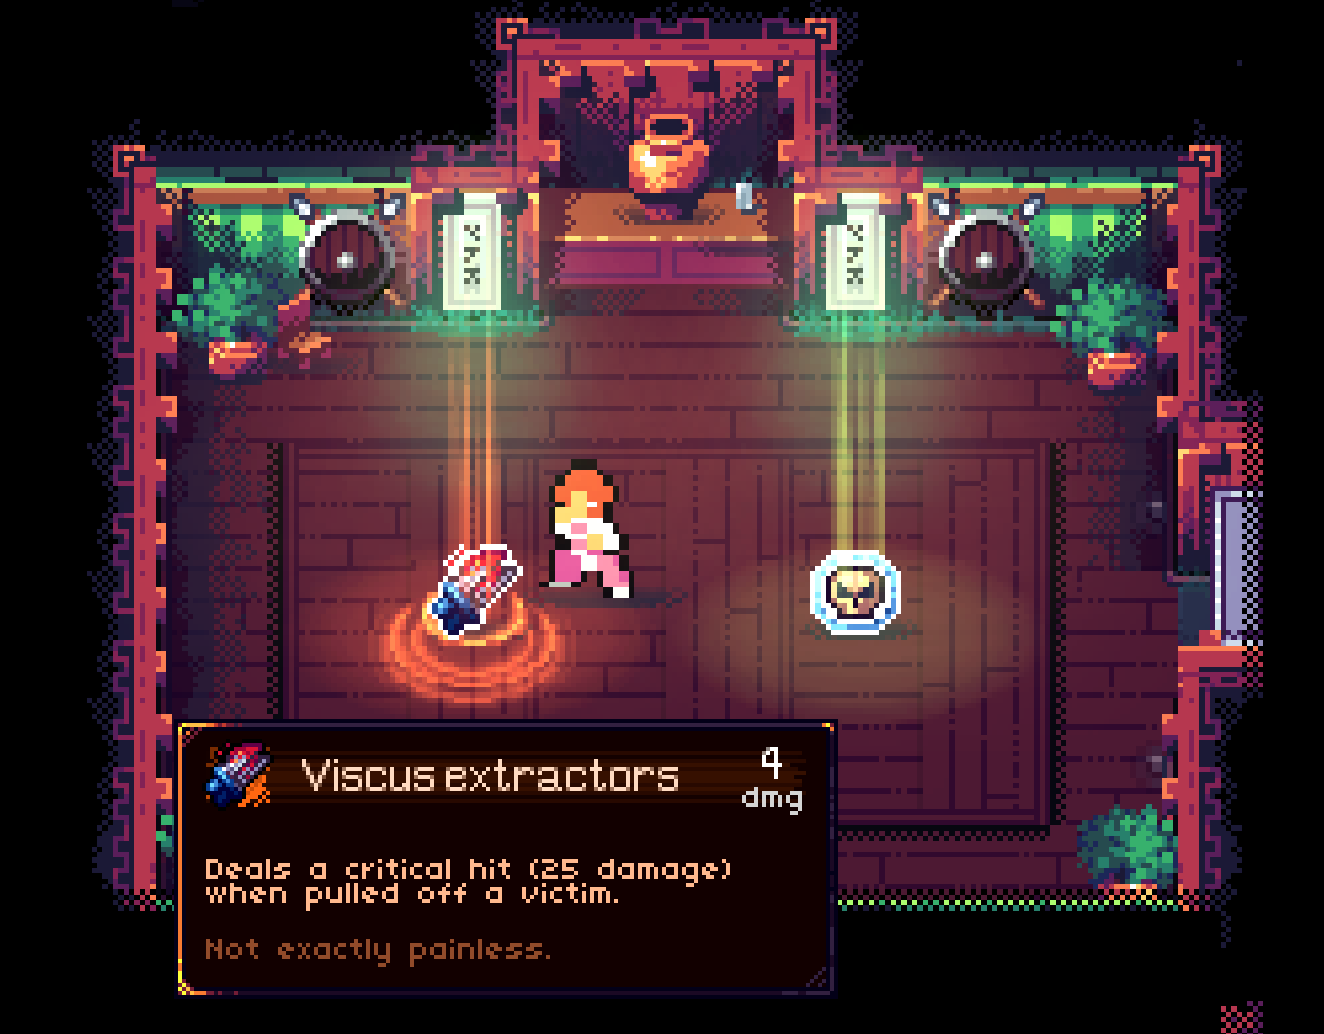
Tenjutsu of course has tons of unique weapons (each with a specific gameplay), loot, upgrades and bosses. It’s a rogue, right?
But I also wanted to address the issues with the quite linear world design from Dead Cells. I want the player to have control on their path. So, you can take down the game bosses in whatever order suits you. The later, the harder. Don’t like the bullet hell boss? Take him down first. Think of it as Megaman, but “roguer”: each eliminated boss will have consequences on the rest of the run.
There’s sooo much more to talk about (the city evolutions, the enemies, the progression system!), but… no, today is not the time, yet :)
I posted on Discord a hot take on the recent announcement from Motion Twin (“MT”), my former company where I operated as a Lead dev and Lead game designer.
It was late, my words were definitely a bit impulsive, and I truly apologize for the blunt words.
So let’s clarify my own statement.
For the context, I’ve been an associate at MT for about 19 years and was responsible for most of the design of Dead Cells, and its development, from gameplay, controls, balancing, items and down to the engine (see gamebase). I was not alone, but frankly, I had direct implications on all its parts.
Here is also a quick presentation of the Dead Cells related companies:
Motion Twin (including myself) created the game and released 2 DLCs.
While Motion Twin retained the IP, Evil Empire, created by former MT associates, continued the hard work and released 22 new major updates and DLCs, for about 5 years. They hired 50 people during that period of time.
To put it shortly, Evil Empire did a tremendous job at keeping the game fresh and alive, while taking great care of their players.
On the other side, I’ve seen first-hand how we, Motion Twin, considered our player base, years before Dead Cells even existed. Back when we were making dozens of Browser/Flash games. Our short term strategy was: release, update a bit, drop. It’s not some confidential information, it’s basically what our old player base, from the pre-Dead Cells era, know. I have obviously been part of that, but as a cooperative company, decisions were taken together, and I had my share of disillusion on that topic.
Obviously, when Dead Cells became the success we all know, MT decided to instantly ignore all of its past web-era player base. Fun fact, our former loyal players even waited more than 4 years and hundreds of requests to get the source code of long dead web games, mostly because MT didn’t care much. Thanks to their incredible love and dedication, some of our old creations were brought back to life (see Eternal Twin).
Seeing a similar abrupt termination decision from MT about Dead Cells, I can all but extrapolate on what happened behind the scene.
The current Motion Twin team is more or less 3 people from the former Dead Cells team, including one employee that joined lately, and one who took care of the administrative stuff. Most of the true original team members are now gone. Even MT founders are long gone: one founded Shiro Games (Dune, Wartales, Northgard), one created Shotgun King, and me, well.. wait for it, cool things are in the making :)
To be honest, the only true Dead Cells team is now basically Evil Empire that managed to carry the flame for so long, with a true love for the franchise.
Even I didn’t trusted them, when we decided to give them our baby. I seriously doubted that anything cool would happen from this deal. Oh I was so wrong. Five years later, Motion Twin was responsible for the 1st million units, while Evil Empire made the 9 following millions (public data).
The kind of obvious reason for all this fuzz is certainly to leave room for Windblown, the upcoming dash-dash-dash rogue from MT. As the press slowly started to realize that the Dead Cells true architects were now EE, I can easily see how the panic happened at MT. If you check the recent articles about Dead Cells, EE was mentioned more and more as the actual authors, which was honestly quite fair, given their supportive pedigree. But I can imagine MT didn’t like the fact that people started to realize that.
I kind of understand the MT strategy: it’s a rather logical marketing stunt. Get rid of Dead Cells to leave room for Windblown. But as Motion Twin always did, it’s a one-way strategy that leaves people behind: both loyal players and employees at EE. Nothing really new, unfortunately.
I’d close that topic by simply quoting someone still part of the current MT team (I hope he won’t mind, I kept him anonymous). He had some interesting take, as we debated about how we should, or should not, take care of our past communities and our former player base:
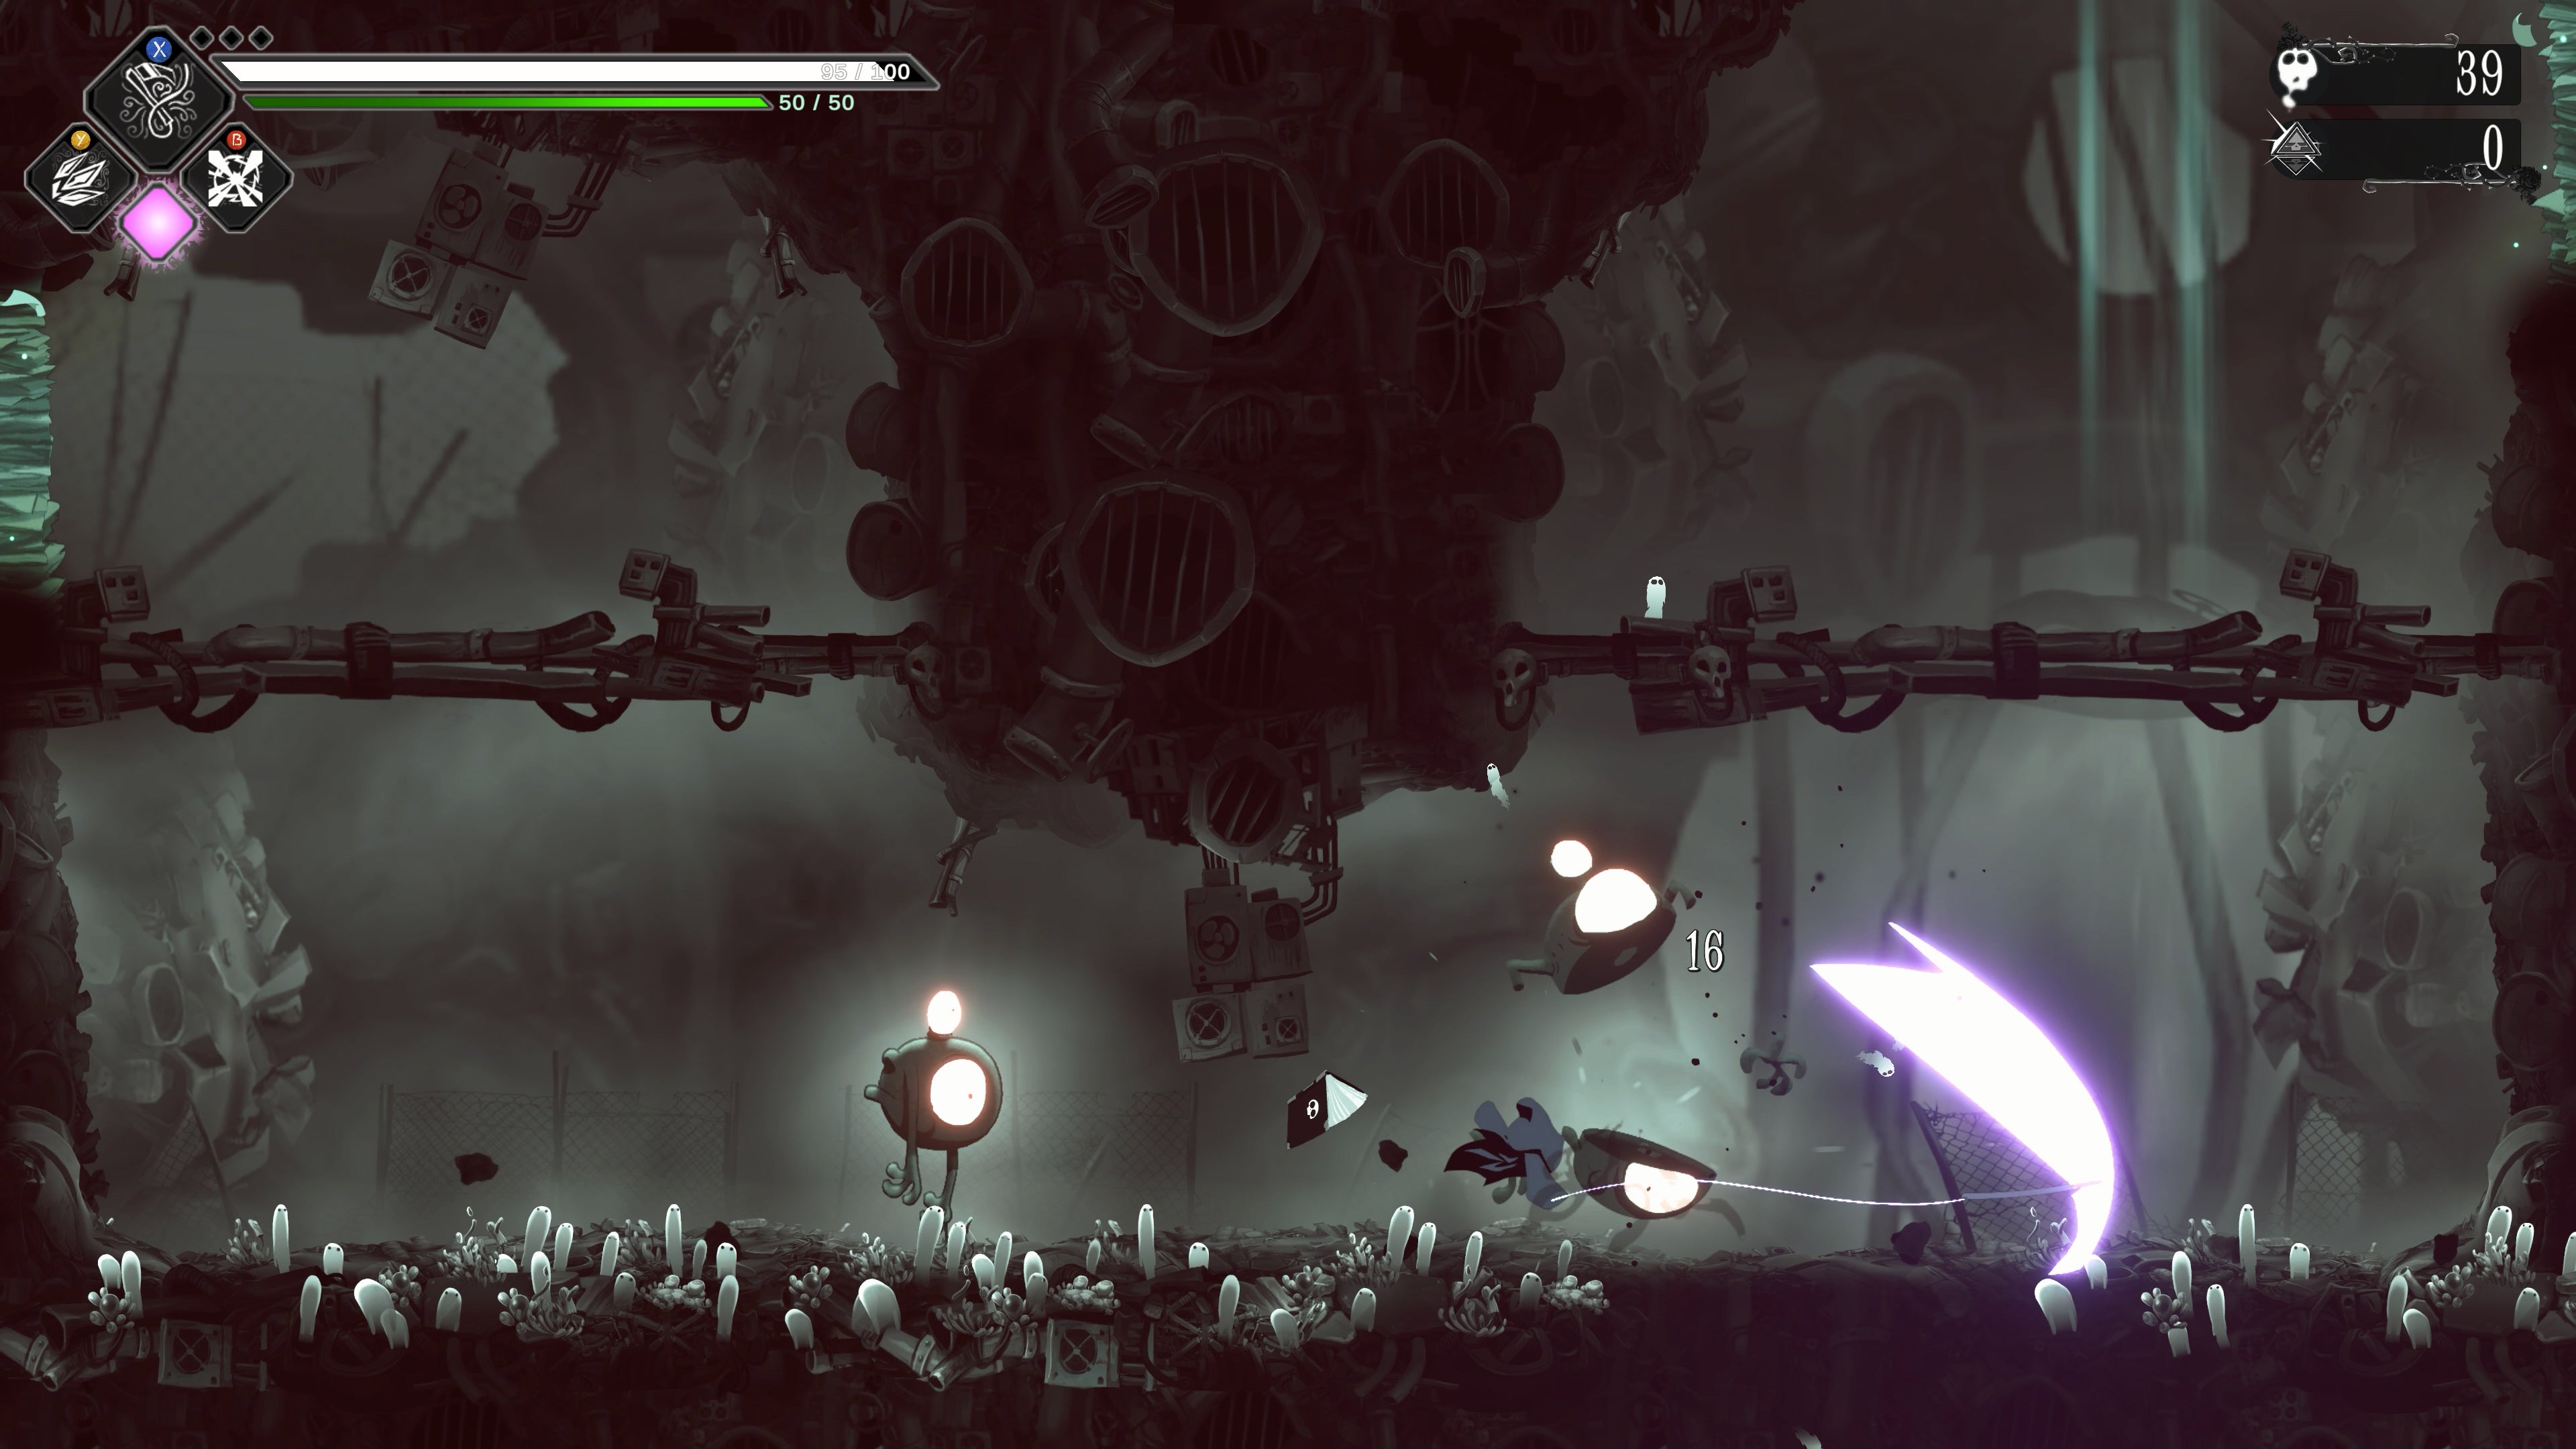
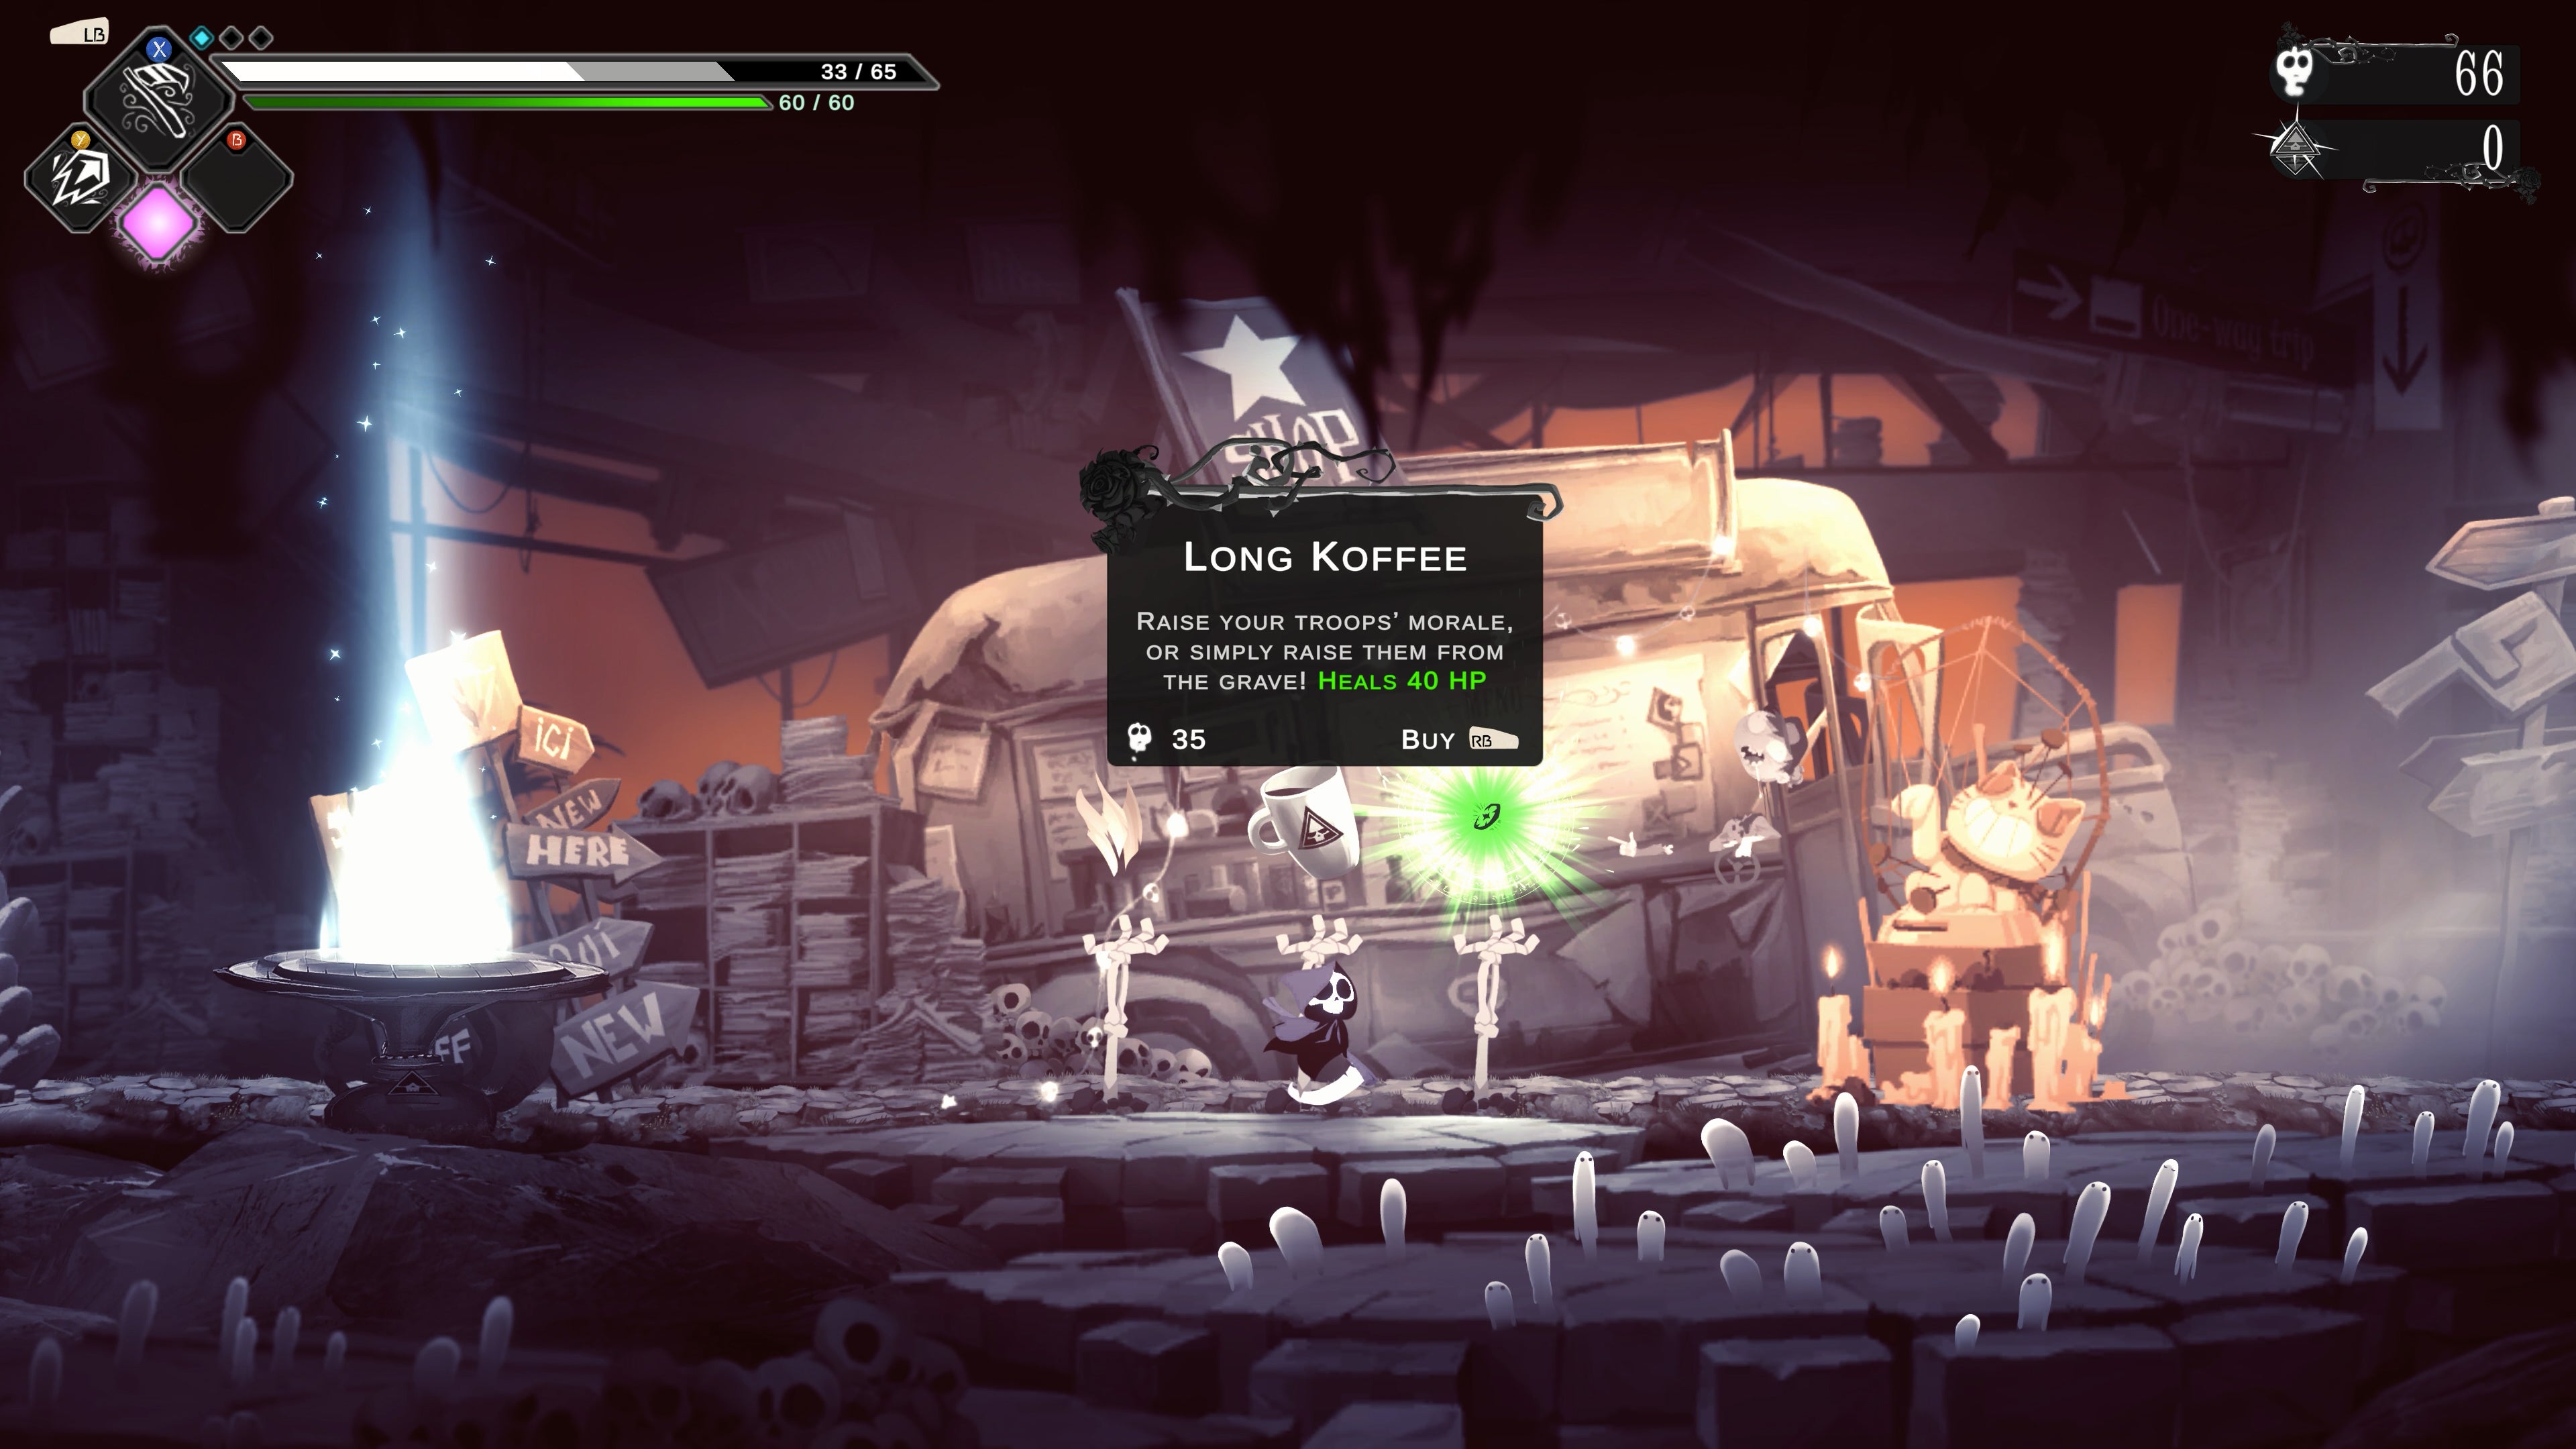
I worked as a gameplay consultant with the amazing team at Magic Design Studios.
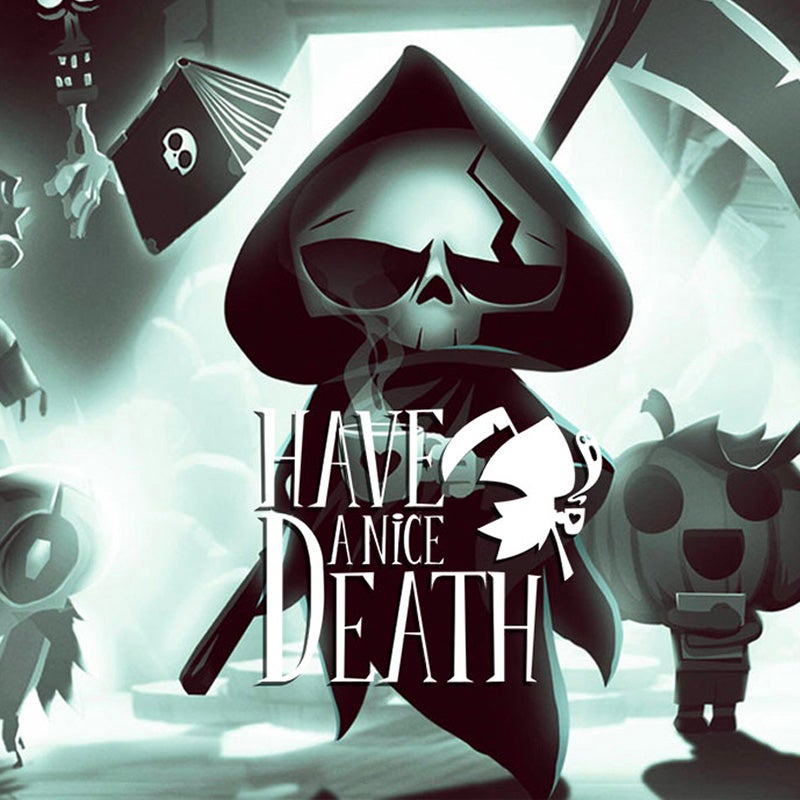
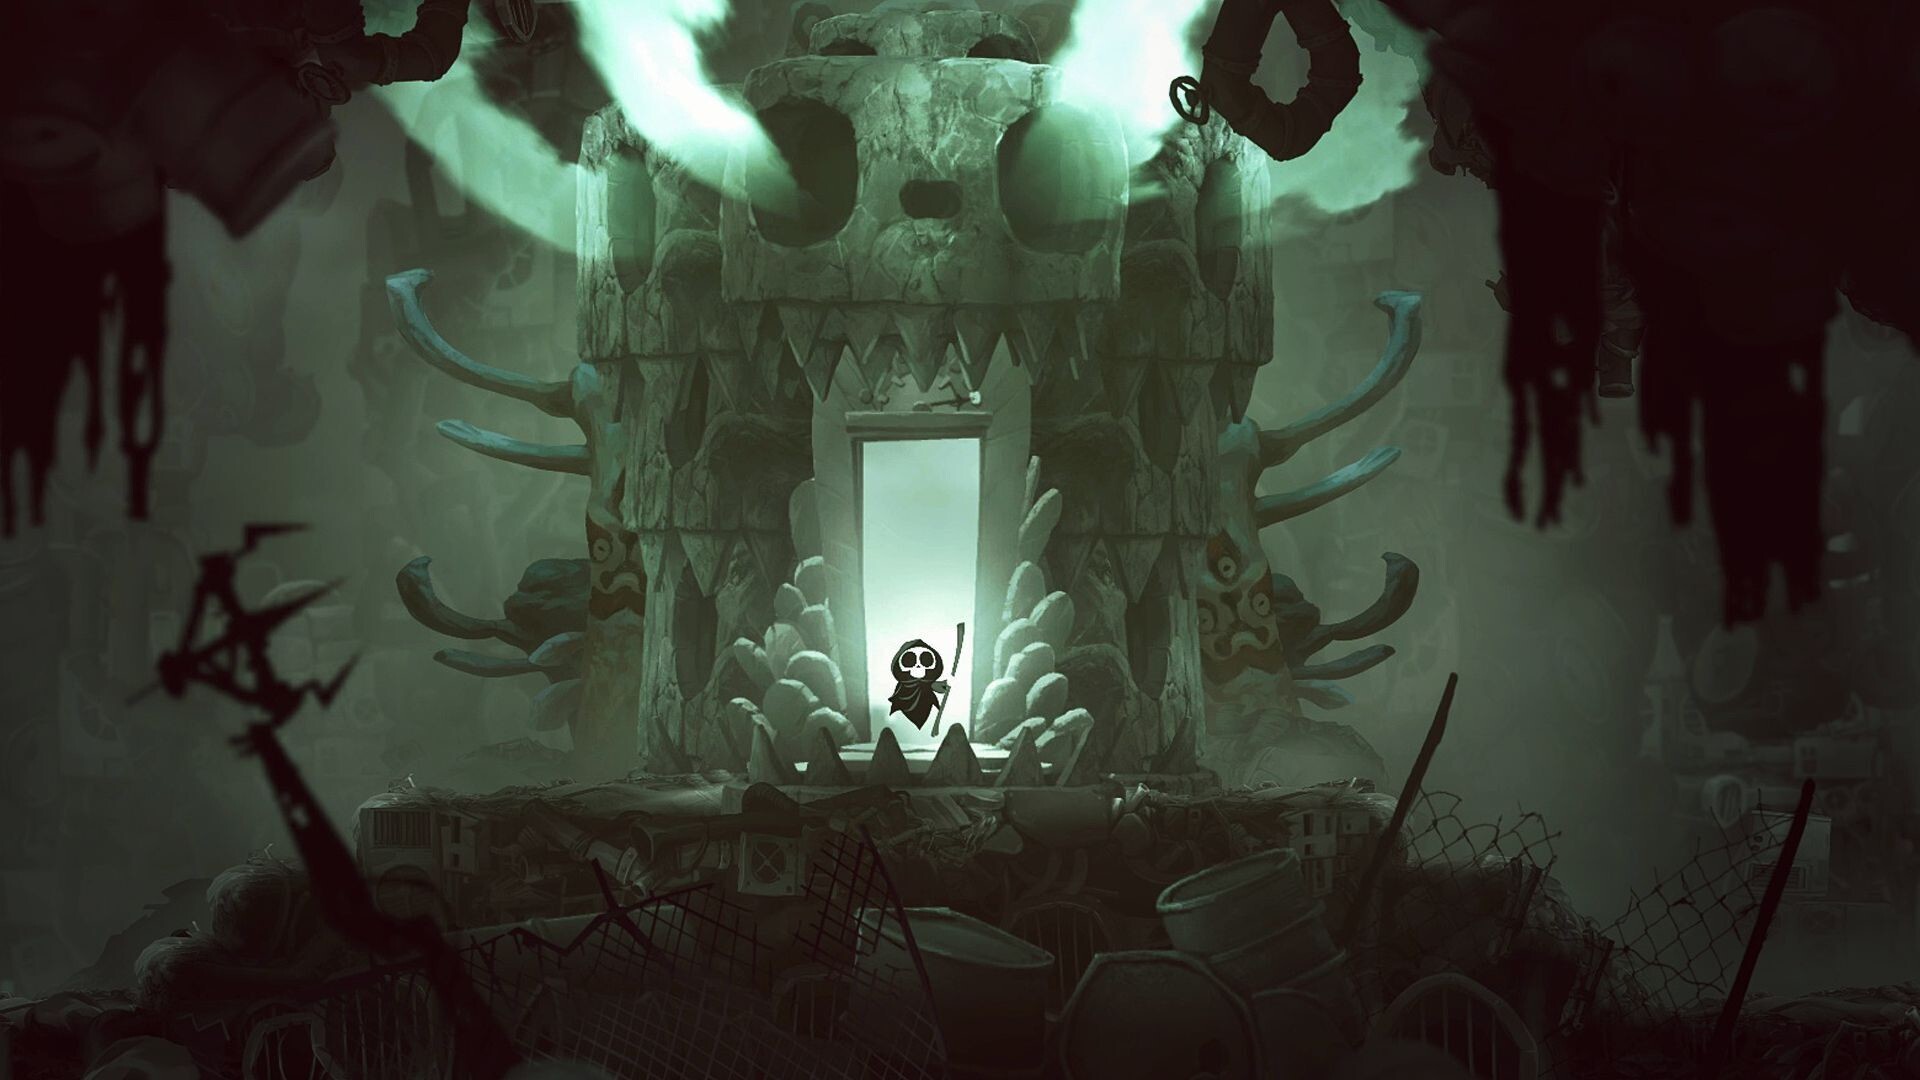
Have a Nice Death is a 2D action roguelike where you play as an overworked Death, whose employees have run rampant, completely throwing off the balance of souls – and his vacation plans. In order to restore order, you’ll have to grab your trusty scythe and show your employees who’s boss.
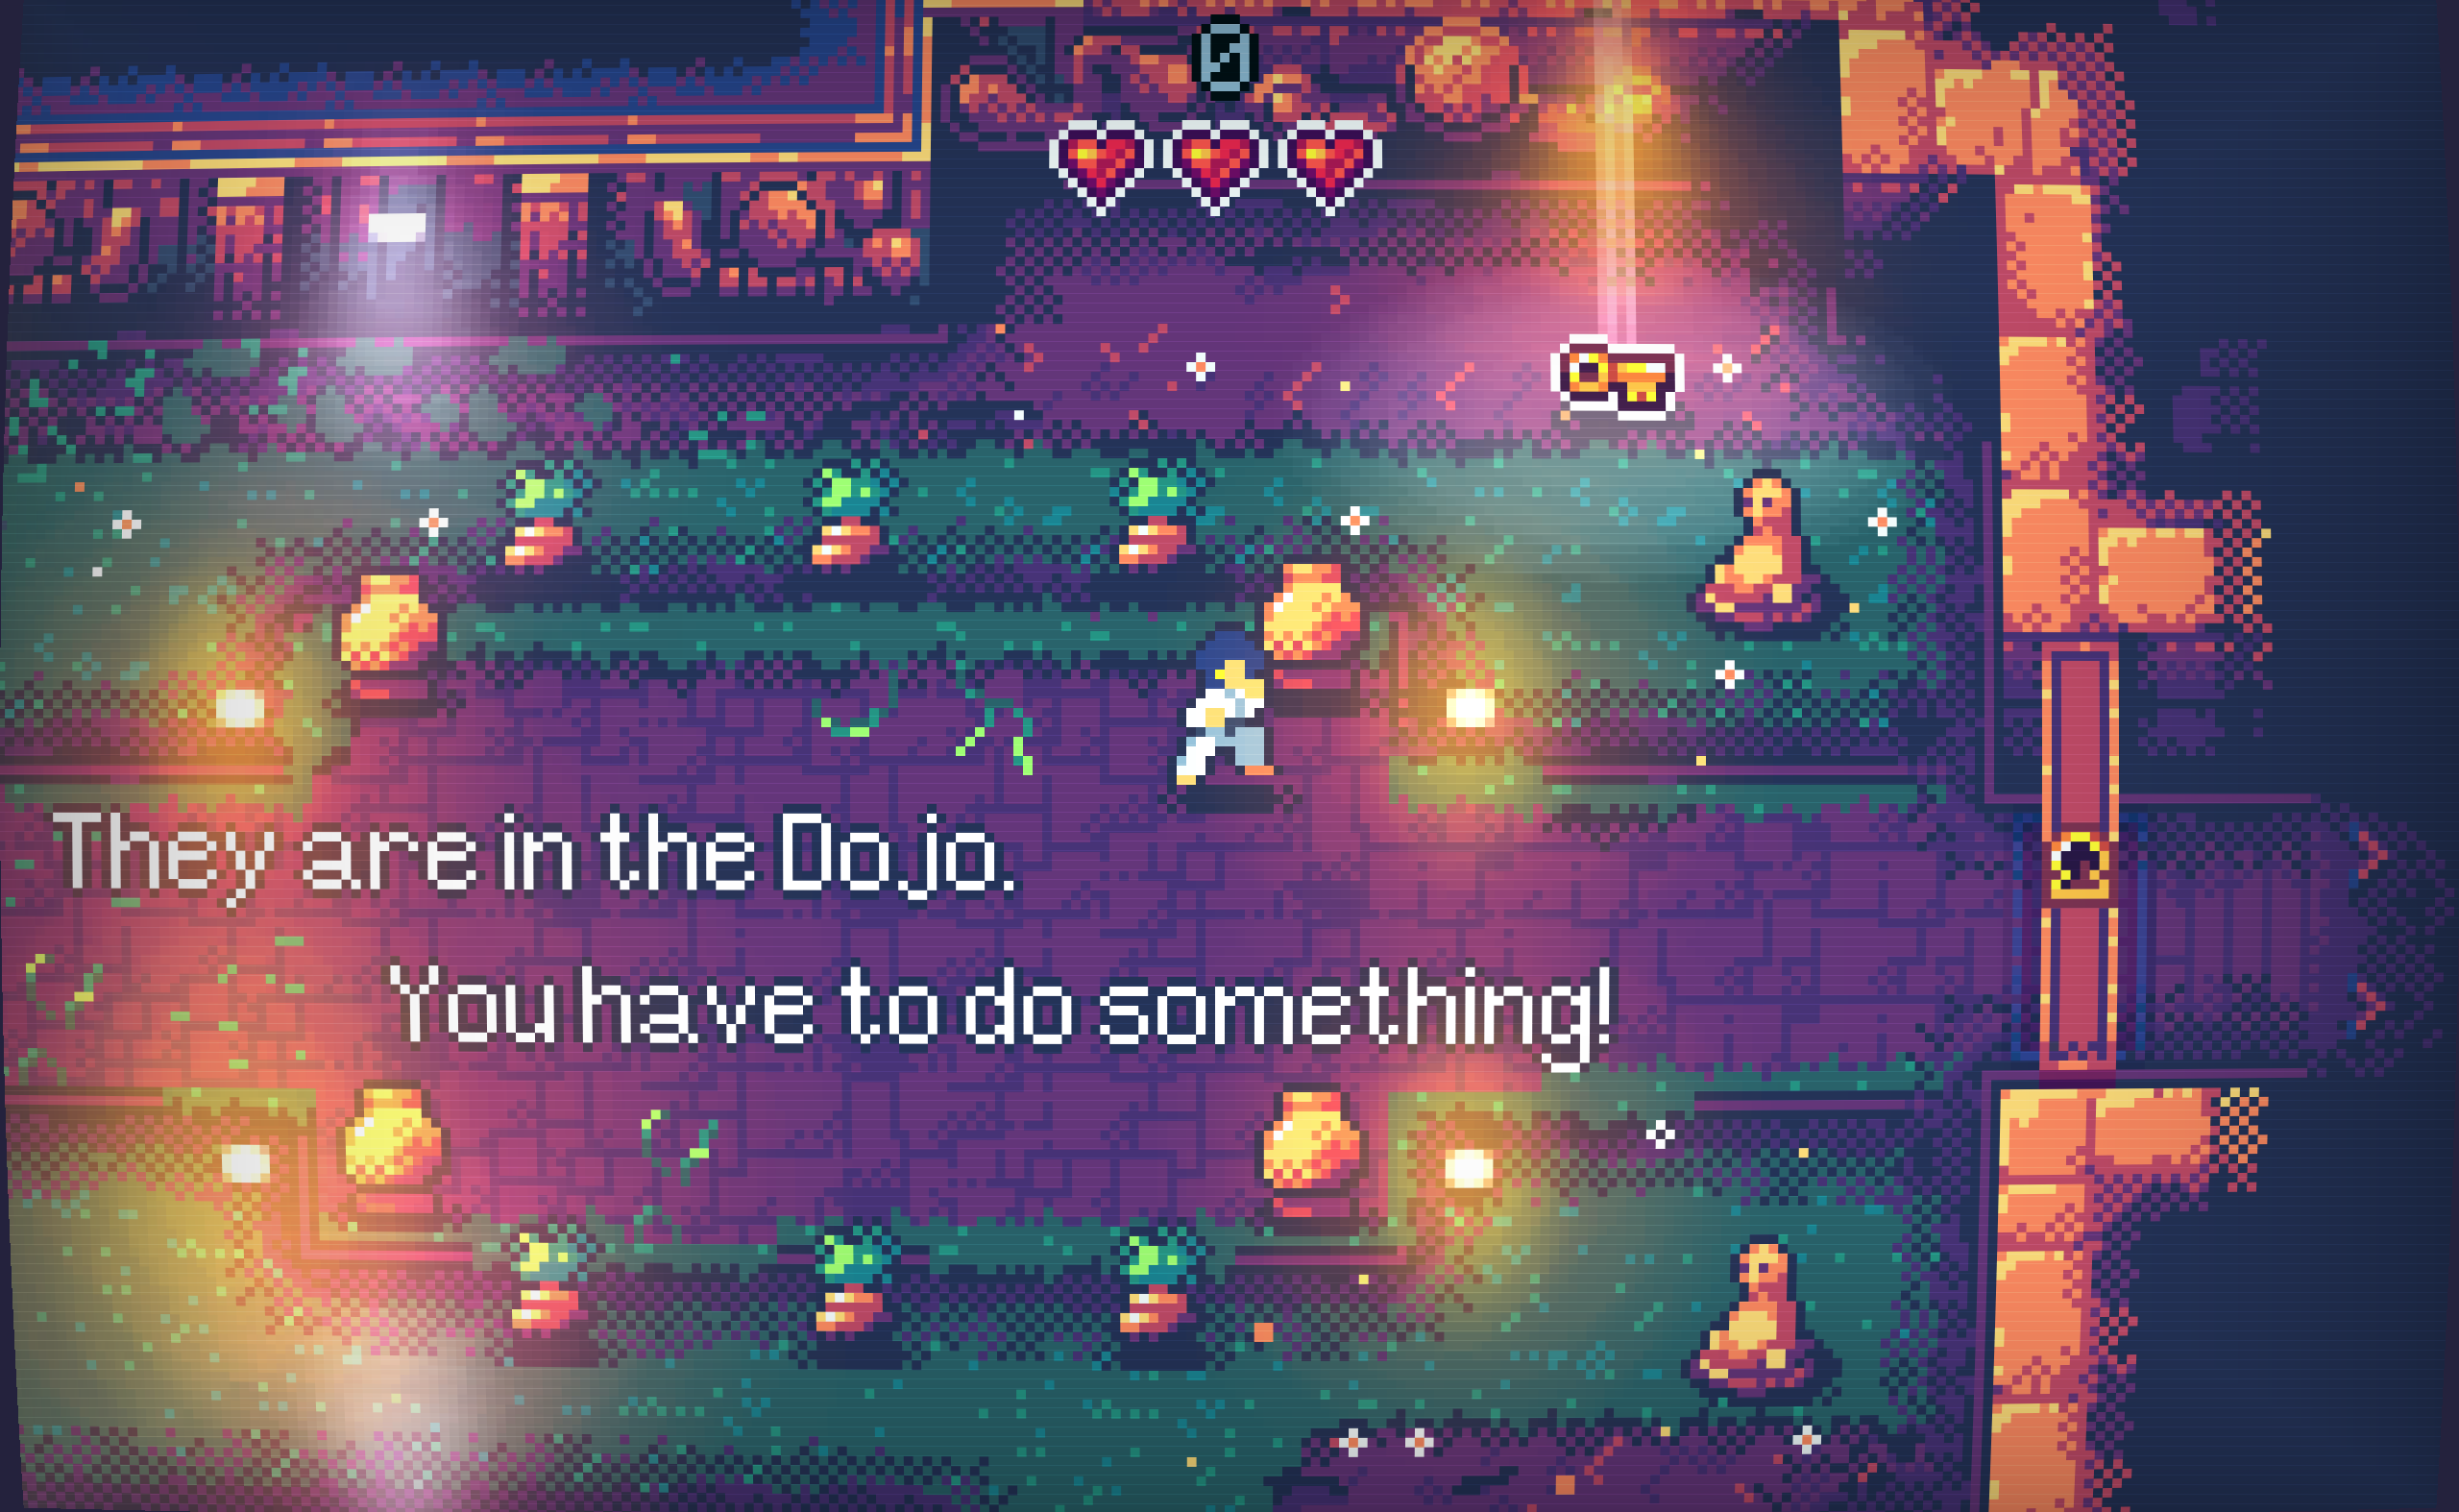
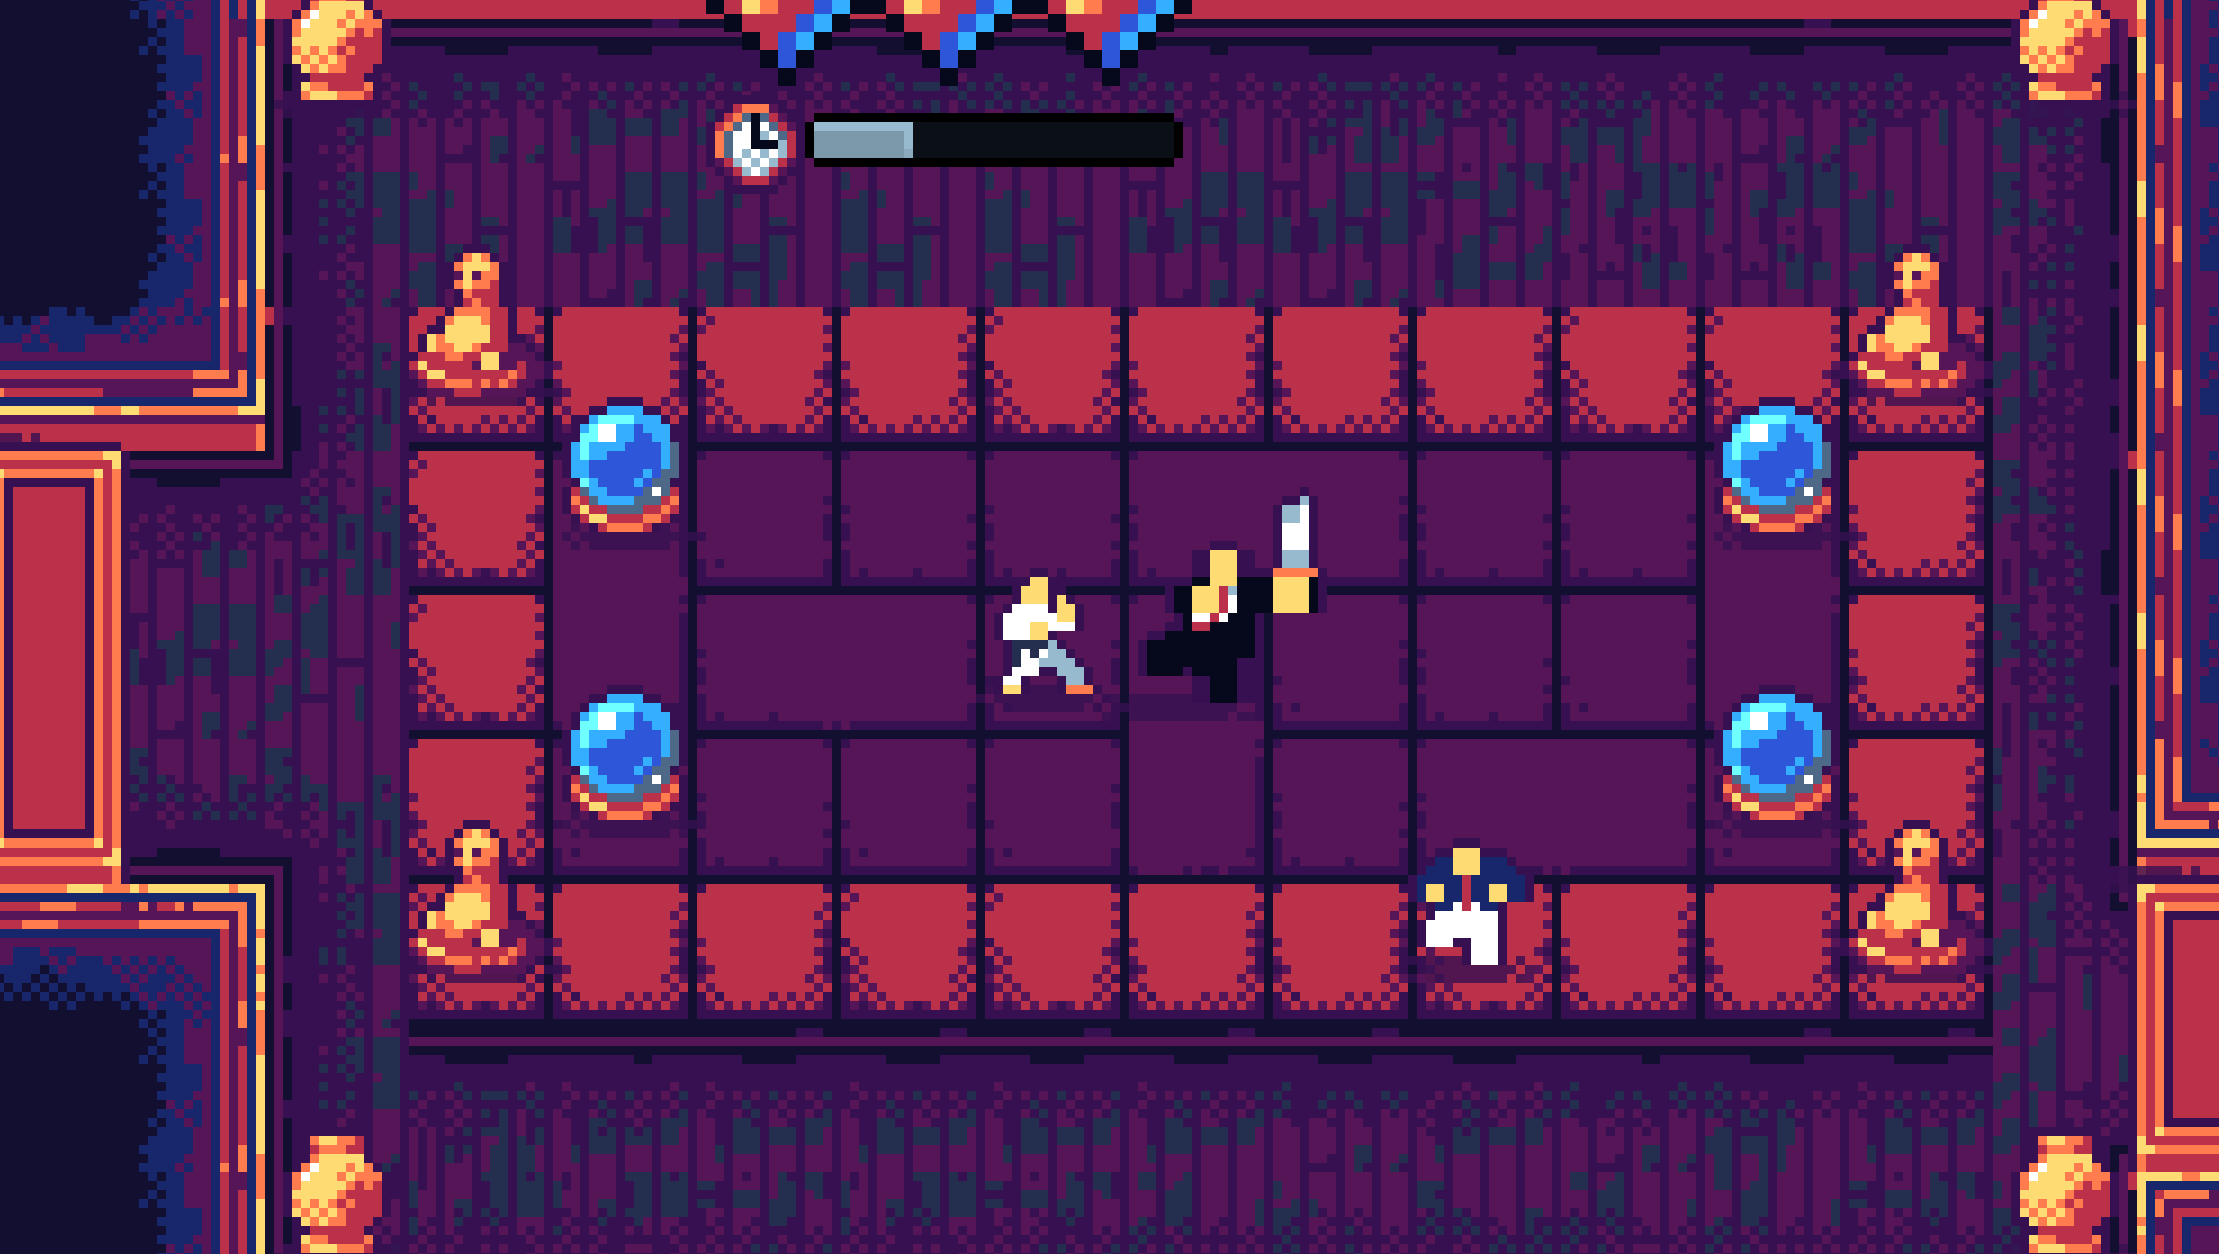
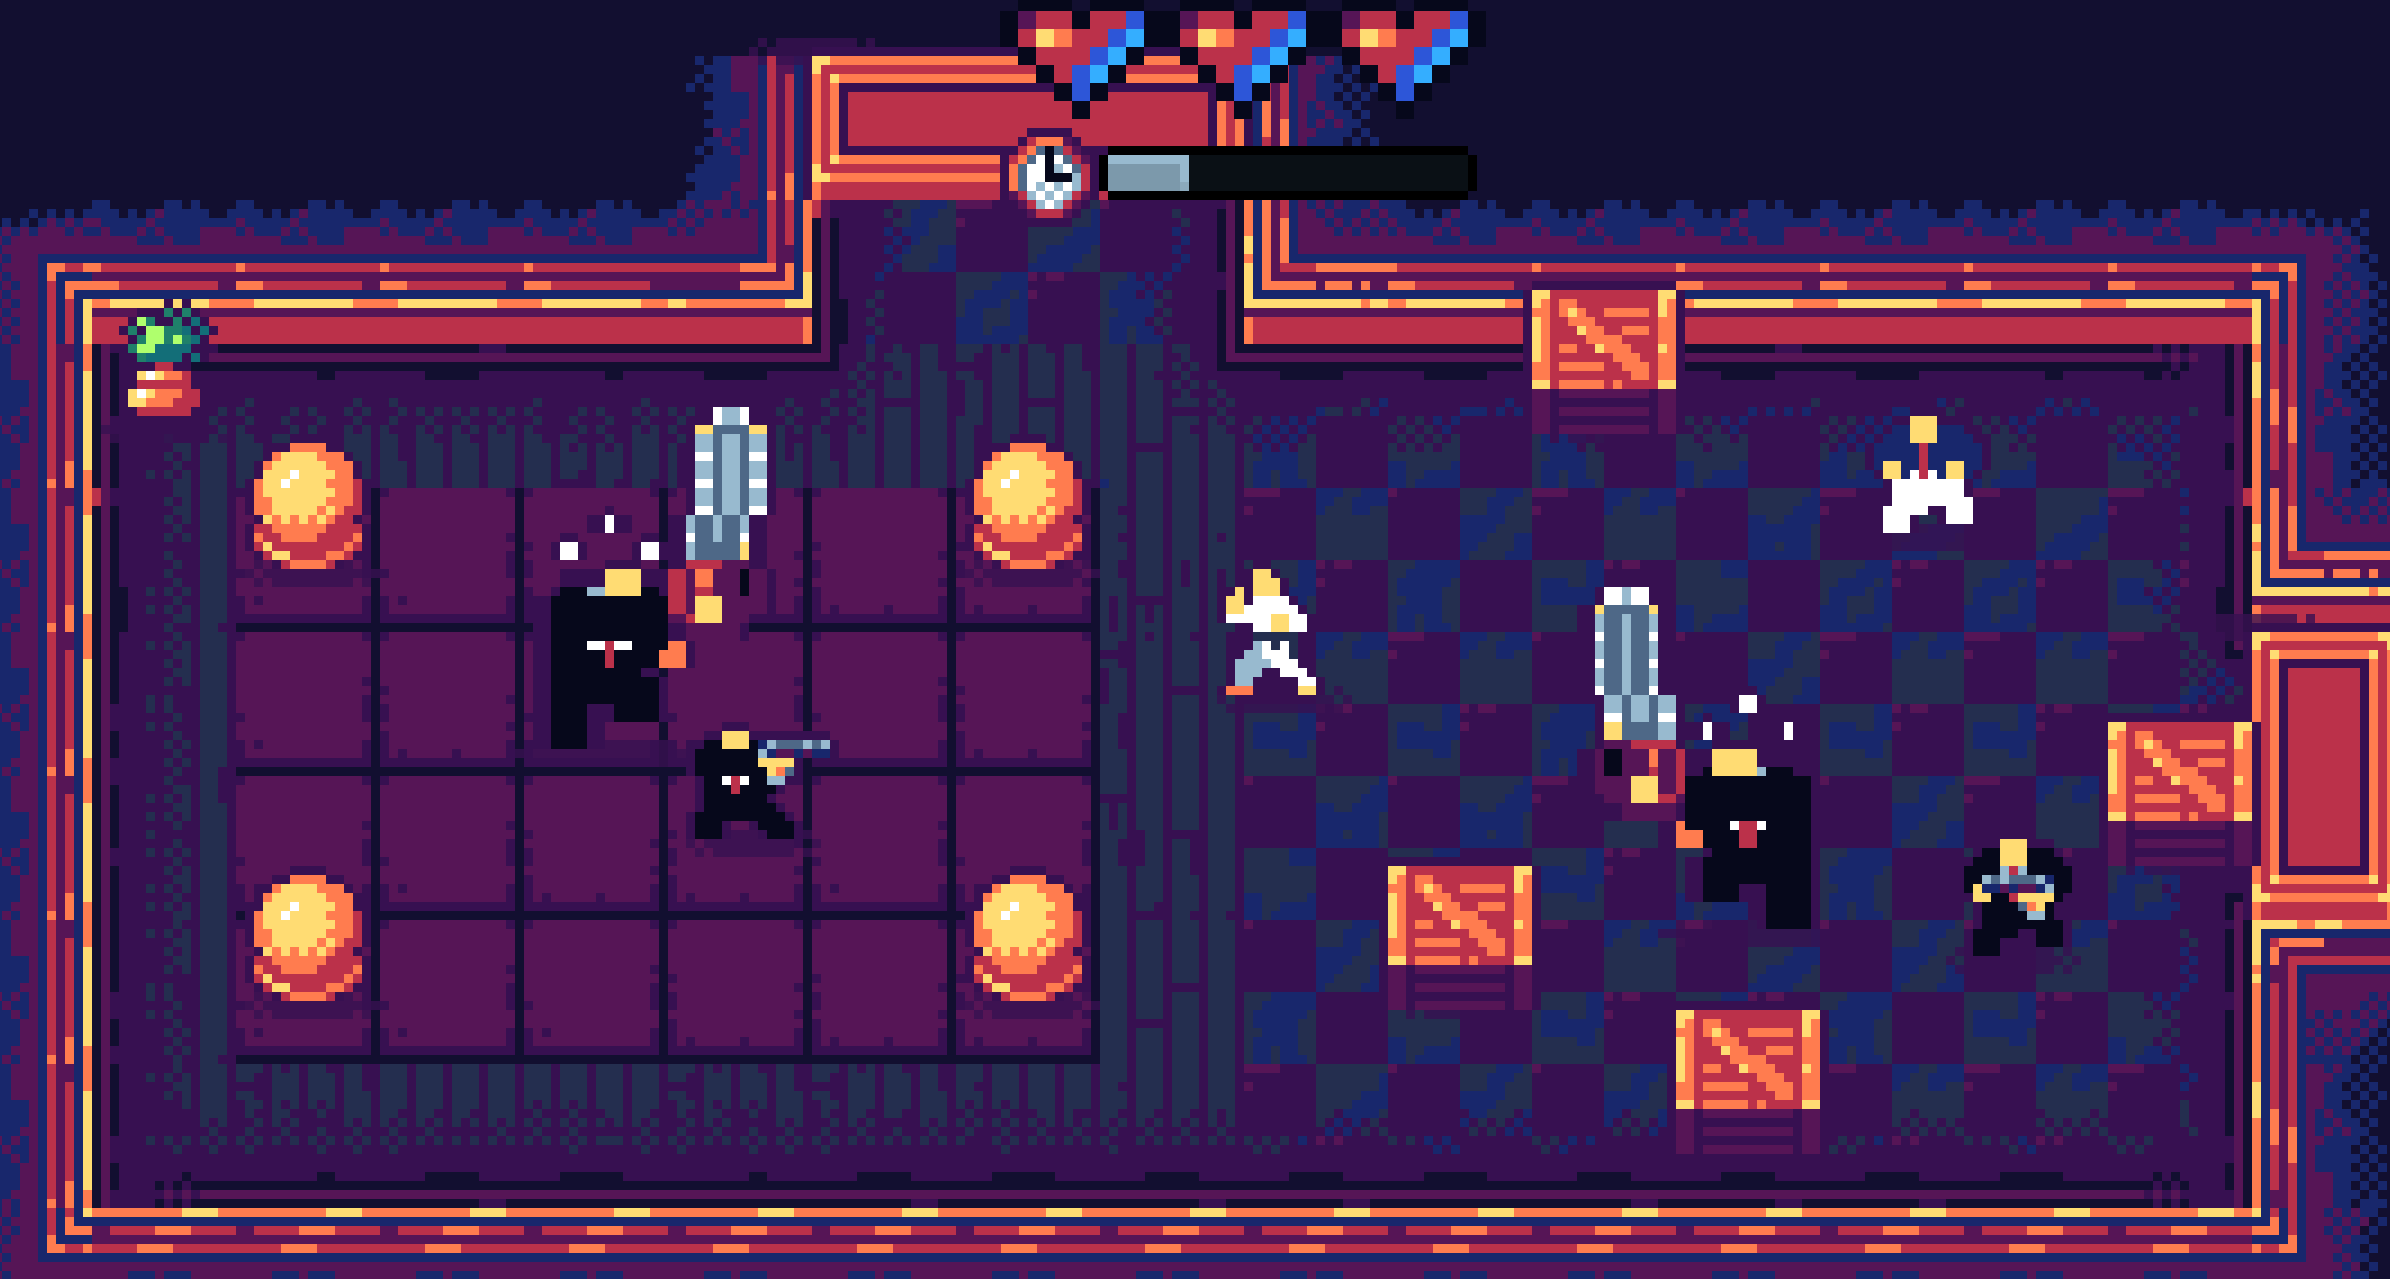
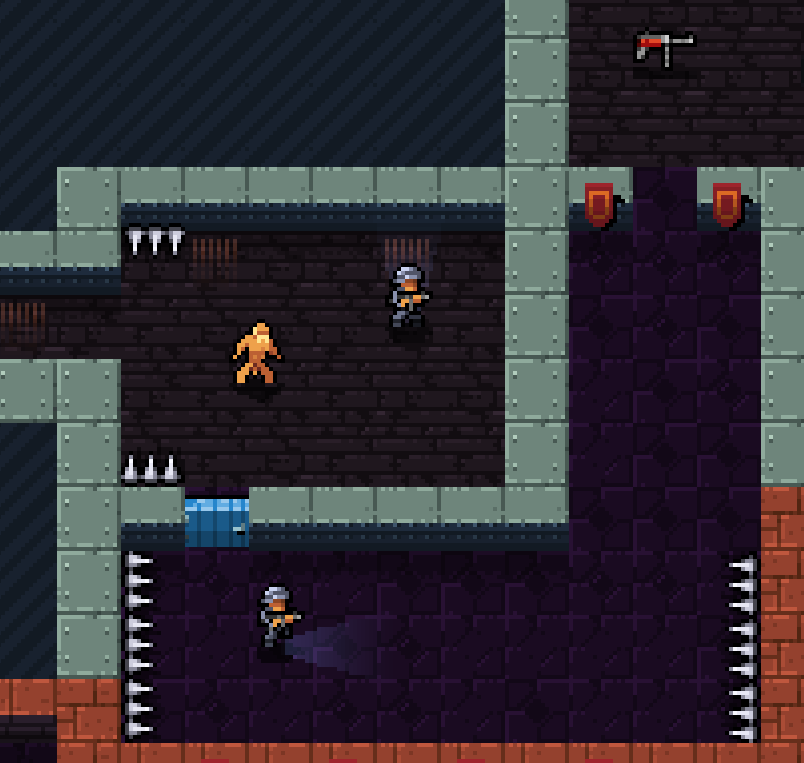
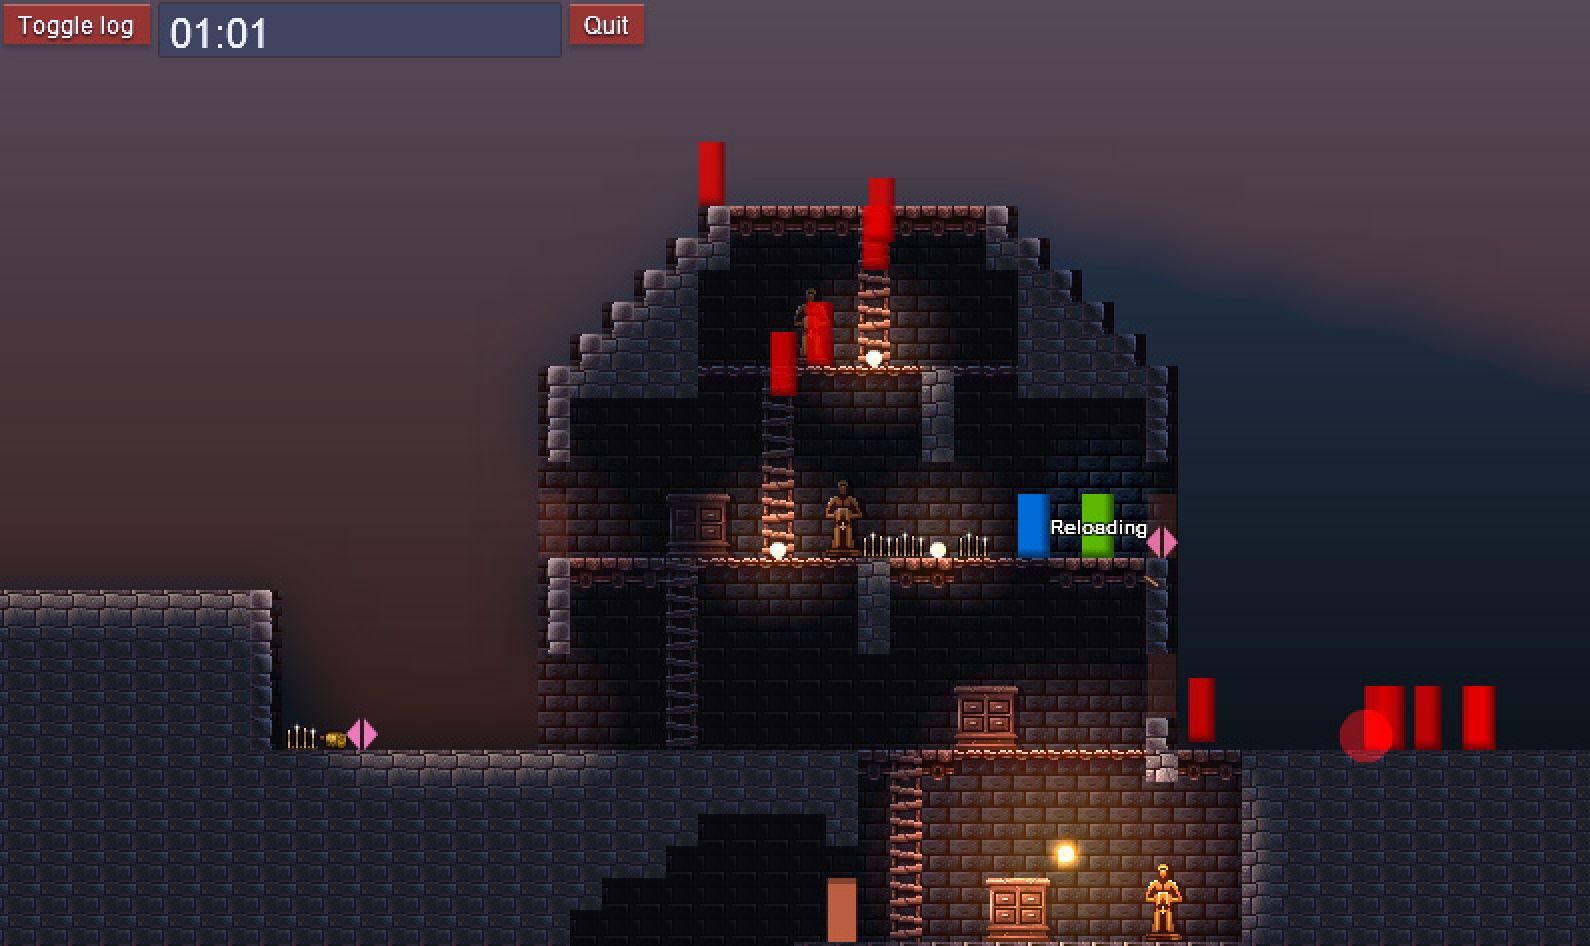
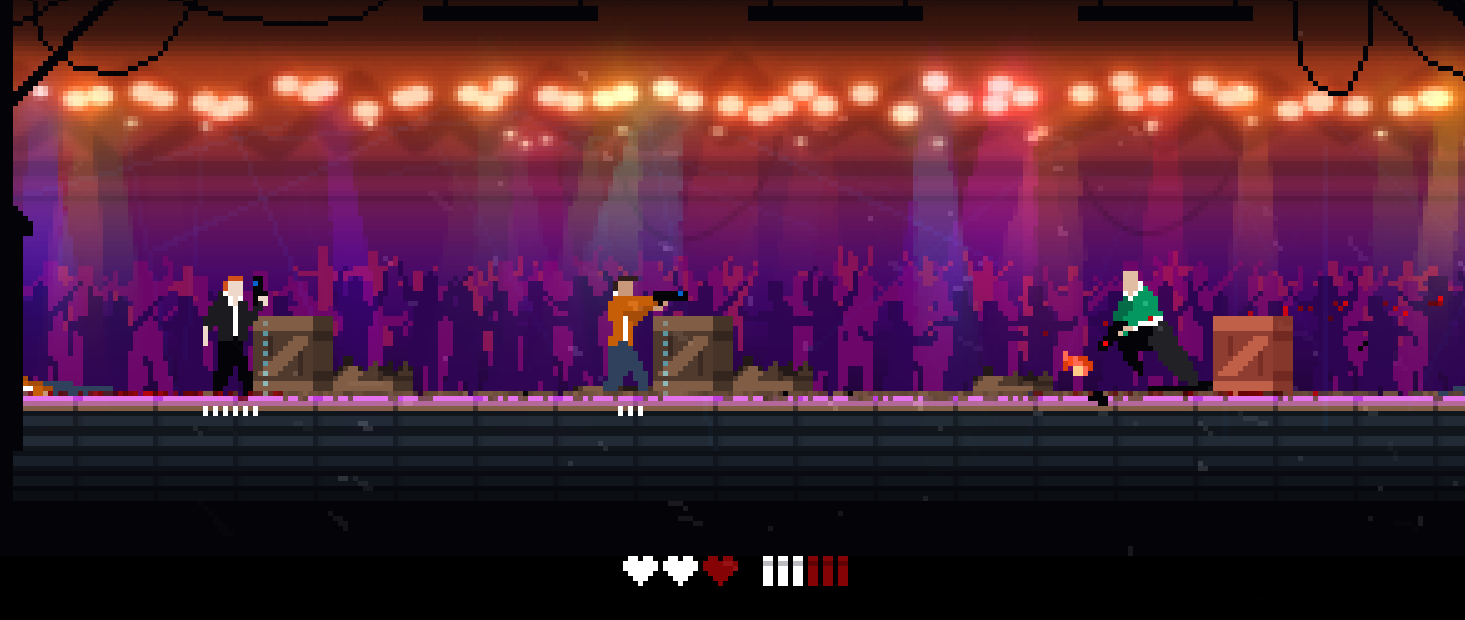
Your dojo has been attacked by mysterious armed men in black. You have to take it back!
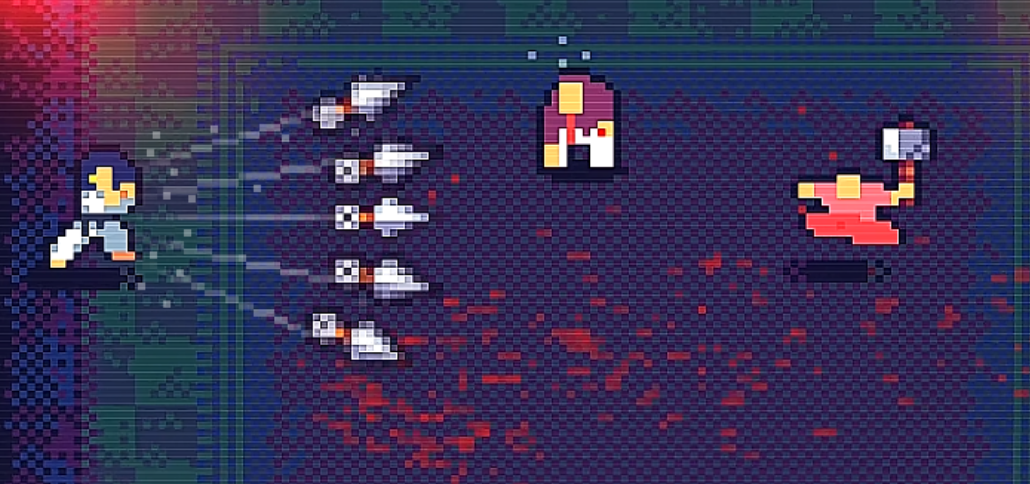
Tenjutsu was made in 48h for Ludum Dare 51. The theme was “Every 10 seconds“.
Fight enemies, collect DEATH MARKS (ie. skulls) and tag enemies with these marks. Every 10 seconds, marked enemies will die. Some stronger enemies will require more marks to get rid of.
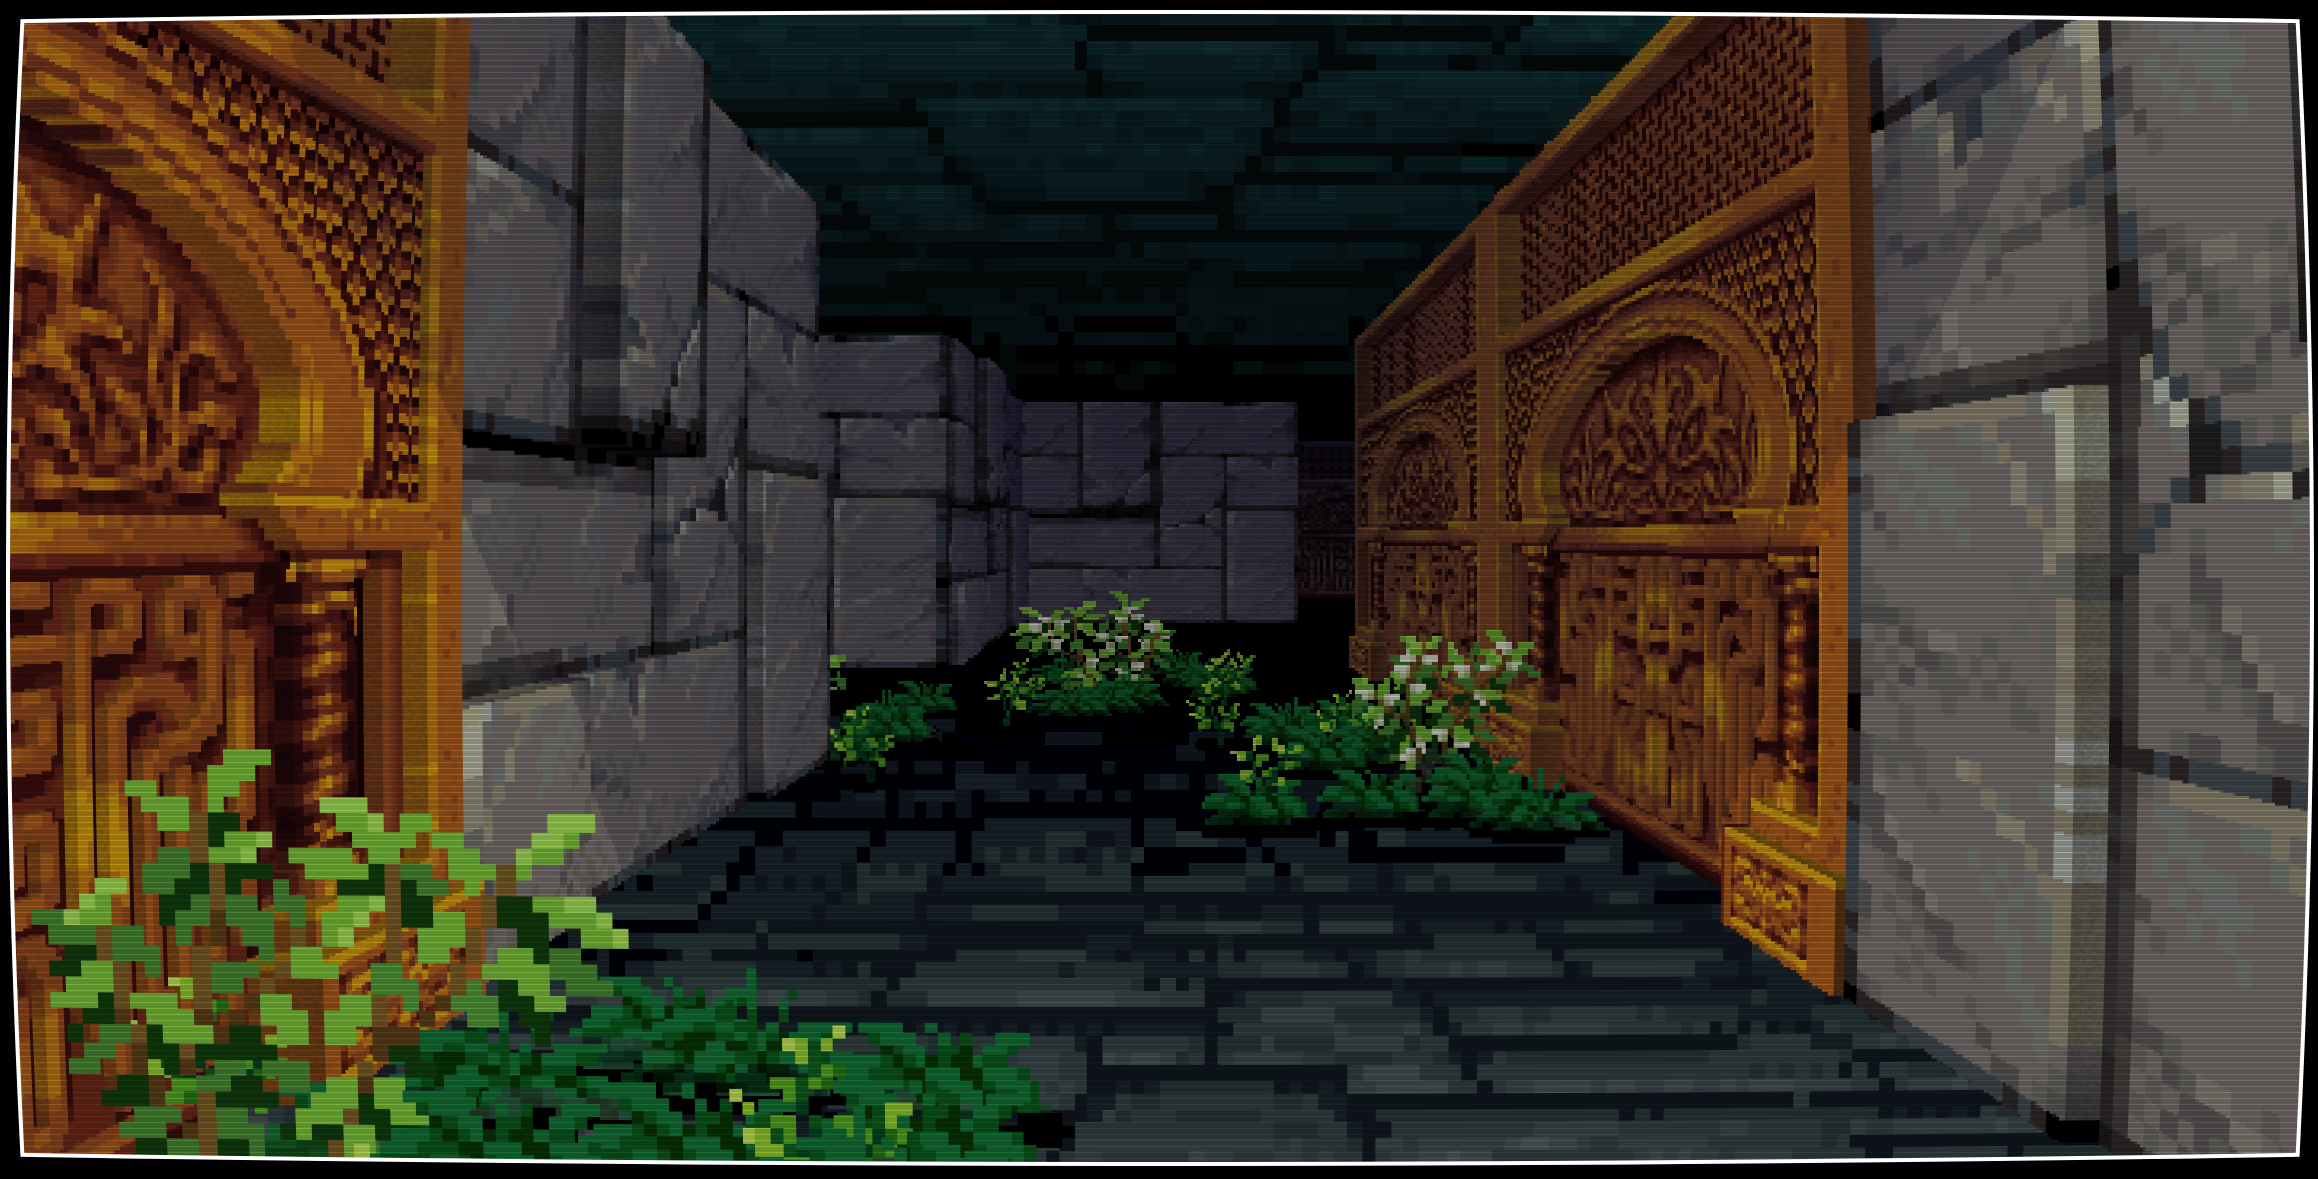
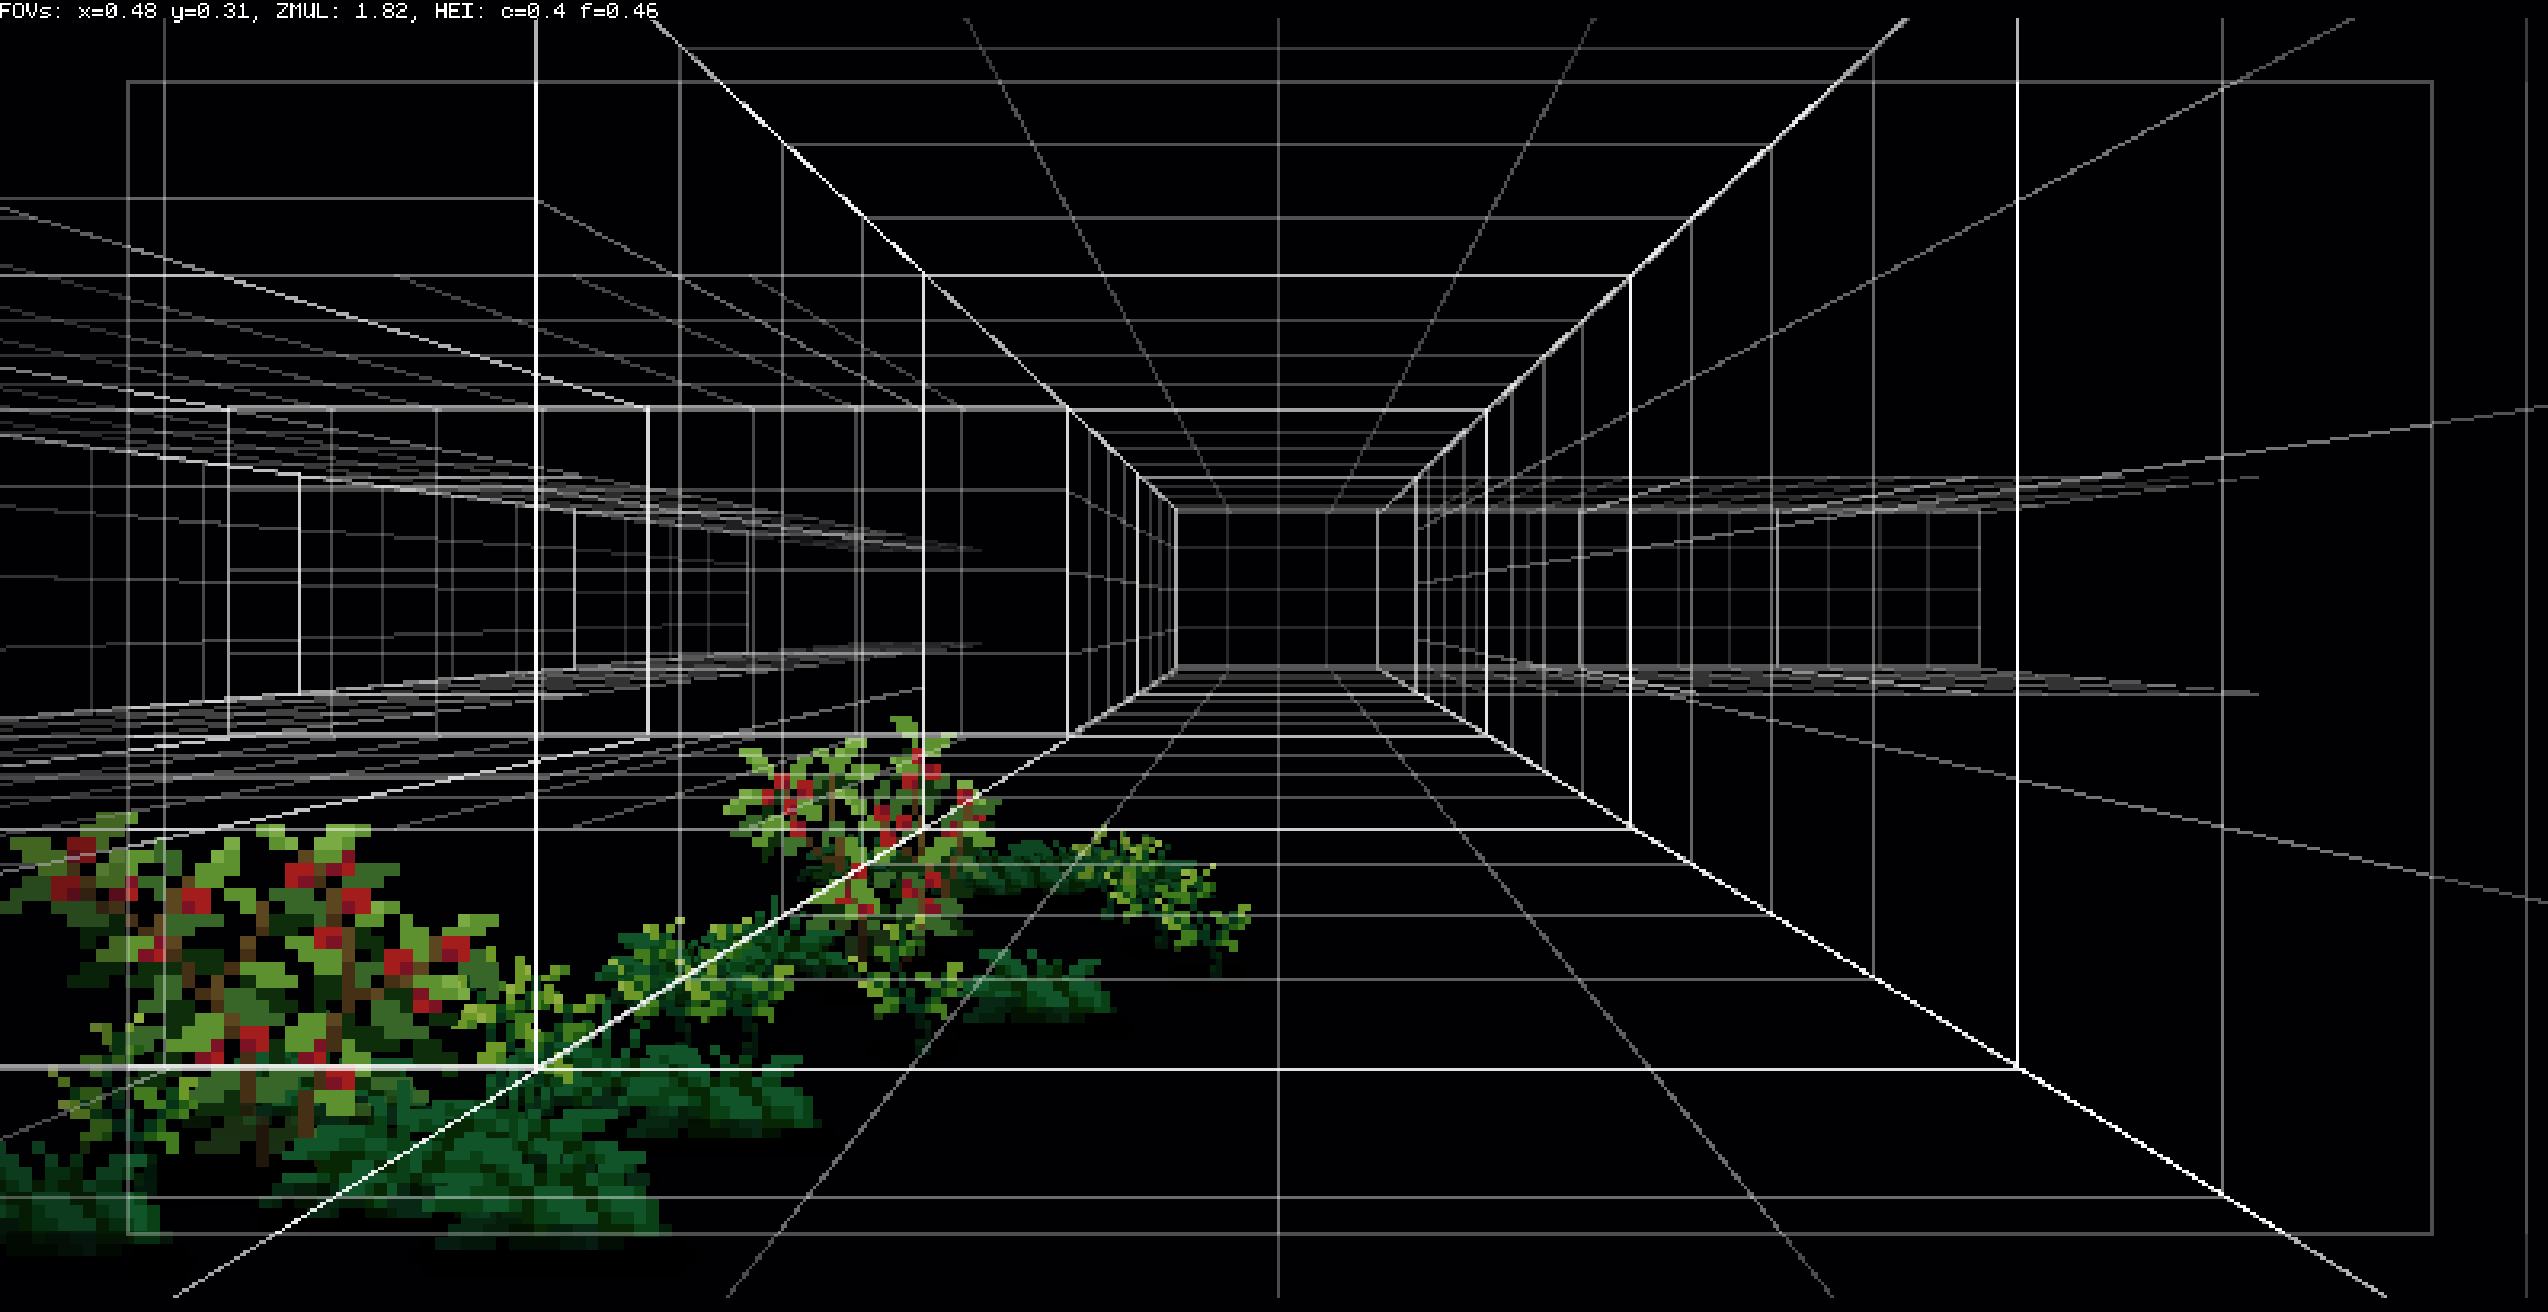
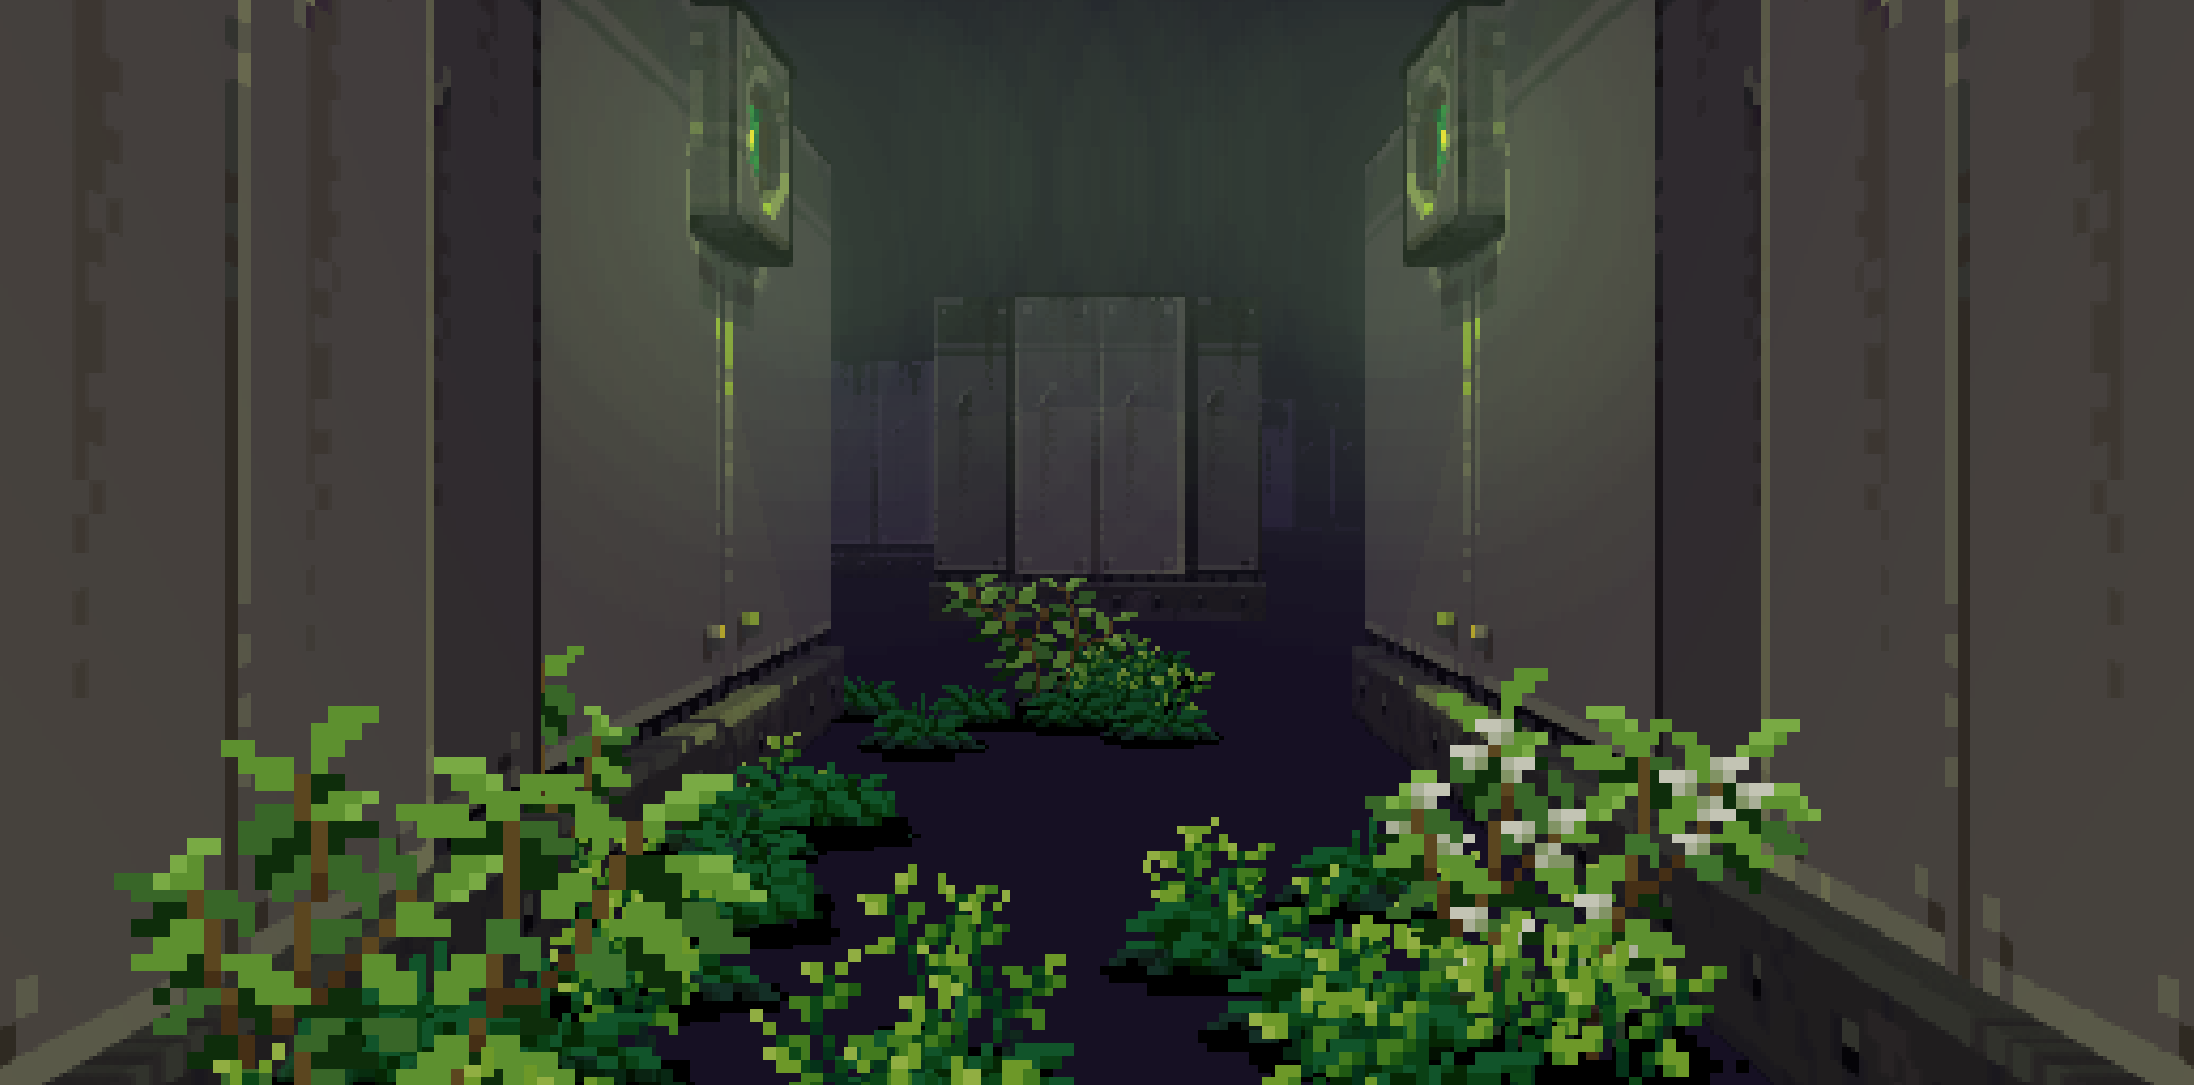
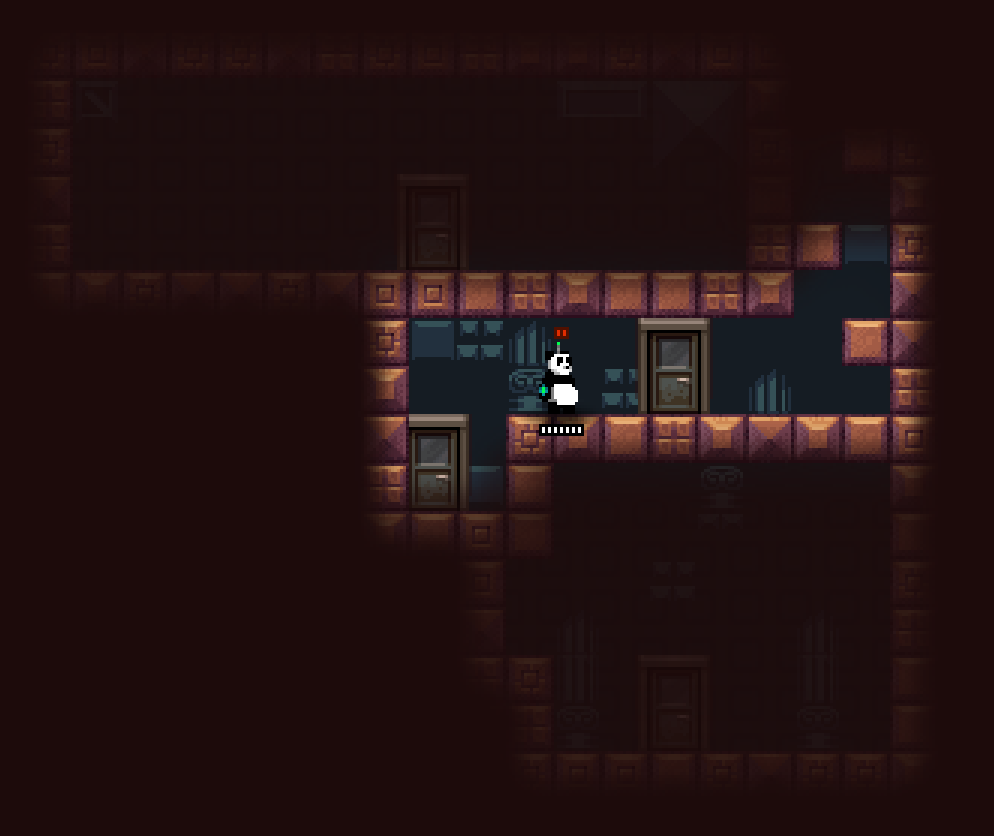
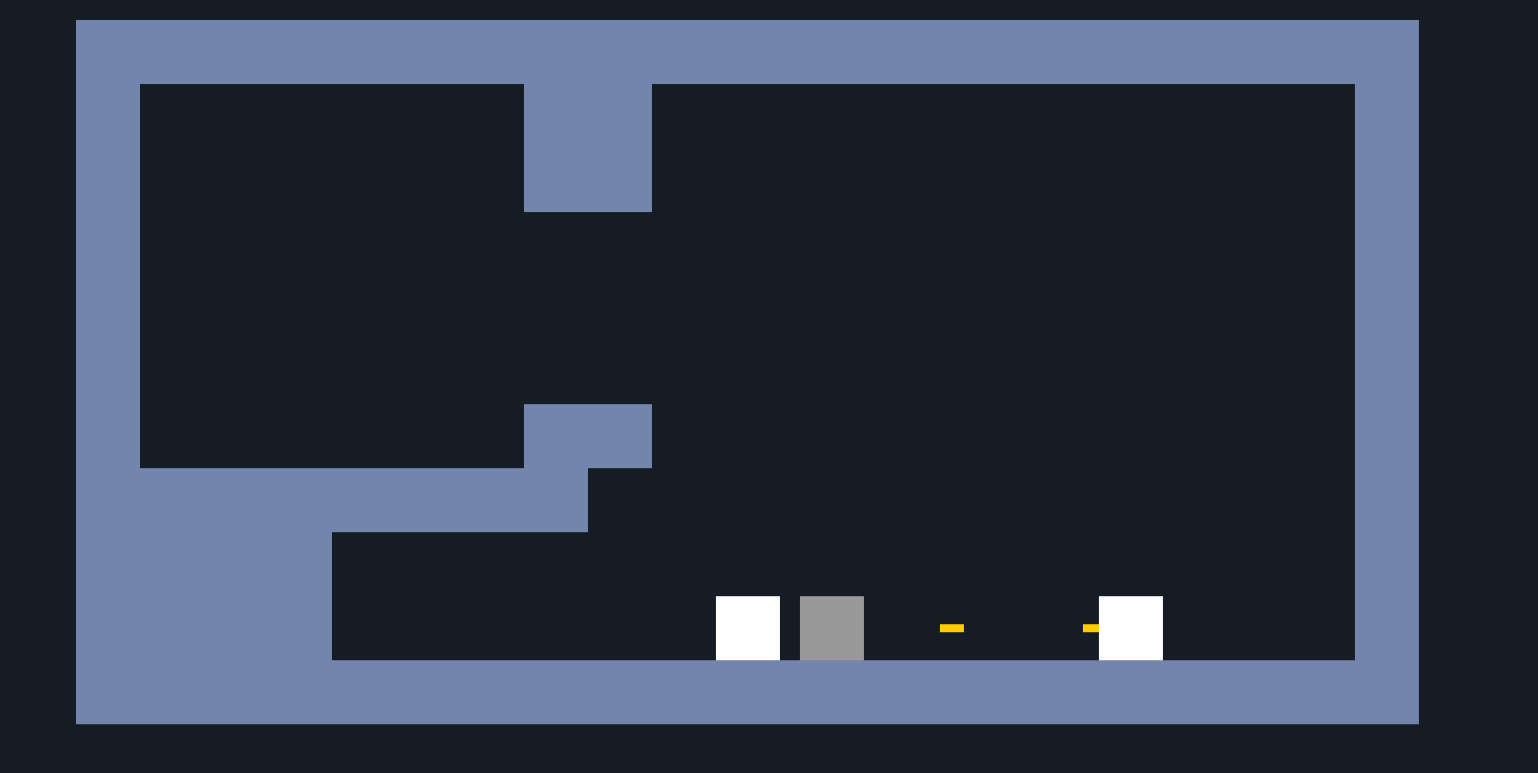
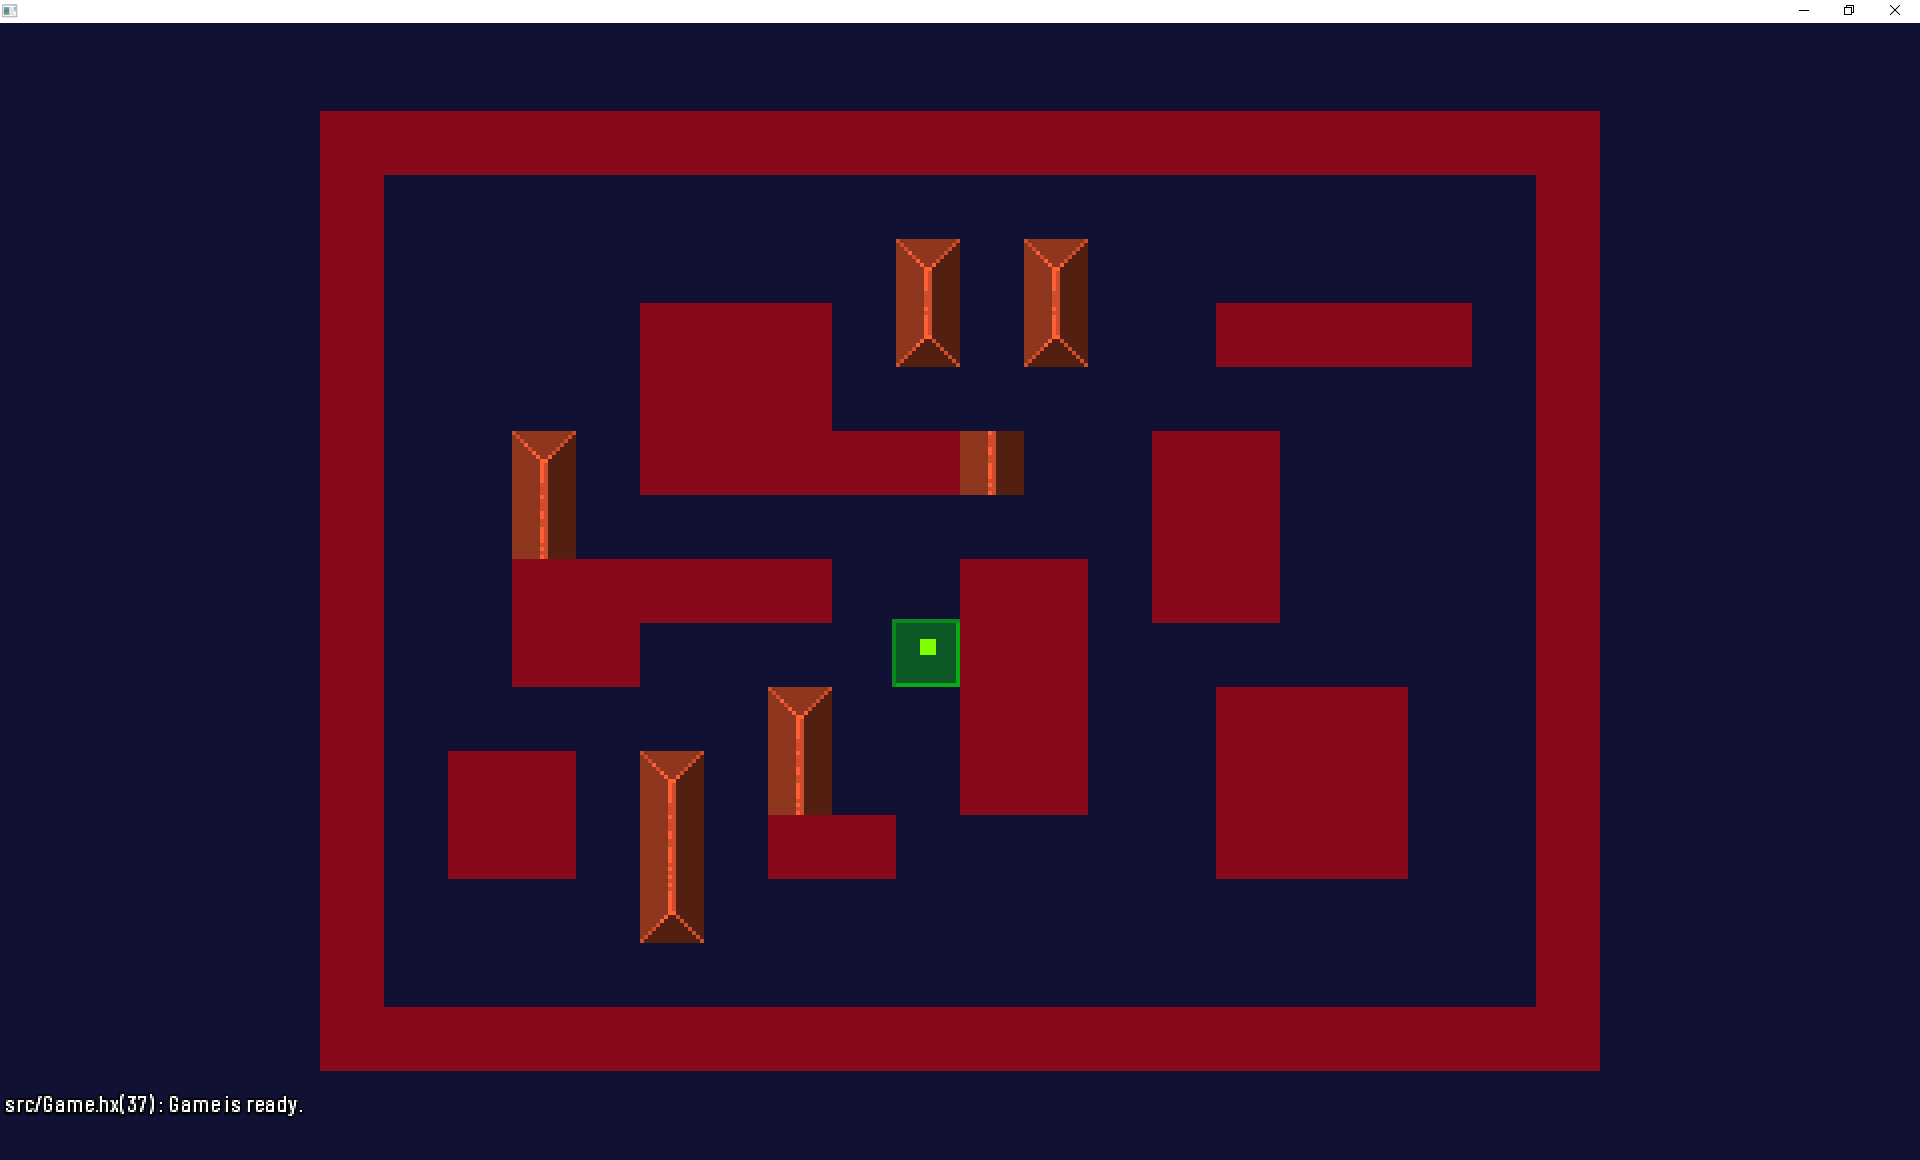
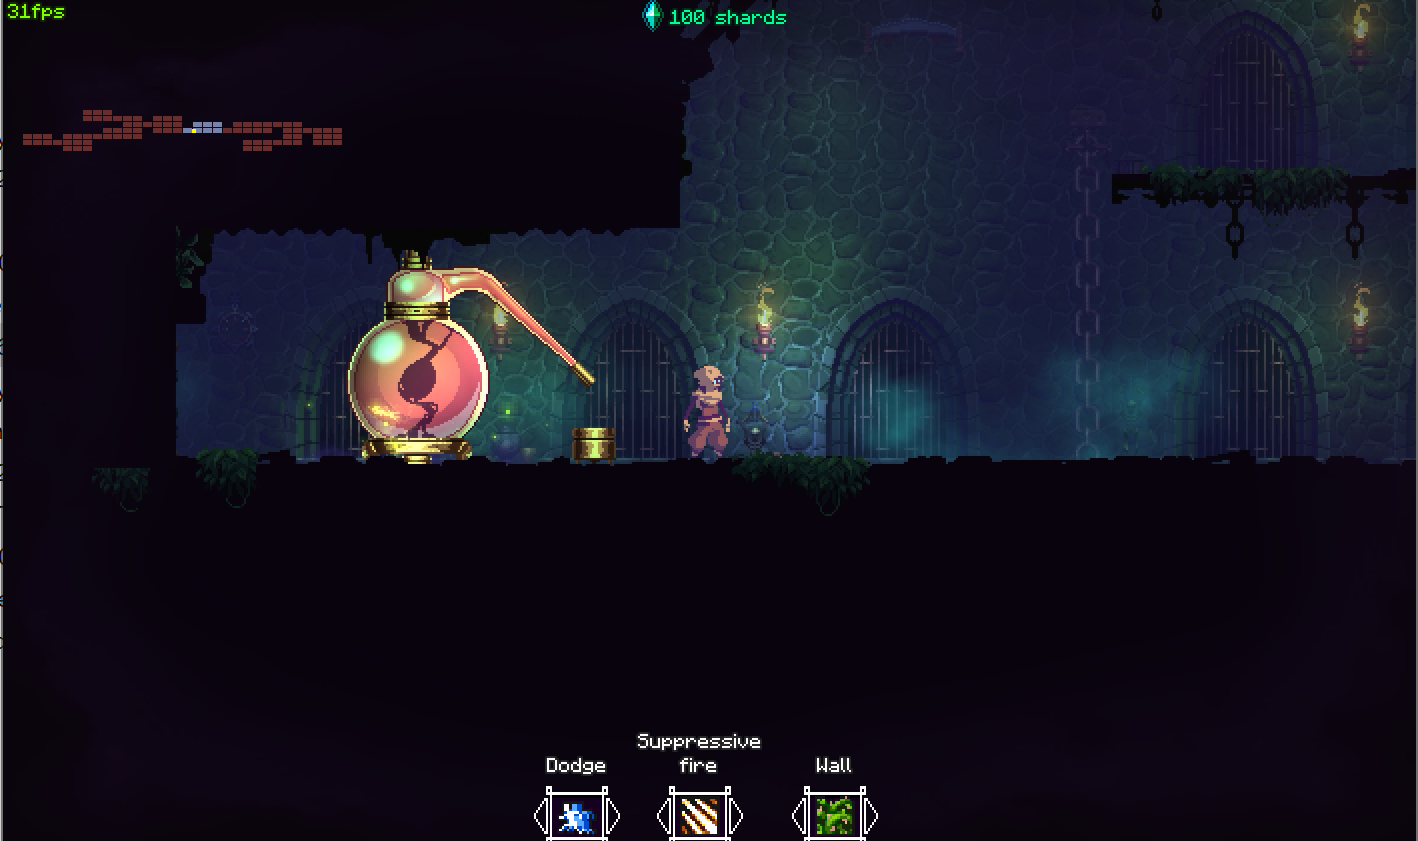
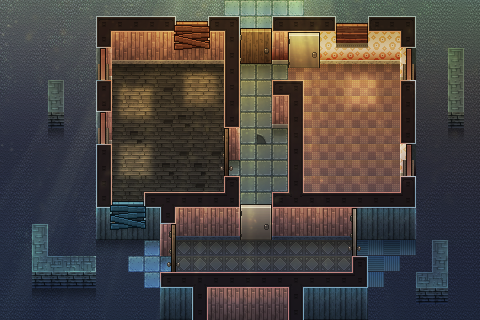
This is not an actual game, but a proof-of-concept prototype that implements a retro/modern “Dungeon Master” engine:
True 2D engine: no 3D involved here, it’s all fake.
Fake texture details: all wall angles and 3D details on them are generated on startup, making the process of creating art for such engine quite fast (you only need a wall texture and its height map)
Smooth movements: using various motion design tricks, the movements should be smooth and understandable for an external spectator.
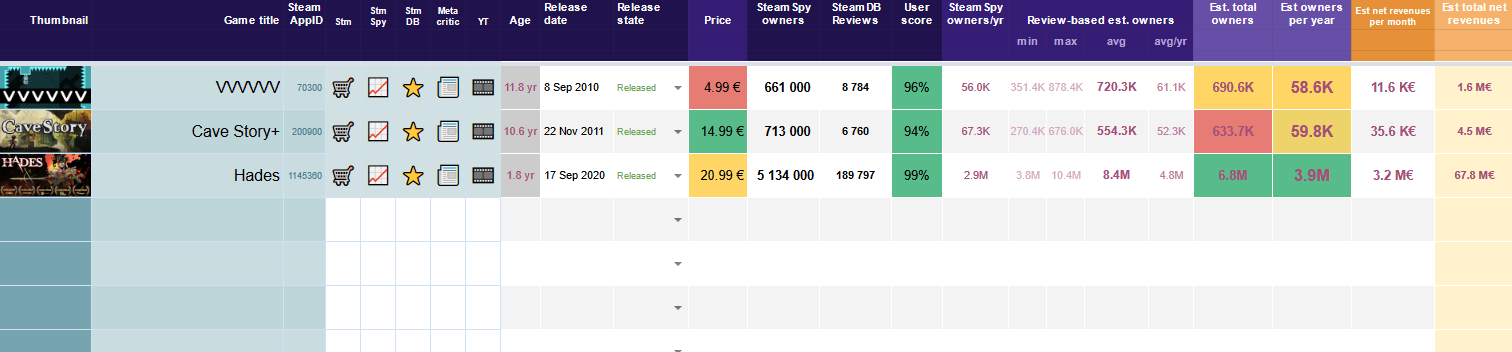
Market Study is a Google Sheets document which allows you to get a rough estimate of sales and revenues of any released title on Steam.
It’s precise enough to get an idea of how successful a particular title was, which is a critical piece of information for any game dev. I use it almost every single day.
Update: Julien Cotret (@CotretJulien via Twitter) made a script to fill in details automatically: link.
How to use it?
To use it, just fill in the required information:
Game title,
Game Steam AppID (it’s part of the url of a game: https://store.steampowered.com/app/70300/VVVVVV)
Game release date (from store page)
Game full price (from store page)
Open the SteamSpy page of the game by clicking the “📈” icon. Copy the “owners” count. You will need a Steam Spy account. Please support their great work!
Open the SteamDB page by clicking the “” icon. Move your mouse cursor over the review rating percentage on the right, and copy the total review count from the tool tip that appeared.
That’s it!
License
This document is released CC BY-SA 4.0 license. It basically means you can do whatever you want with this document/tool, as long as you keep the same license if you re-share.
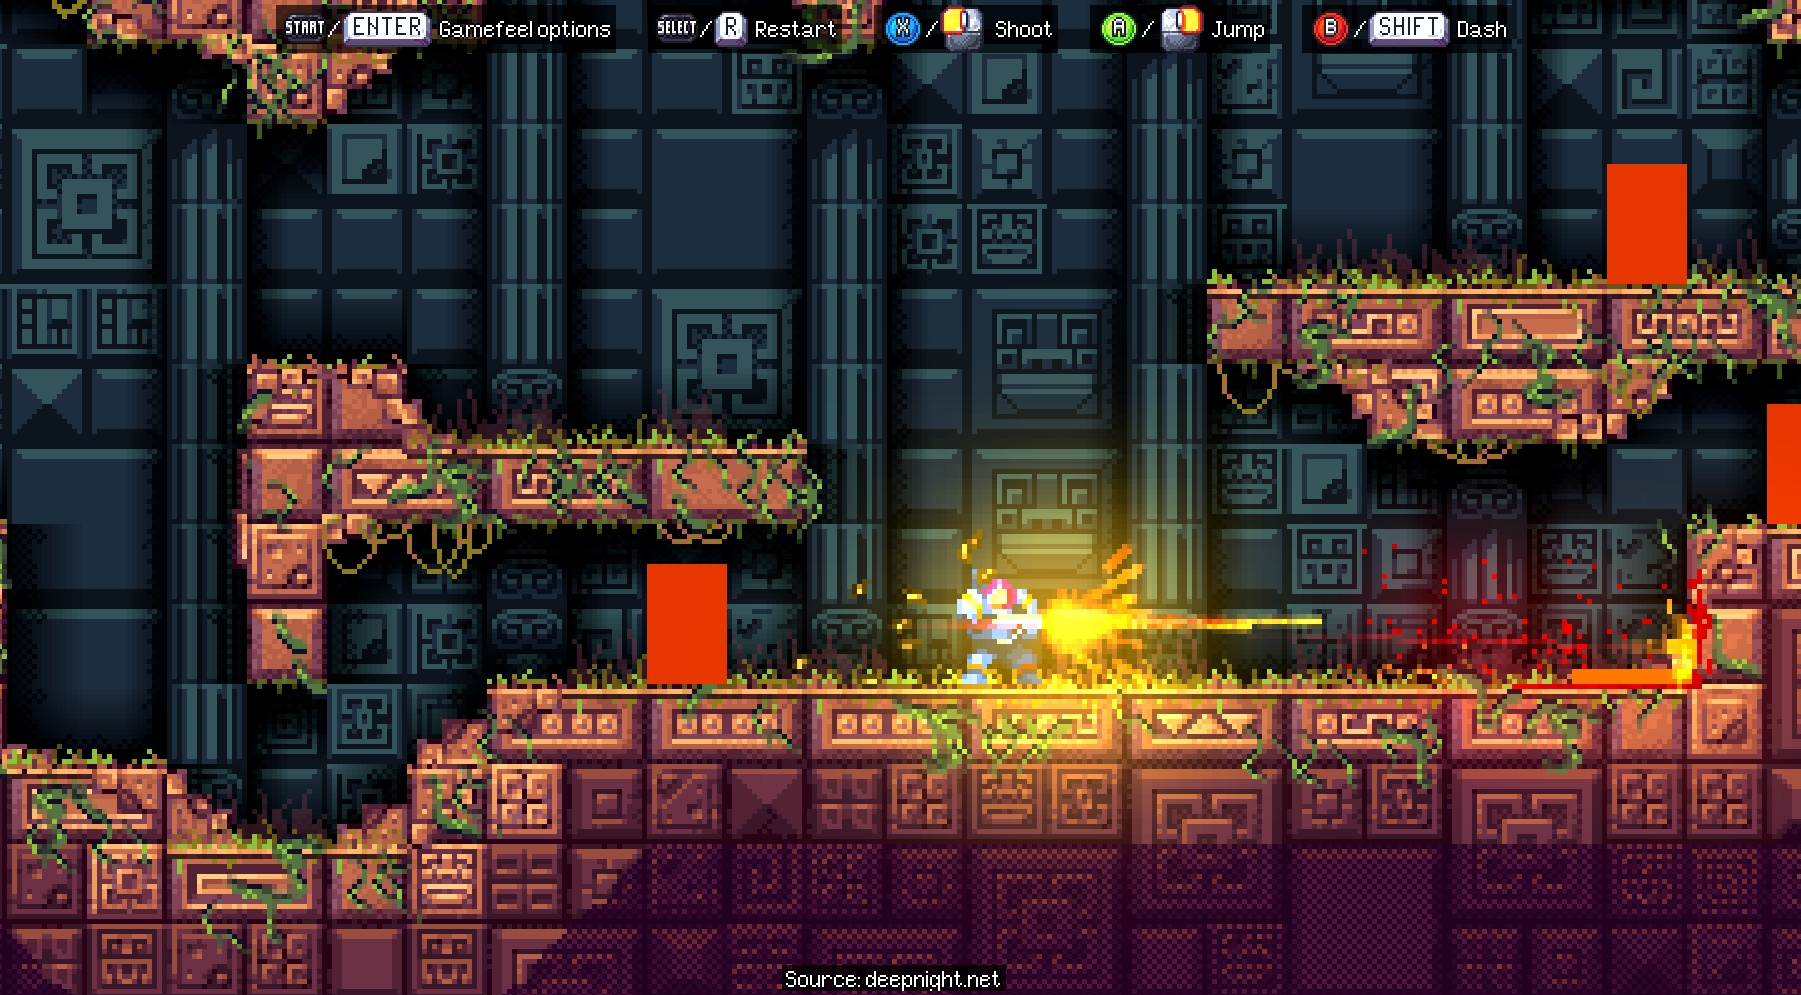
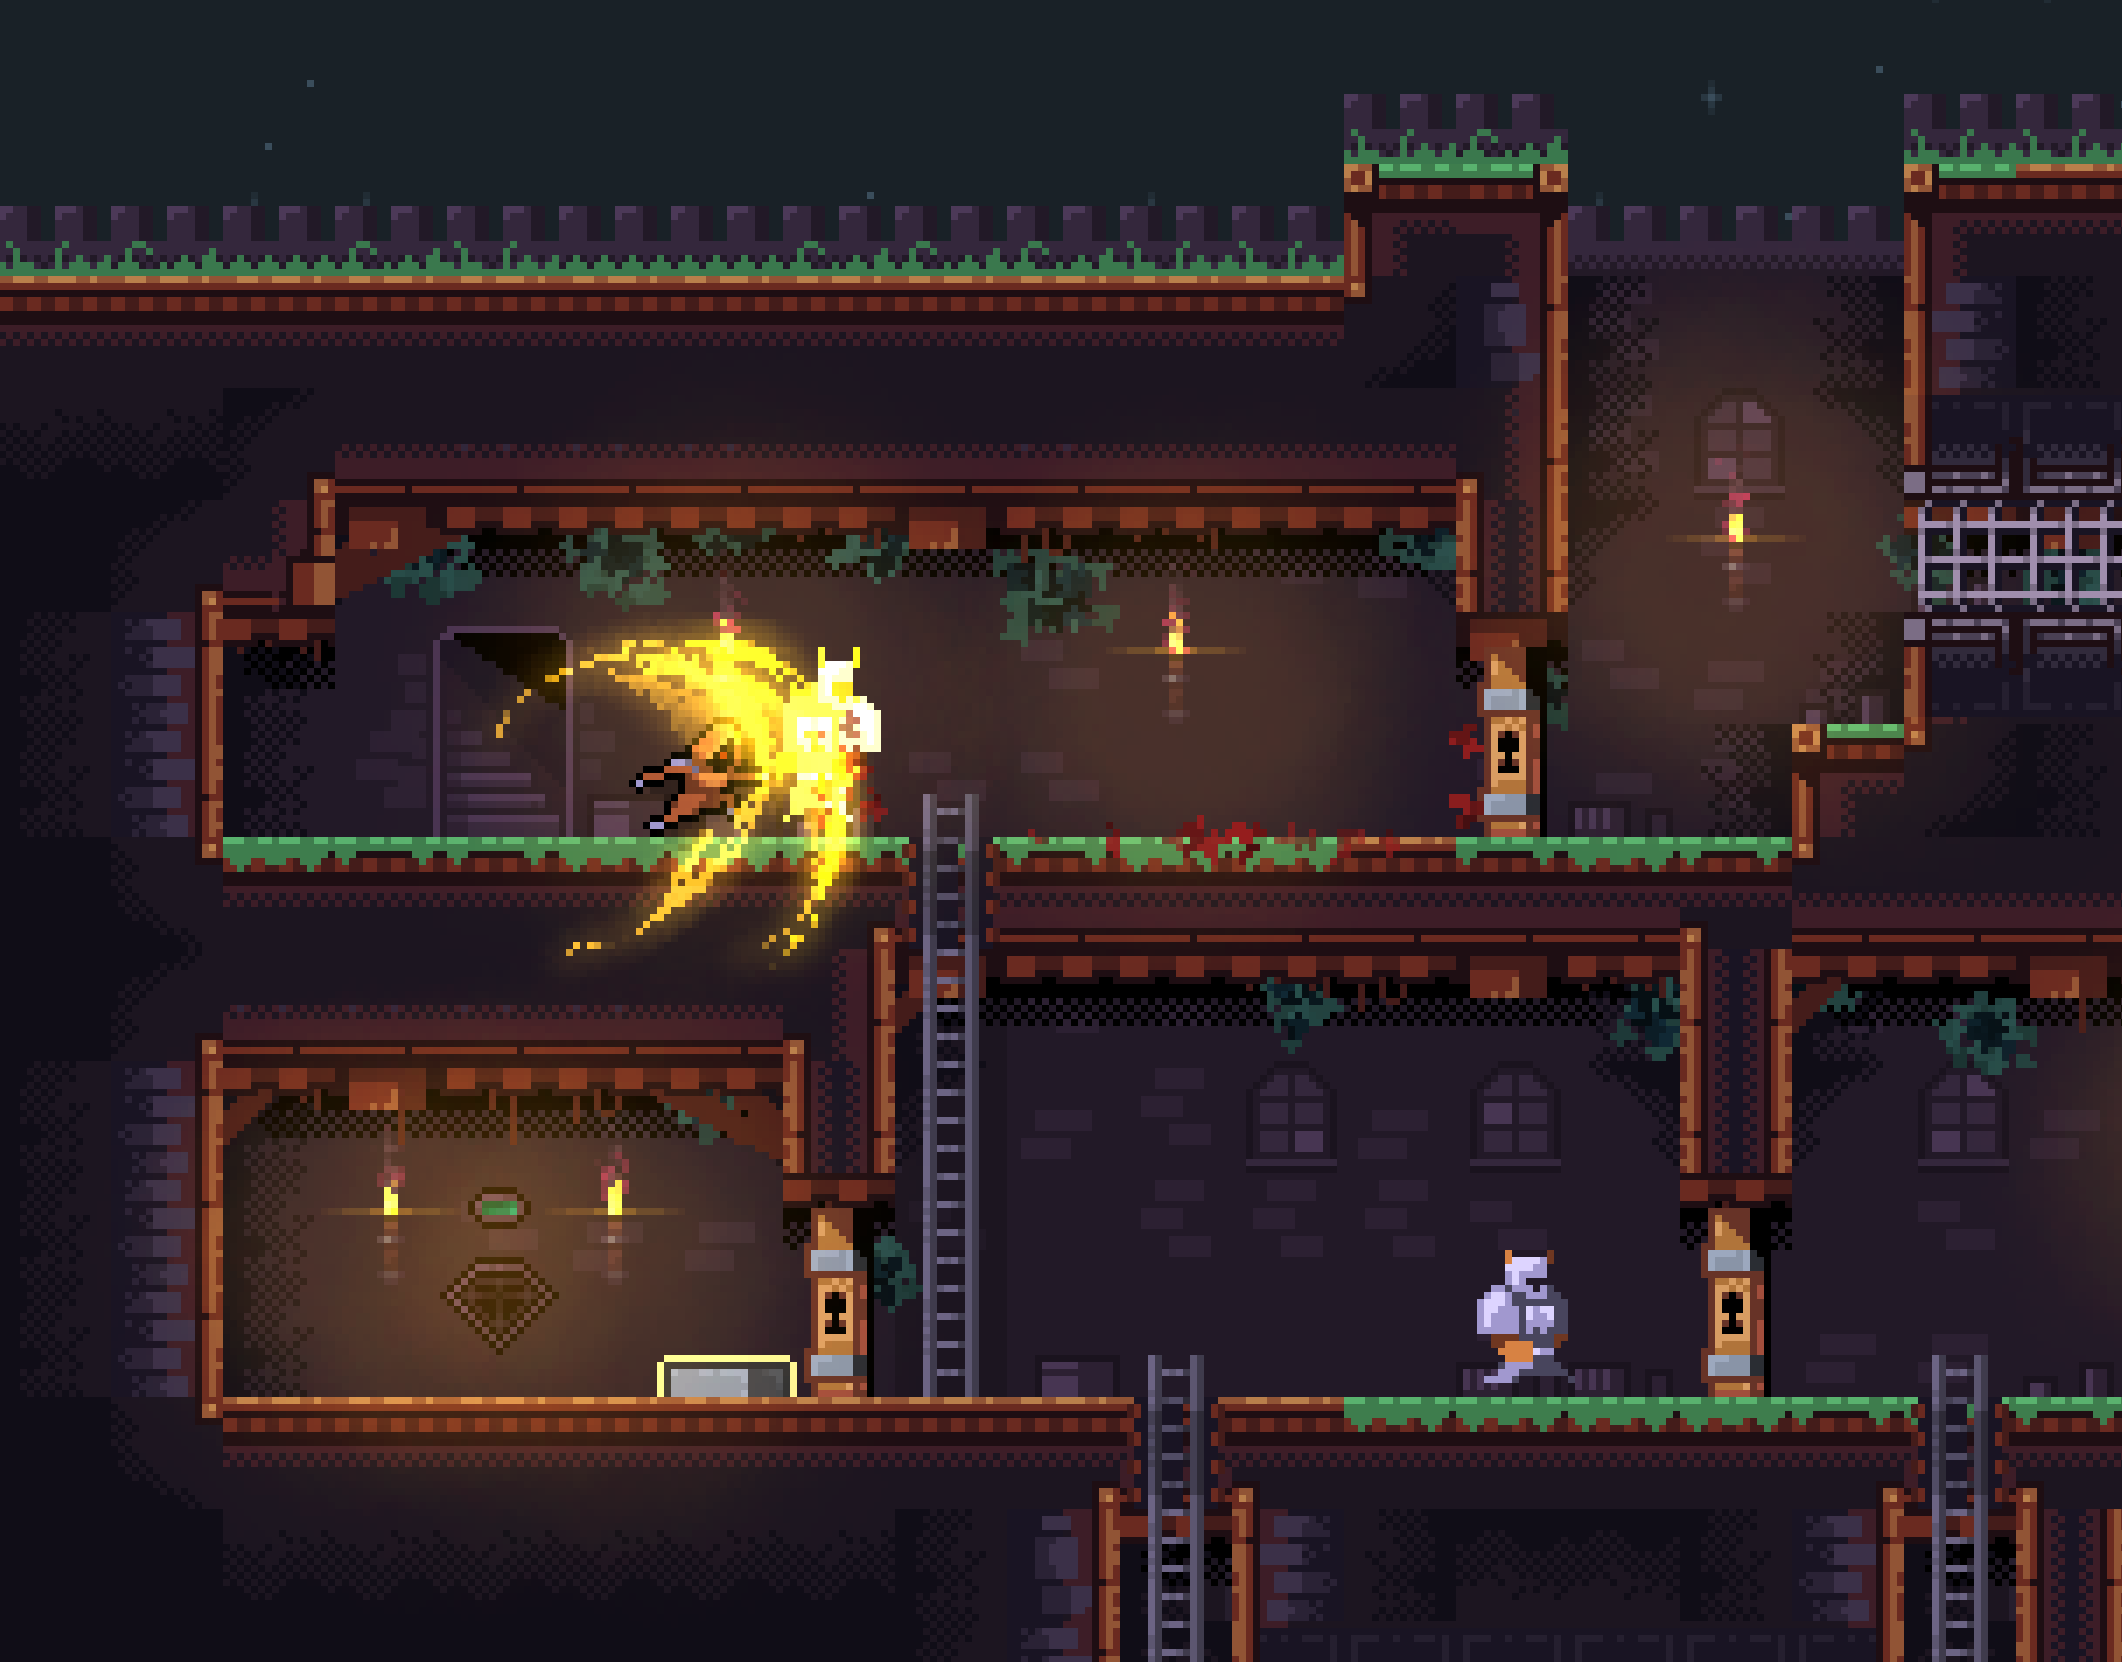
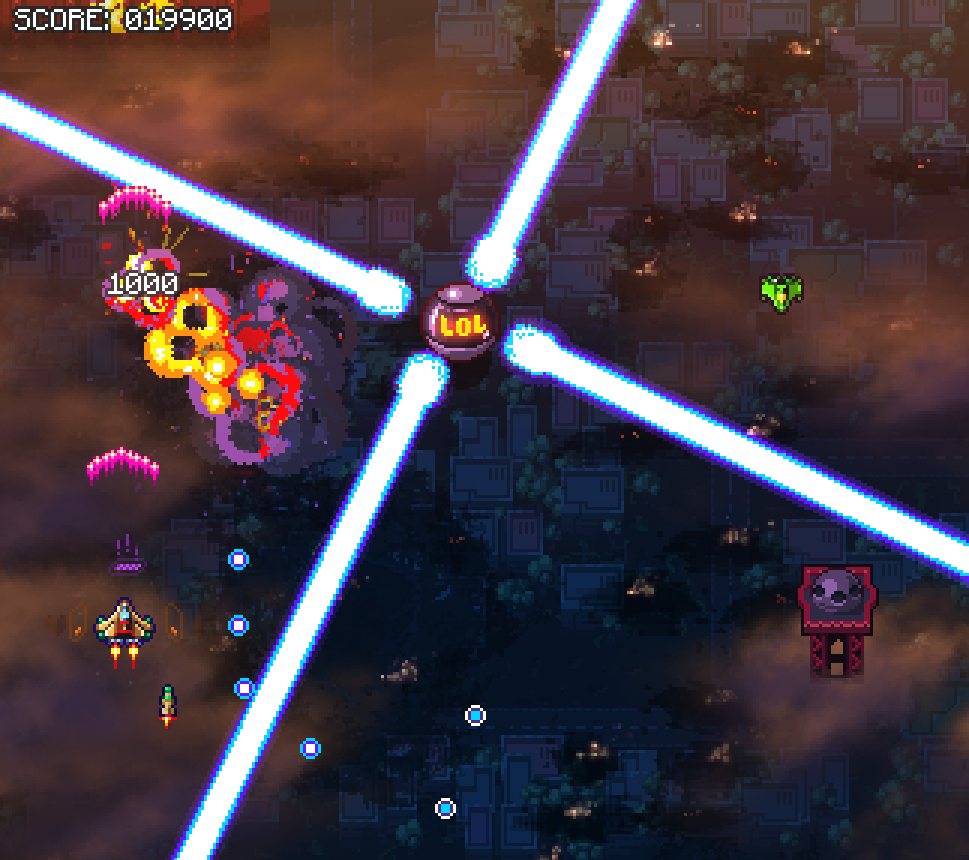
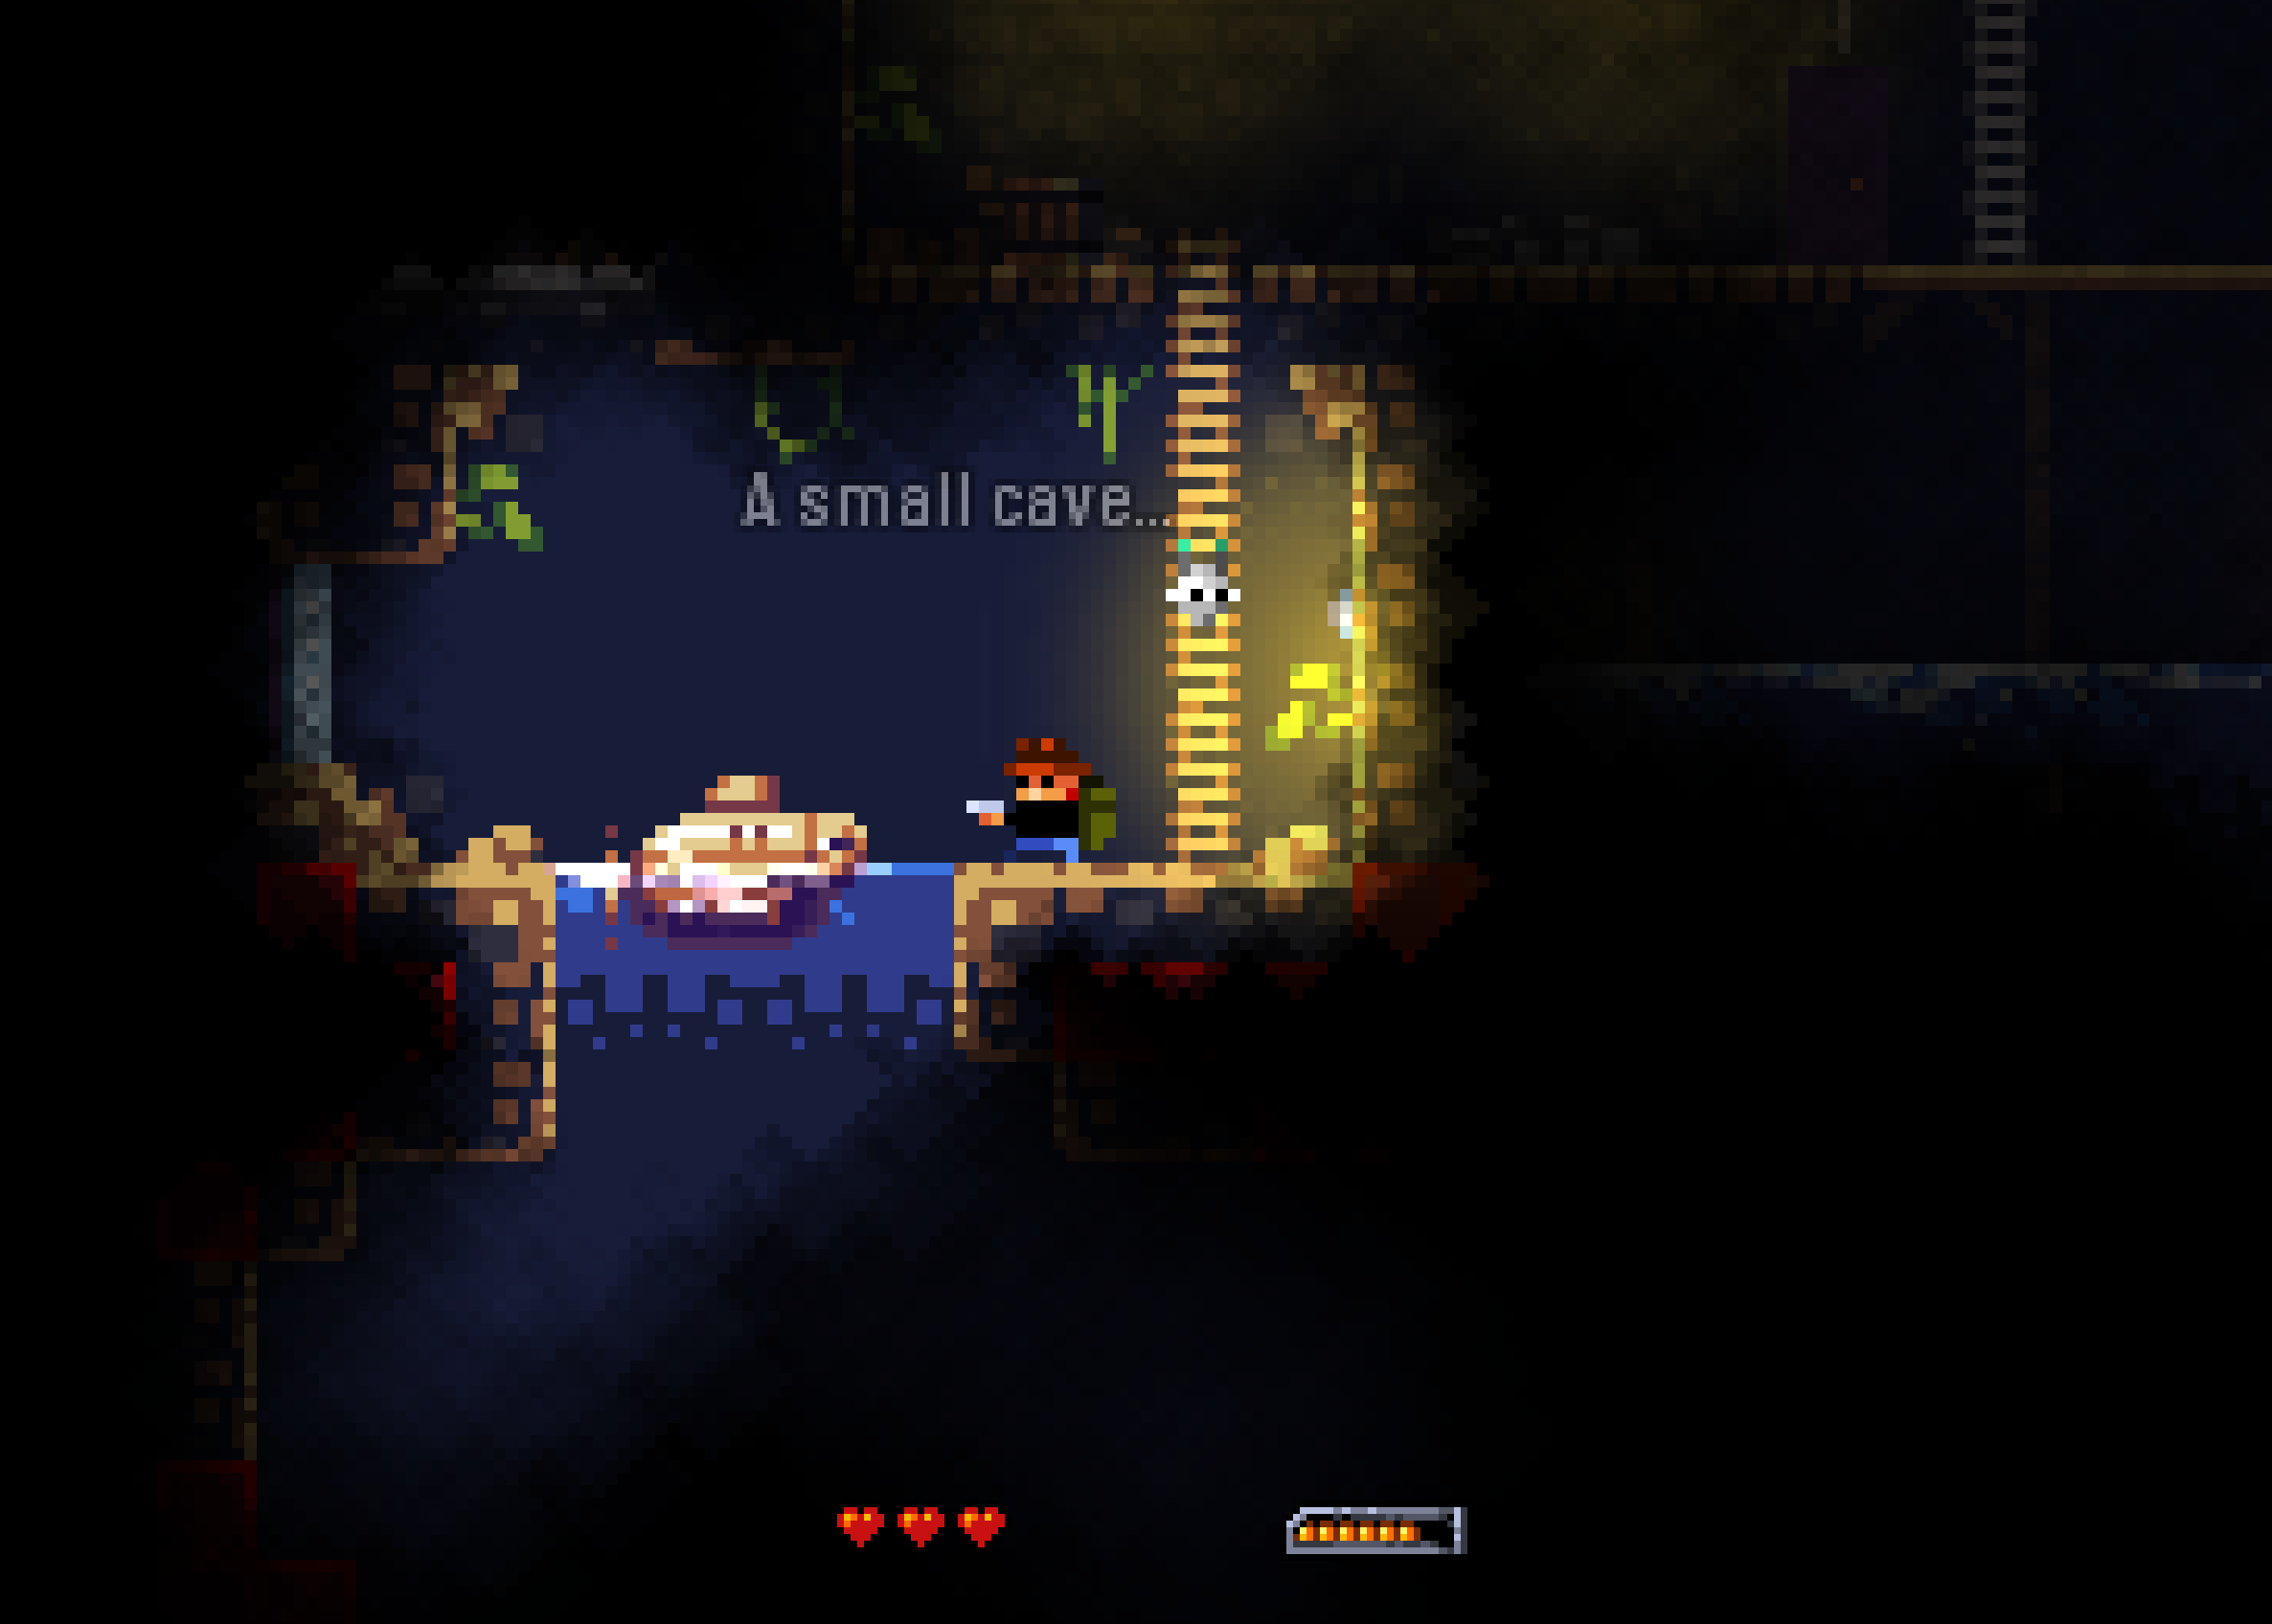
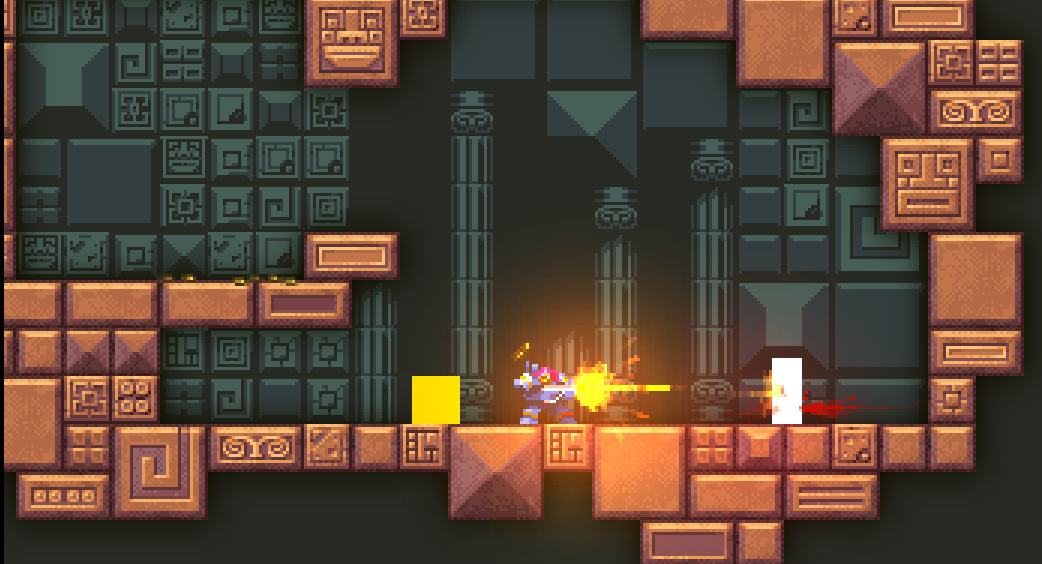
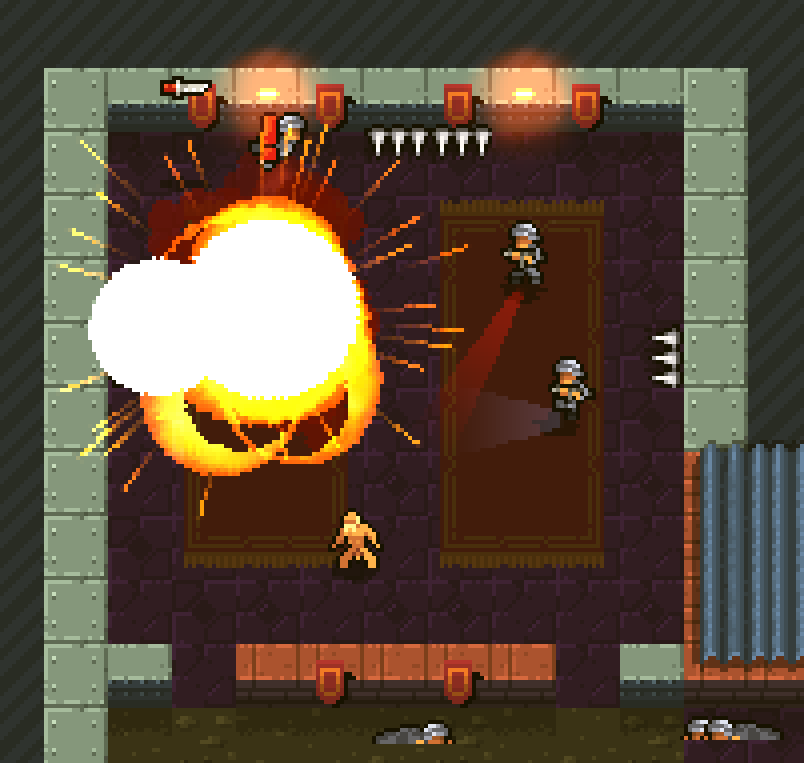
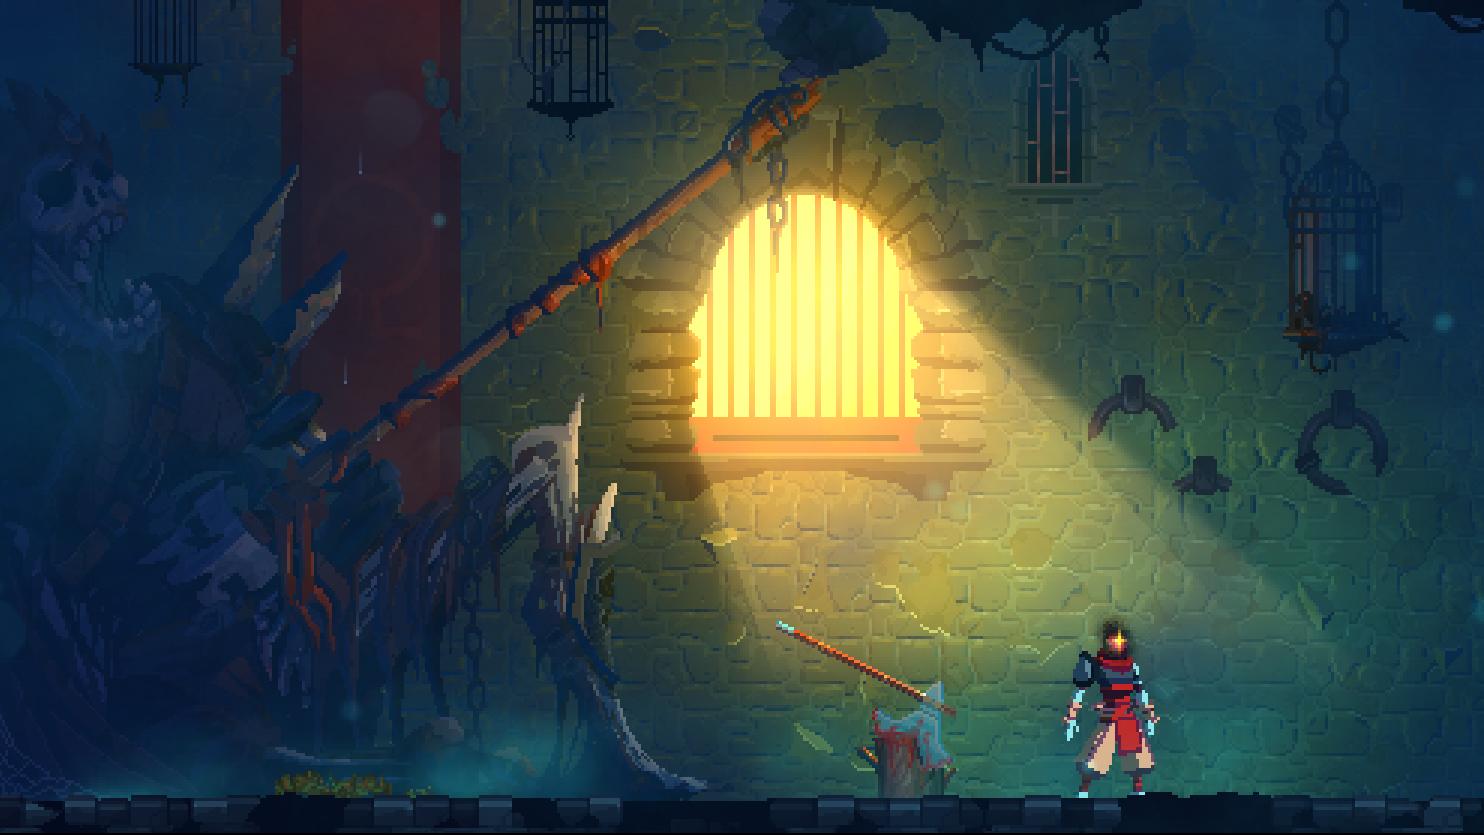
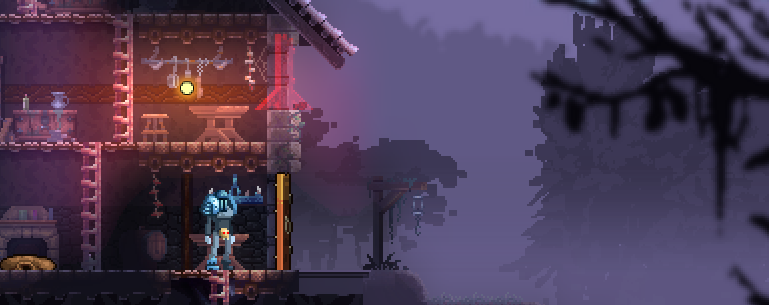
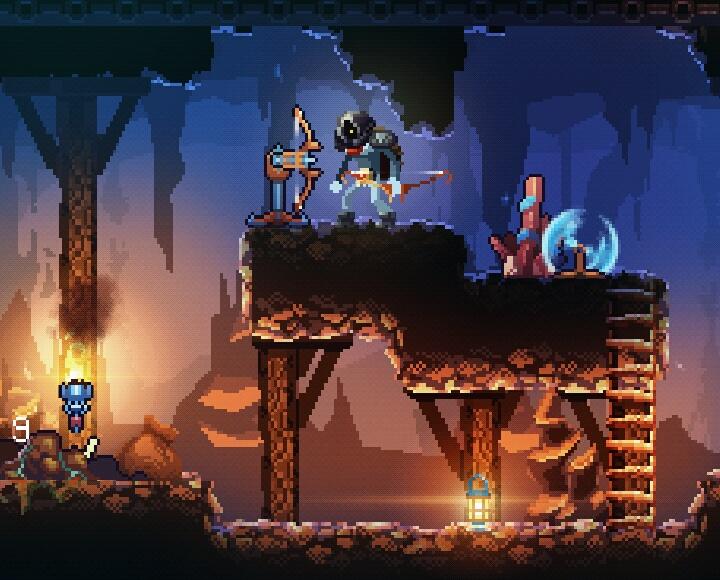
This game was created in 48h for Ludum Dare 48 entry. The theme was “Deeper and deeper“.
I definitely spent too much time tweaking the fire effect but I’m pretty happy with the final result anyway :) I couldn’t implement everything I wanted to get closer to the actual theme, but the general idea was to make a game where you really feel that things are getting worse and worse, and out of control at some point.
The initial intent was to make the final levels feel like “you can’t stop the fire anymore, you only have to survive and find your way out“, but this didn’t make it to the 48h game.
Extended version
Nuclear Blaze received lots of positive feedback, and as a matter of fact, my 3yrs old kid also loved firefighters stuff, so I decided to turn this jam project into a full game on Steam and ItchIO :)
The current LDtk discord will be re-organized to become official “Deepnight Games” discord, with separate sections for LDtk, gamedev and soon, “Survive” game project.
I’m about to focus mainly on my game project code name “Survive“.
GameBase for Haxe will have some major 2.0 update really soon
ROADMAP
Being back from holidays and it’s now time to slow down a little bit, to prepare for the future. So here is a rough roadmap on my personal plans about LDtk, “Survive” game project, Deepnight Games, and other side projects.
Deepnight Games (ie. me, Sébastien “deepnight” Benard) is a single person company where I do everything, from coding to art, including support and marketing. This obviously means I have to prioritize, and I’m not in a state where I can do everything ;)
LDtk: I plan to reach 1.0 stable state within a few weeks, as I believe LDtk is now almost feature complete. This is not the end (obviously, but still, it’s important to mention that), but only a major milestone for me to reach. After that point, I plan to continue to support it and add more & more features, but this will happen at a much lower rate, as I’ll move my focus to “Survive project“.
LDtk discord: as of today, the discord server features a mix of discussions about LDtk app, related libs and stuff about GameBase and other game dev topics. To be more consistent with that, I decided to make things a little bit cleaner by making it the official Deepnight Games discord, which will continue to focus on LDtk itself, but will also include channels about GameBase and the future Survive projects when this will be needed.
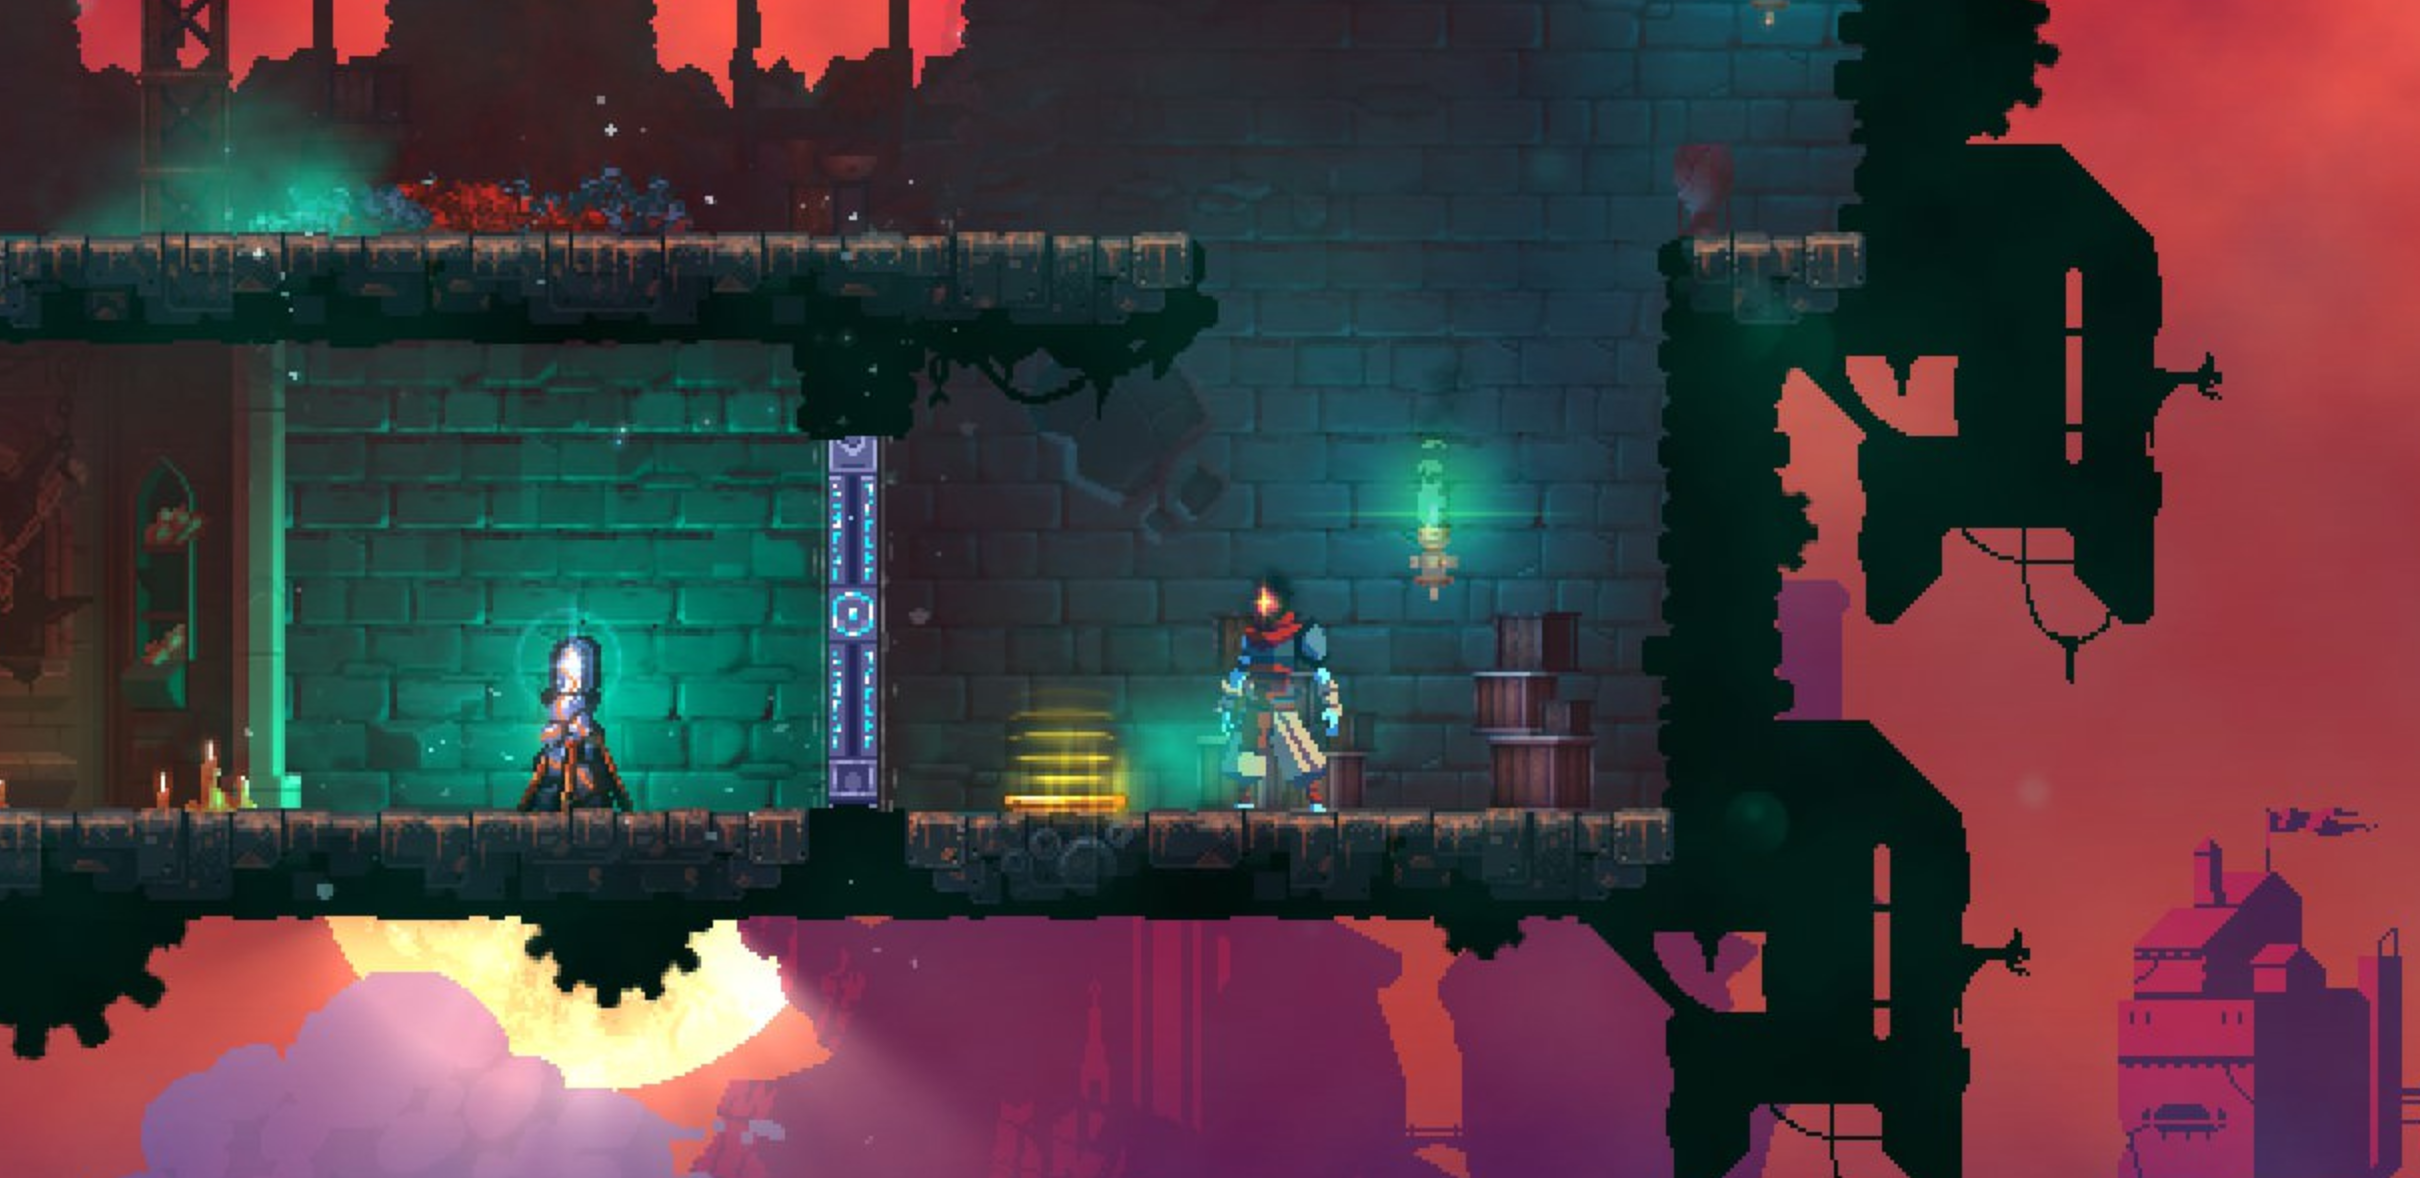
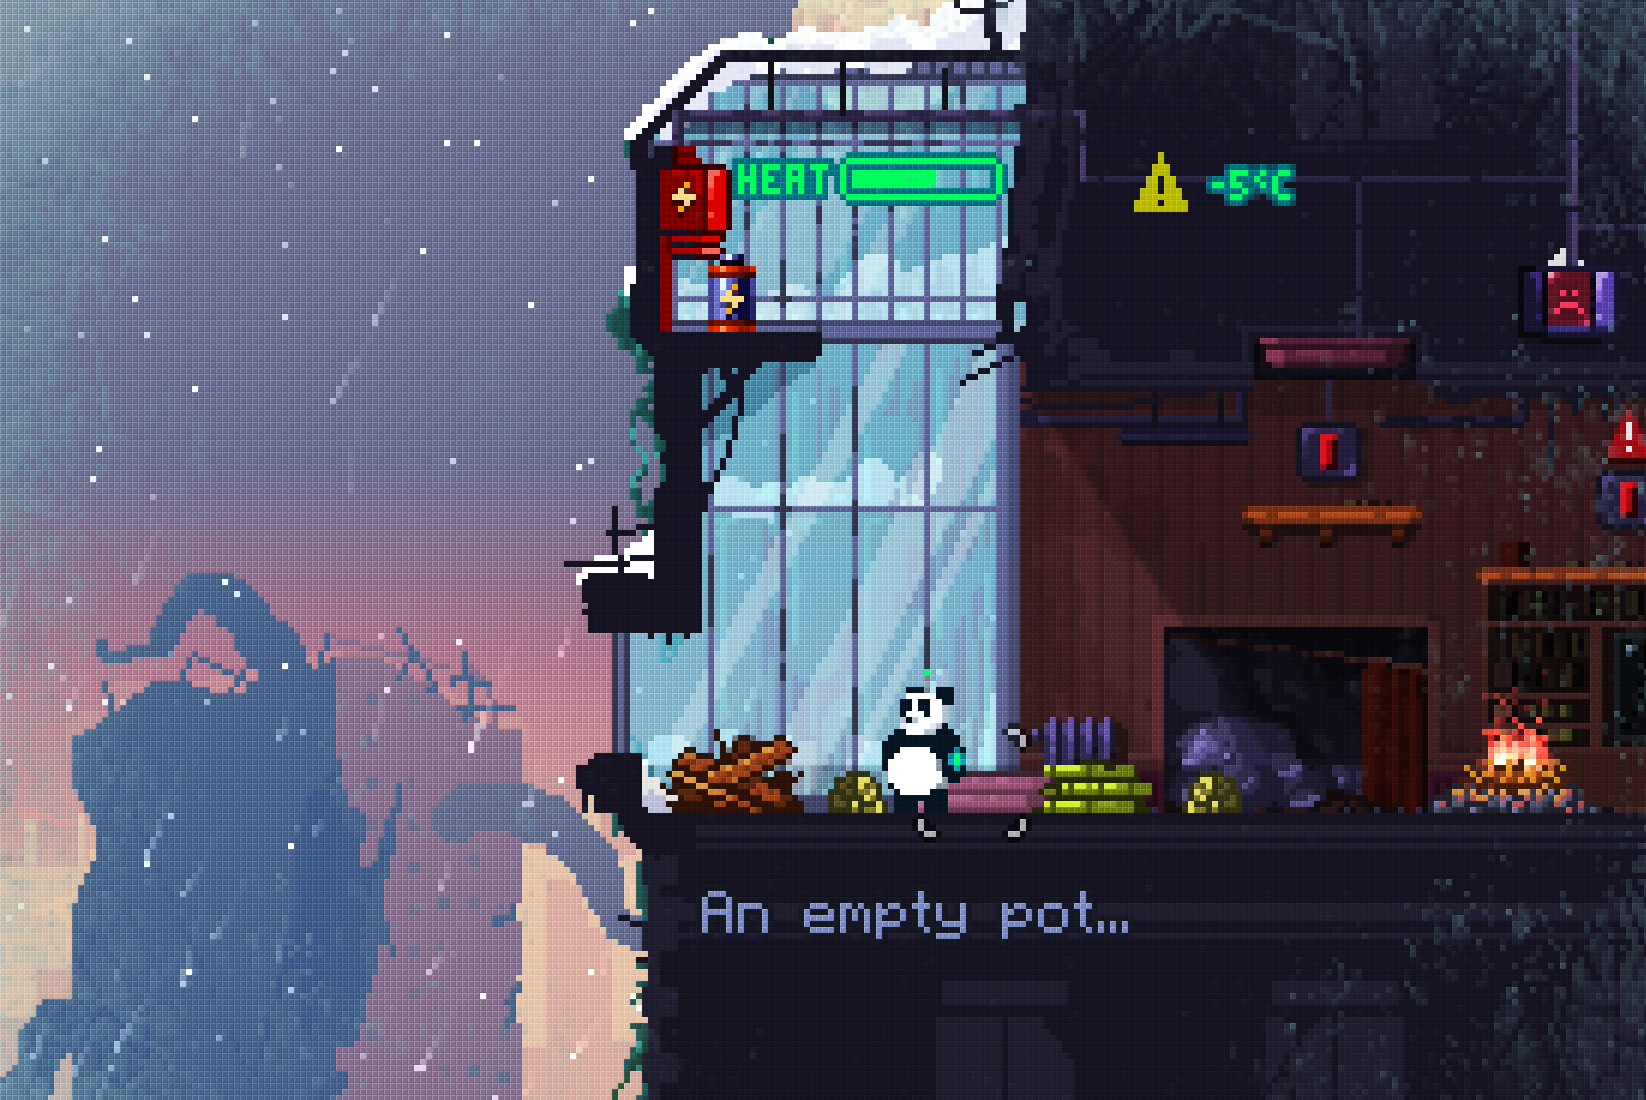
Survive (project code name): a HUGE project and the reason behind making LDtk. Not much to reveal about it for now, except it’s a 2D platformer with a strong emphasis on exploration, mood and combat. I like to think of it as a mix between Final Station, STALKER and System Shock 2. The combat prototype is done and quite satisfying, the main tool (ie. LDtk) is ready and I now really need to starting working on the game full full-time, to make it happen. Good side effect though: because it requires a very solid level editor, LDtk will get more & more extra features as I make progress.
GameBase: One of my goal in life is to teach/share as much as possible. GameBase is a code base for any game dev out there who wants to get a compact and efficient 2D “engine/code base”. I personally use it for all my games (from Dead Cells to Survive, including most of my game jams). It’s based on Haxe language, with Heaps game engine. I just finished wrapping up a major 2.0 milestone for it, soon to be officially announced. I might build some dedicated website at some point to make it reach the “next level”.
ElectronBase: same idea as GameBase, a starting point for devs wanting to make a Haxe/JS/Electron app. It’s mostly for my personal use, but still, it’s open source.
Improvise: I play lots of tabletop RPGs with my friends (mostly using Roll20 platform) and Improvise is a small side project I’m building on my free time to help game masters resolve quick random content generation. It features a very cool dice roller with ease of use in mind and a “random table” editor to create your own stuff. Not released yet, will be “when it’s done”.
RPG Map: another tool I previously released for tabletop RPG game masters. I don’t think I’ll work much more on the current version (except a few bug fixes), as my long-term plan is to create *RPG Map 3* as an Electron/WebGL based app, for easier future development. Some merging might also occur with Improvise, depending on the state of both project.
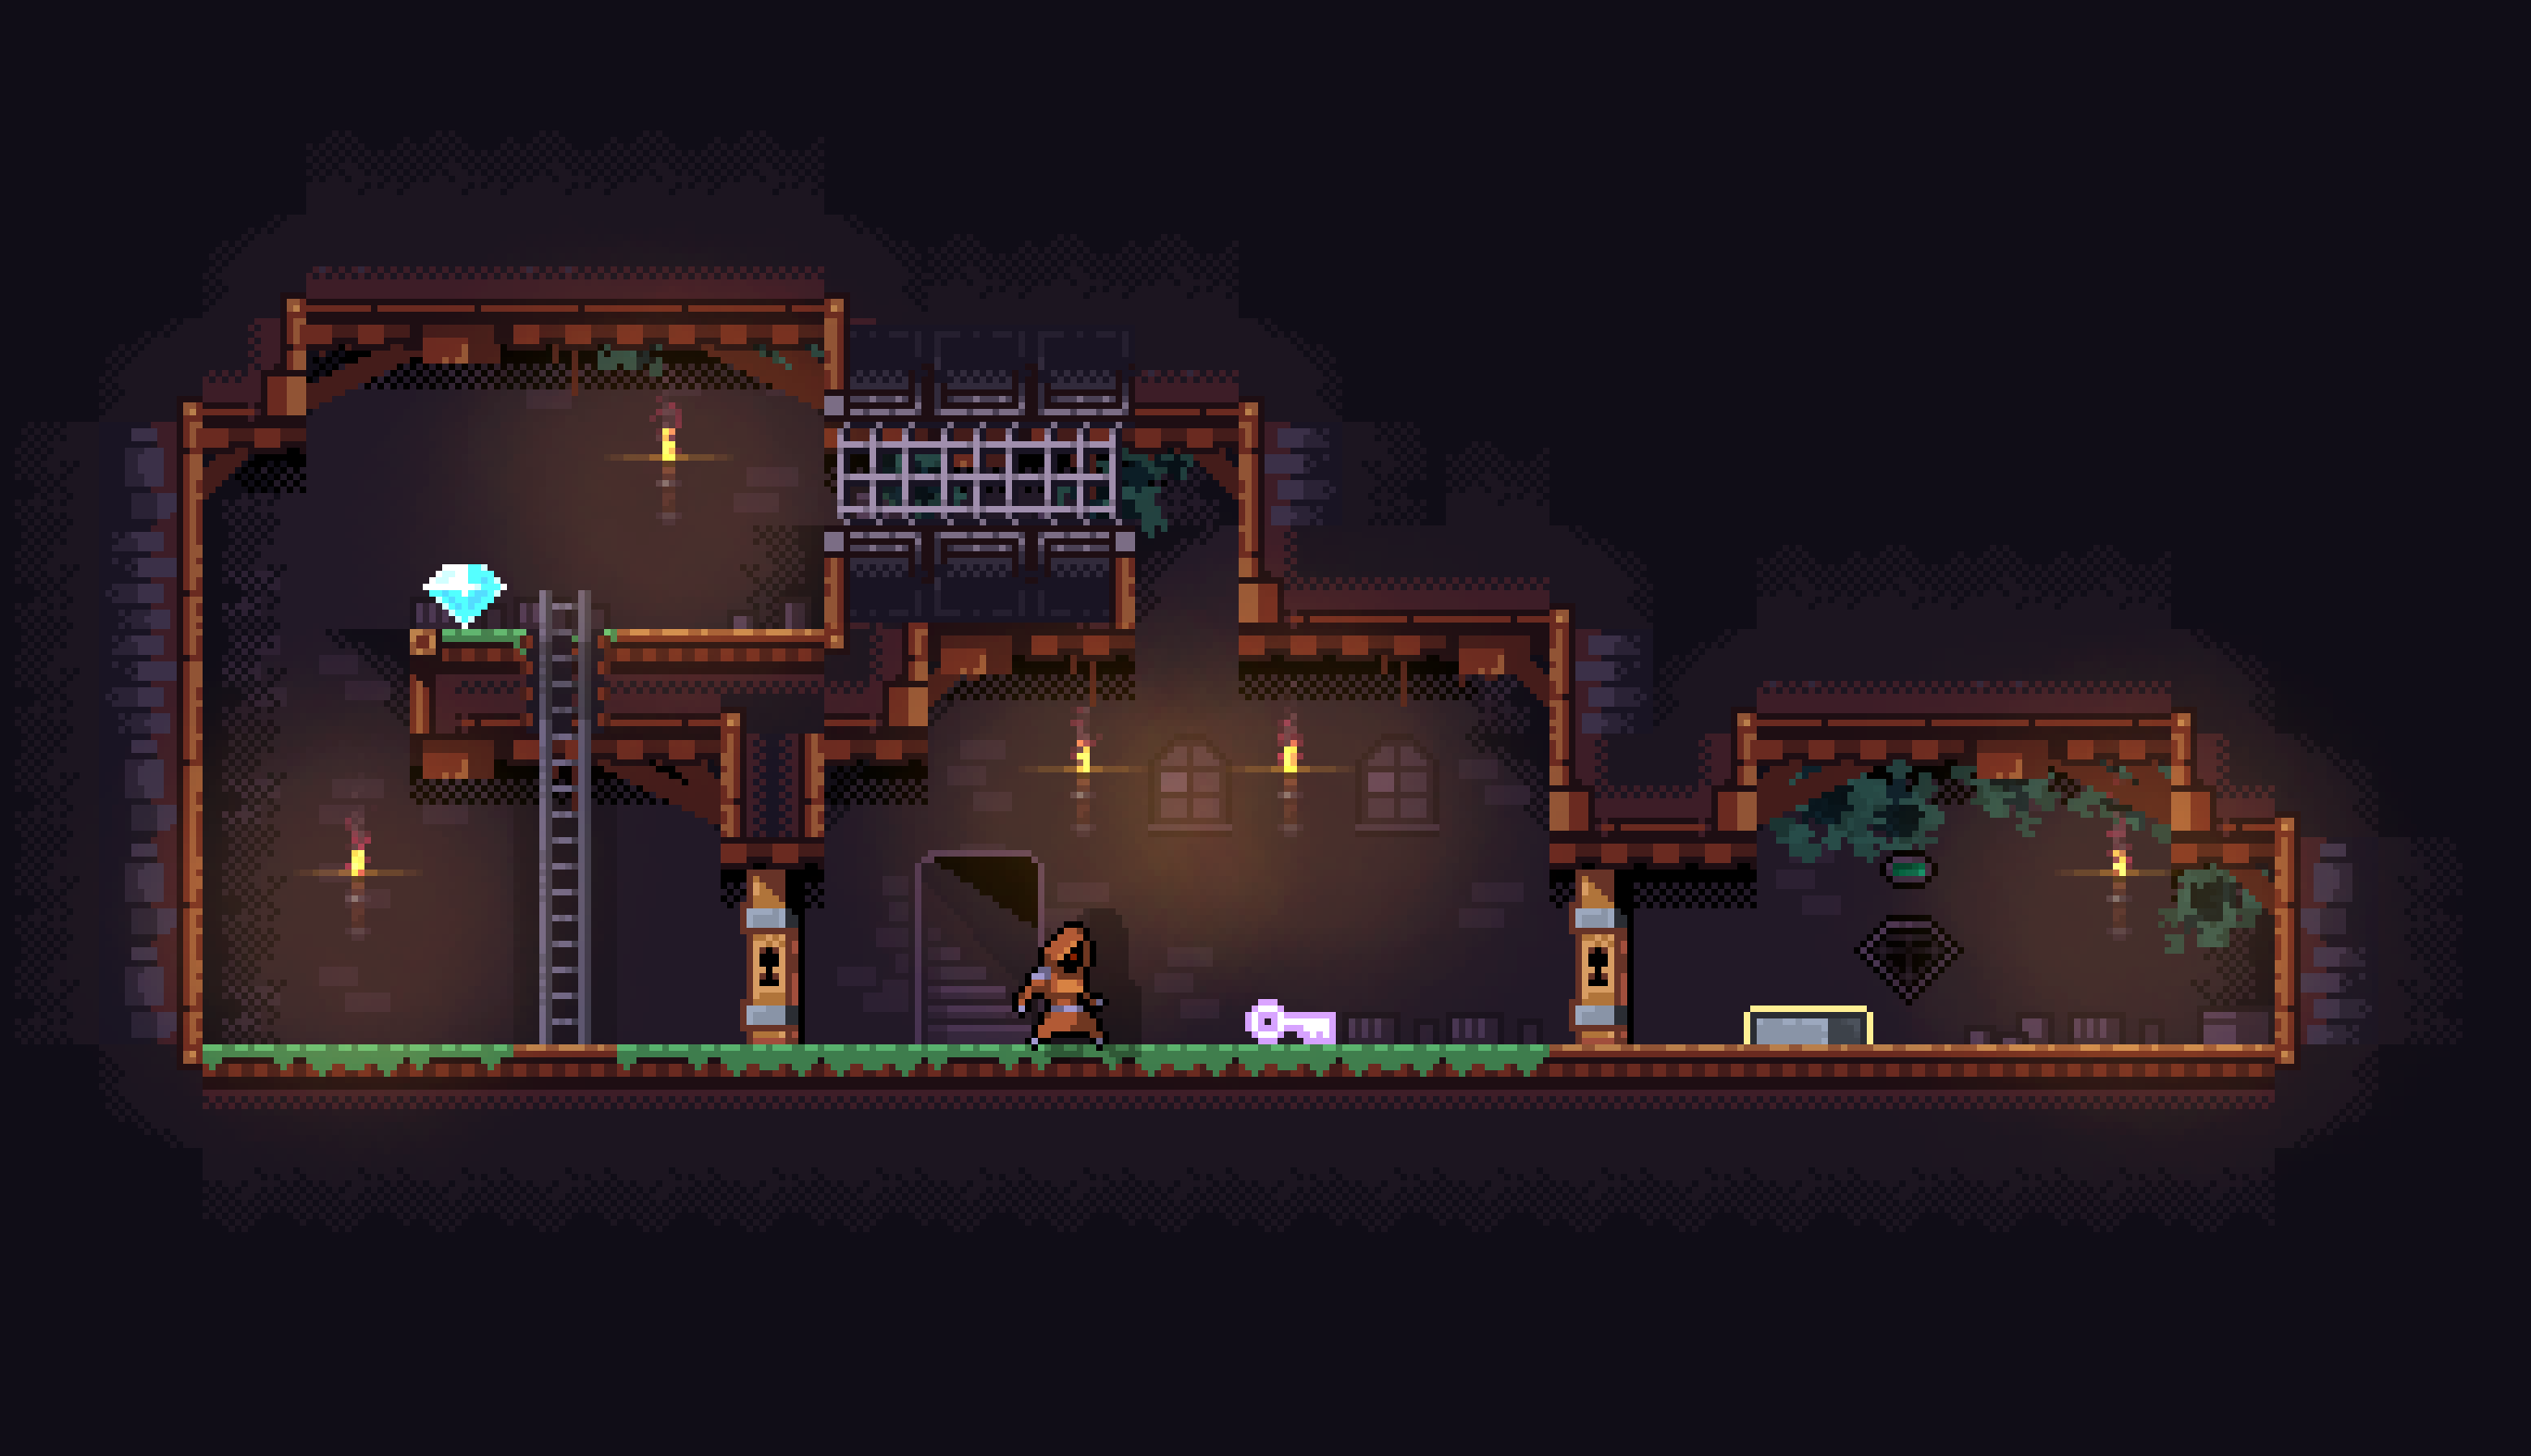
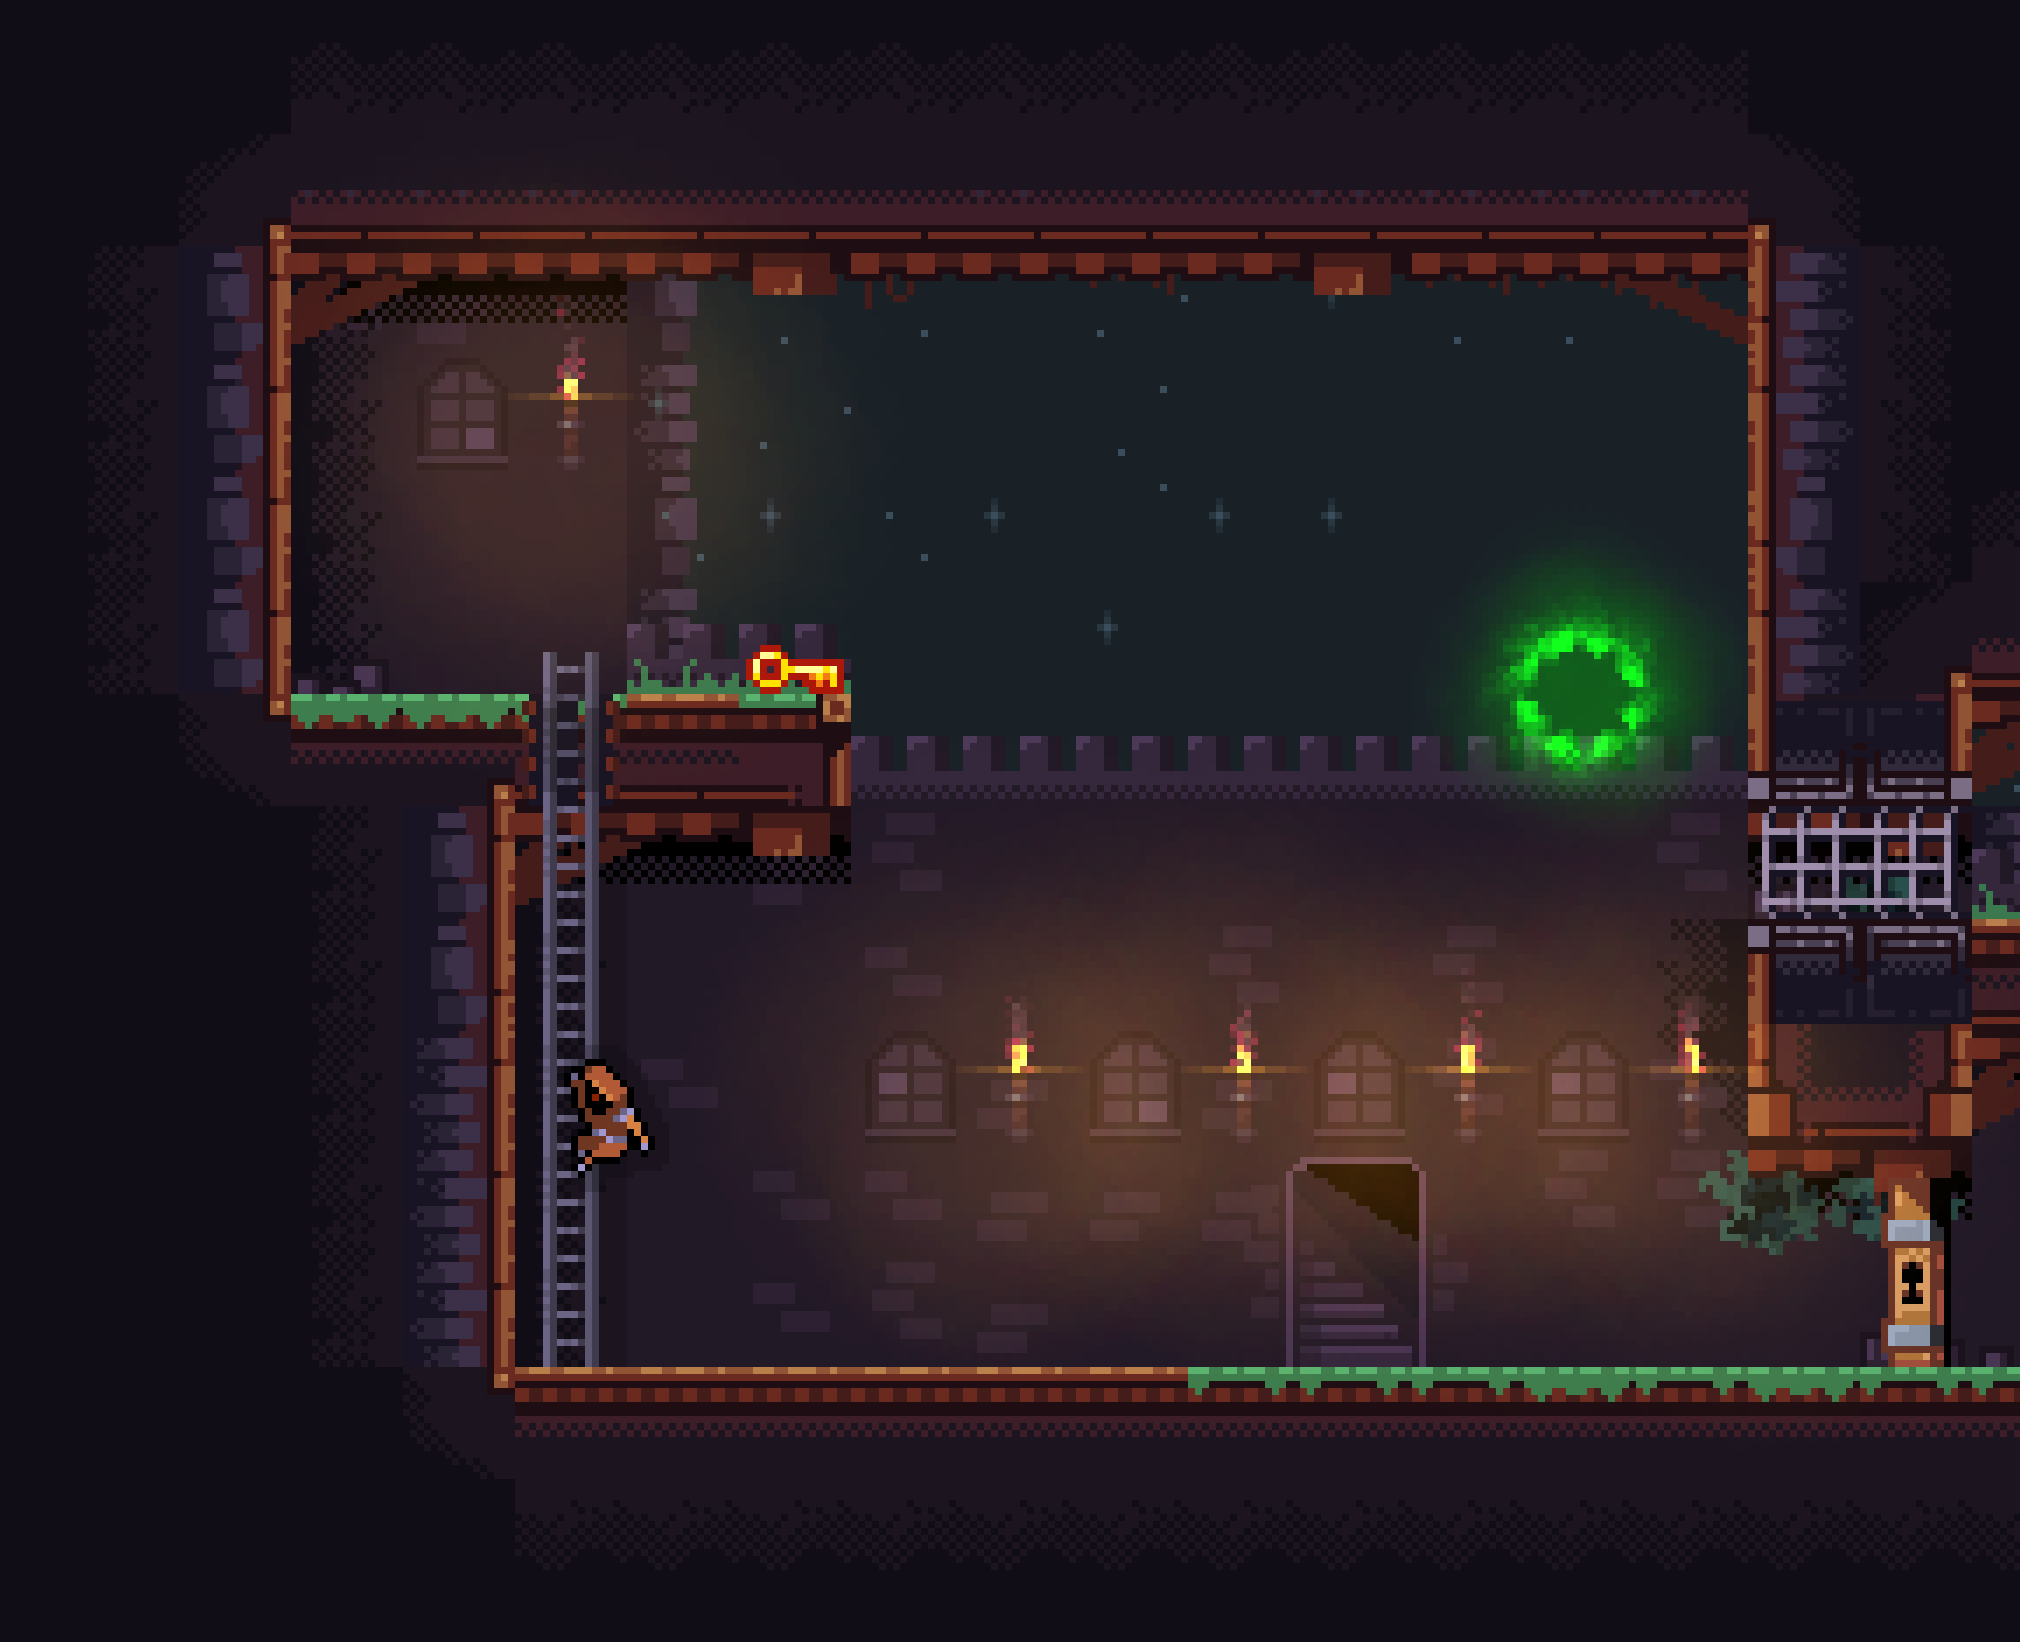
To me, this game was some crash test for LEd, the level editor I’m developing for the indie community. Pretty much everything went really smoothly, and LEd allowed me to create visually advanced levels with quite few work.
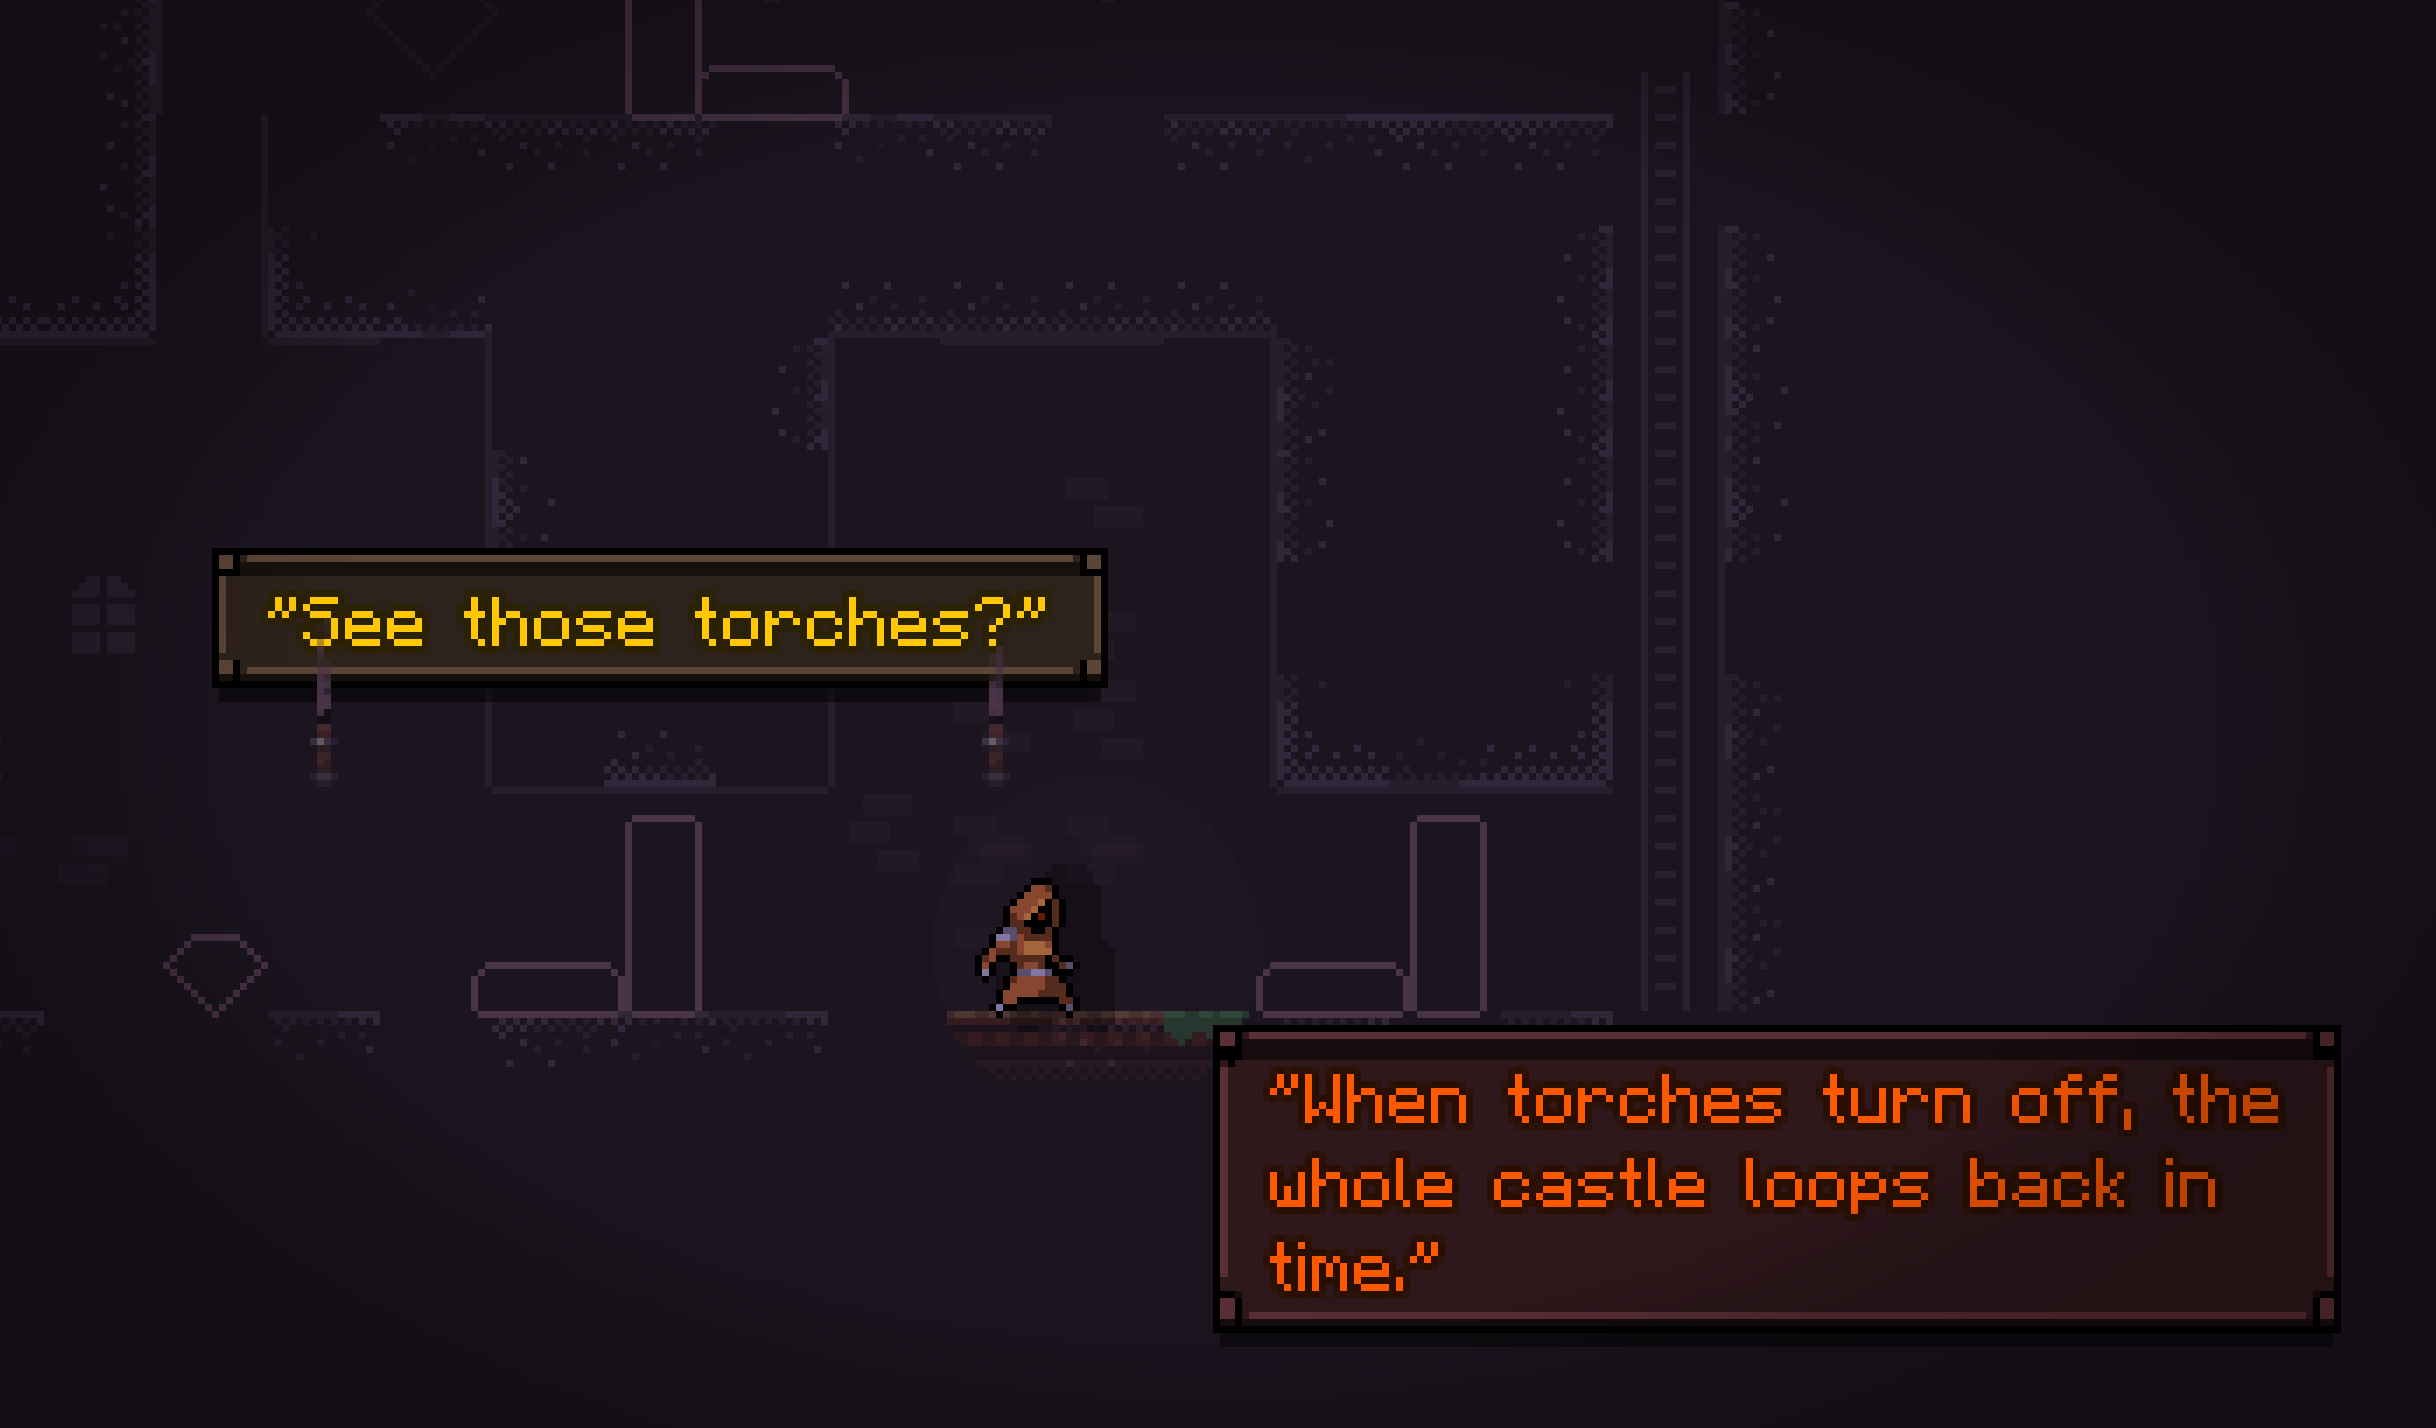
Gameplay wise, I add a very bad time trying to make the time-loop functionality fun, and it never became a really good base for interesting puzzle design. It proved to be hard to create many unique situations with it. With some sleep, I now have some better insight at what should be fixed, but I’d love to hear about your comments :)
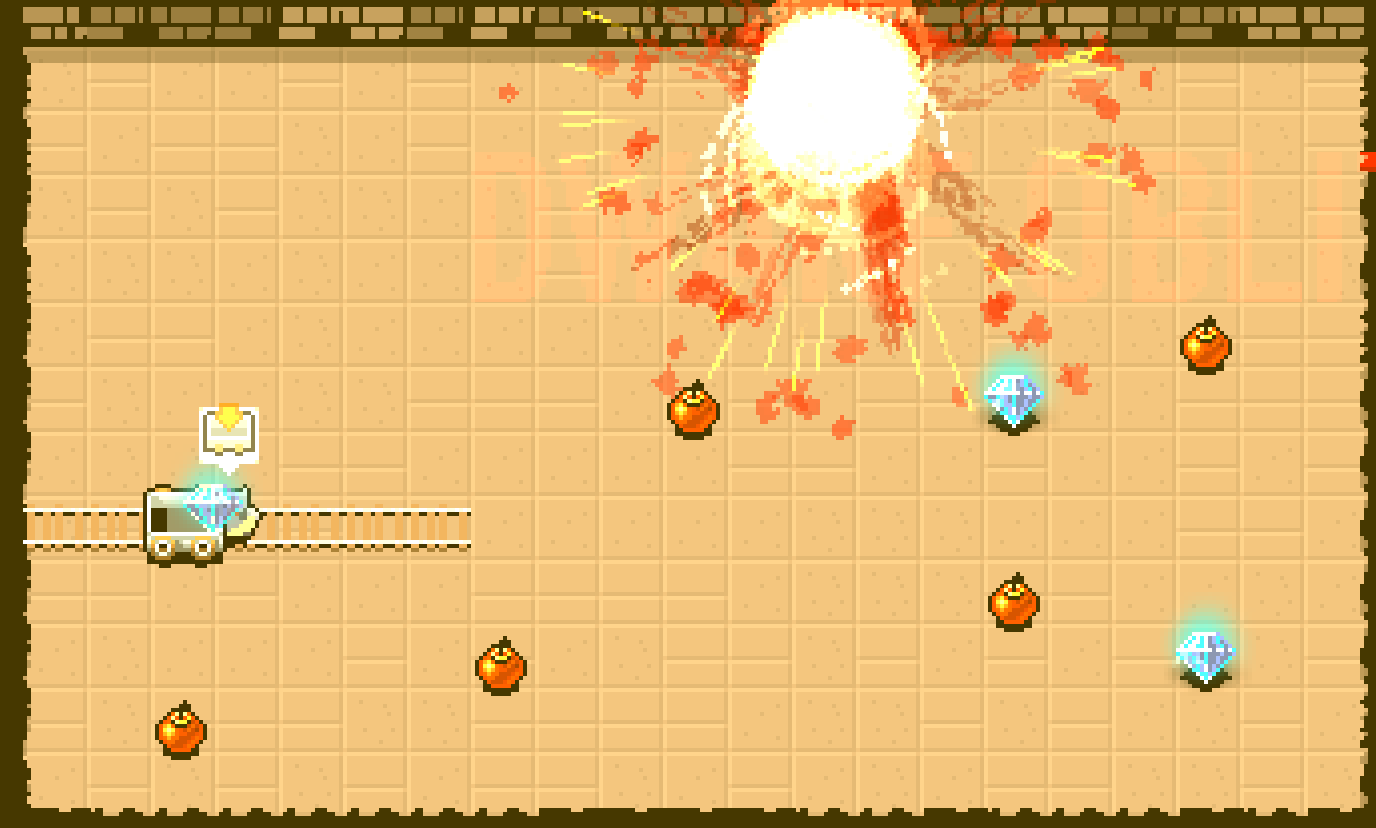
You are Little Blue Tractor and your goal is to find all the cows and bring them back home before night falls (the game lasts about 3 mins).
“Petit Tracteur Bleu” is a game I created for my 2.5 years old son, Gabriel, because he loves tractors. So please, don’t expect anything crazy here, it’s just a very simple game :)
It was designed to be played by someone who never played a video game before, and most movements are automated. The manual jump mechanic is only useful to explore hidden areas (using bumpers).
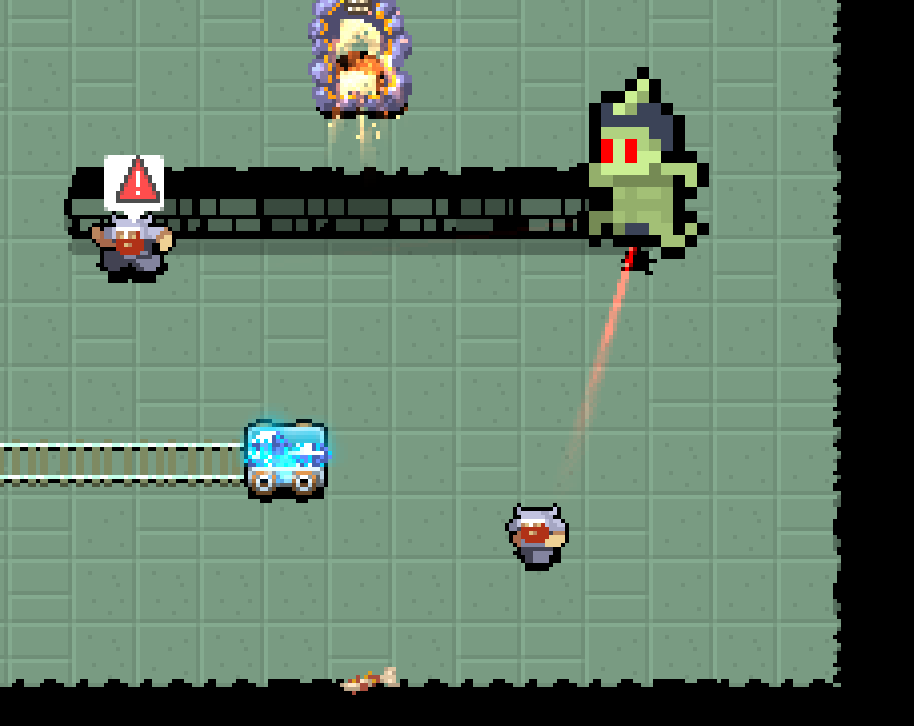
Dumber Dwarves is a dungeon crawler where you can’t control the adventurers directly and they are not the sharpest tool in the shed. Slap them or throw some meat on the battlefield to give your “instructions”.
The game was created in 48h (well, more like 35h) for the GMTK 2020 game jam. The theme was “Out of Control“.
Please note that there is no sound nor music in this game. Didn’t have time :)
Trivia
The game first started as a god game where you were to teach humans things by only slapping them. So, if a disciple was picking up some food for example, slapping him would teach him to avoid food (ie. “god thinks food is bad“). Problem was: a disciple who learn something tends to repeat the concept on its neighbors. So, someone who thinks food is bad will also slap other disciples picking it. It was even possible to slap someone slapping, so it would teach that slapping someone was bad. And so on :)
It was a funny little prototype, but too sandboxy to actually become an interesting jam game. Maybe with some extra work, but definitely not in 48h.
TL;DR: you can simply check the roadmap at the end of the article.
First of all, let me thank everyone of you for your amazing support :) I received many very touching messages which were really important to me (and actually balanced the total lack of support I received from my former team mates at Motion Twin). I’m now really motivated to prove worthy of your confidence.
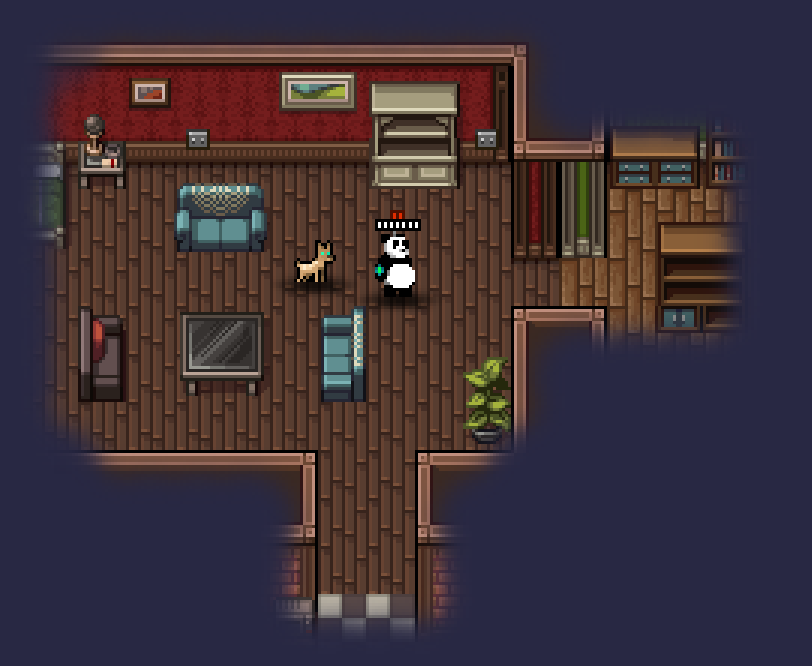
Moving forward, I’m now officially a game company, called Deepnight Games ❤
Some of you might notice the tiny red star on the character shield ;)
I’m now legally allowed to make, publish and hopefully earn money from games.
L-Ed / RPG Map
Aside from all the administrative stuff, one of the first things I did was to work on a 2D level editor for game-devs, based on my experience with RPG Map 2, code named L-Ed (for Level Editor). It’s not released yet at this point, but should be out there really soon, probably open-source. I will talk about this one a little bit more in a future article.
This project, plus the whole Covid-19 thing obviously had a few impacts on the development of RPG Map 2. My time was very limited and it was impossible for me to invest as much time I would have loved to on RPG Map. This means the Update 17 was delayed a lot: it’s still planned, just without any estimated release date yet.
Roadmap
So here are my general roadmap for the next few months. Please note the timeline may vary: some events might occur before some others, depending on the time I’ll actually have and the progress made.
L-Ed release
Game-dev oriented 2D level editor, free and probably open-source
RPG Map (Steam release)
Not much to do here, except a few bug fixes, and me getting used to the Steam publishing workflow.
RPG Map update 17
This is a big one. I plan to rework completely the UI using what I’ve learned from making L-Ed (basically: using NodeJS). This will allow the app to become completely cross-platform: Mac & Linux support is coming!
My first game as a solo dev
Top secret stuff for now, but I’m quite excited :)
PO files are part of the GNU GetText localization technique. It’s a very simple format that can be edited using various tools, like POEdit (available on Windows, Mac & Linux).
The philosophy
The “classic” way to do things is to write “dev English” sentences in your code, then use this Dev-English to kind-of translate to “proper English” (which will be used in the release version of your game), or translated to “proper whatever-language” you might want.
Note that your Dev-English are the keys for the translation texts. So changing your Dev-English texts will break the keys. The good thing is POedit handles that well, and properly suggests “lost” translations.
Lang.hx (from gameBase): the main API to access texts from my code
LangParser.hx (from gameBase): a separate script that parses all source code files and extracts strings directly from them (built using the Haxe “makefile” langParser.hxml).
If you want to use the GetText lib for Haxe, you will need to install it:
haxelib install deepnightLibs
Usage
Marking translatable strings with Lang.hx
In your code, just use calls like: Lang._("Some translatable sentence"). This will allow our tools to extract all the strings that require some translation, so we can feed our PO tool.
For example:
function myStuff() {
  trace("This is an untranslated text");
  trace( Lang.t._("This text is meant to be translated, and will be extracted.") );
}
Extracting texts
You can run haxe langParser.hxml from the command line to extract all strings in Lang.t._(...) calls.
All these strings will be stored inside a POT file, which is a Catalog file.
In my above example, the POT file is my “Dev-English” string catalog. It should be stored it in the /res/lang folder.
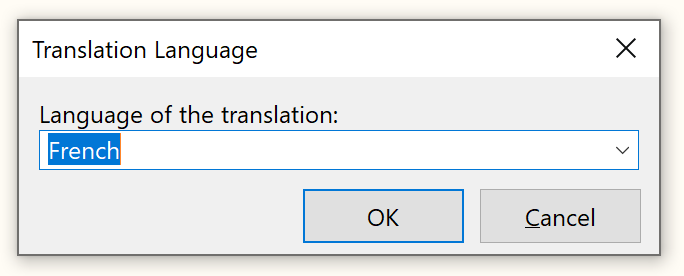
In POedit, start a new translation by setting the target language (could be French for example, or English again, if you want to turn your dev-English into something better).
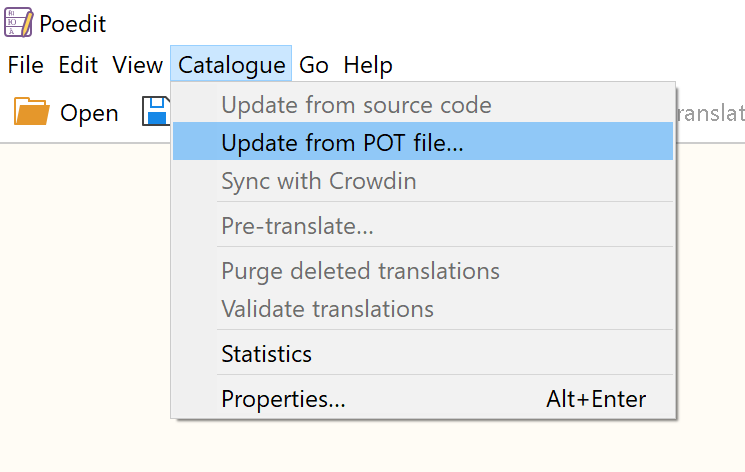
Import your POT catalog using the menu Catalog -> Update from POT. This will add all the untranslated strings extracted by the LangParser script.
Translate or validate existing entries “as-is”, and save your PO file. It will also generate a MO file which is basically the optimized/binary version of the PO file.
Import translations into your code
Modify the Lang.init() method to import new languages. All your Lang.t._("My string that needs translation") calls will be replaced by the translated string found in your MO file on runtime.
Important: all the PO and MO files should be stored in /res/lang folder!
Advanced features
Strings with parameters
If you need some dynamic content inside a translatable string, you use the ::myVar:: system. To replace myVar in your string by the actual value you want, you need to provide an anonymous object to the Lang.t._(“…”) call.
See the following examples:
Lang.t._("Hello ::name::! How are you?", { name:user.name });
Lang.t._("::v:: + ::v:: equals ::eq::", { v:5, eq:10 });
Note that the compiler will check any anomaly here:
Lang.t._("Hello ::name::! How are you?");
Lang.t._("Hello ::username::! How are you?", { name:"foo" });
Both will pop a compile error of variable name mismatching.
Adding translator comment
Sometimes, you may have some strings that could translate differently based on context.
For example, in your app, you might have a setting for some font size, and one possible value is the string “Large“. In this case, it means “Big“. For another setting, like a world size, you might have a setting string “Large” again, but this time it means “Vast”. They would translate in different ways in French for example.
To disambiguate these strings, you can use Translator comments:
Lang.t._("Large||for a font size");
Lang.t._("Large||for a level size");
Both will return “Large” at runtime by default, but they can now have distinct translations, if needed (so the return will vary in this case).
Warning: due to some technical limitations, you shouldn’t have ANY space around the “||” (double pipes) characters.
In POEdit, translation comments appear right in front of the corresponding entry:
The most basic way to use is to open a command line inside your project root (where the HXML files are), then type:
haxelib run redistHelper
This will display the tool help, including some examples.
Basic usage
To package your project, just run:
haxelib run redistHelper myProject.hxml
RedistHelper will parse your HXML and create a redist folder containing all the required files. You can simply distribute that package and it should work :)
You can package all your HXML files in one single call:
haxelib run redistHelper gameHashlink.hxml gameJs.hxml gameSwf.hxml
You can optionally add the following parameters to the RedistHelper command:
-zip : will create a ZIP archive for each package
-v : enable verbose mode (mostly useful for debugging)
Embedding extra files
You might need to add some extra files to your packages, like a README or a LICENSE. Just add their path to you RedistHelper command:
haxelib run redistHelper game.hxml docs/README docs/license/LICENSE
You can rename any extra file on the file by adding a “@” to their path:
haxelib run redistHelper game.hxml docs/README@readme.txt
Available targets
HashLink project
The goal here is to turn your app into classic and easy to distribute Windows Executable (EXE).
When packaging HashLink (HL) projects, RedistHelper will copy all the required runtime files directly from the Haxe and HL folders from your system. This includes DLL and NDLL, the HL executable and a few other things.
Your project.hl file will be renamed to hlboot.dat which is the default file loaded by hl.exe when it’s run without parameters (see link).
The hl.exe itself is renamed to something closer to your actual project name, feel free to rename as you wish.
If your HXML uses the hldx library, the redistHelper will package a DirectX folder.
If your HXML uses the hlsdl library, the redistHelper will package a OpenGL (SDL) folder.
You can use the -hl32 to also package a 32 bits version of the HL runtimes, for older systems. Warning: this will use the last release HL 32 bits (1.10). All recent HL updates won’t be included!
HTML5 / Javascript
When packaging a JS target project, RedistHelper will produce a basic HTML file to load your app properly. You can use it to create your own integration.
In your HTML body, you basically should have something like that:
If you want to upload a JS app that should be played right from the user browser on the itch.io website, you just have to package your app using the -zip parameter:
haxelib run redistHelper myJsGame.hxml -zip
This will create a ZIP archive that you can easily upload to your dashboard, or send using Butler.
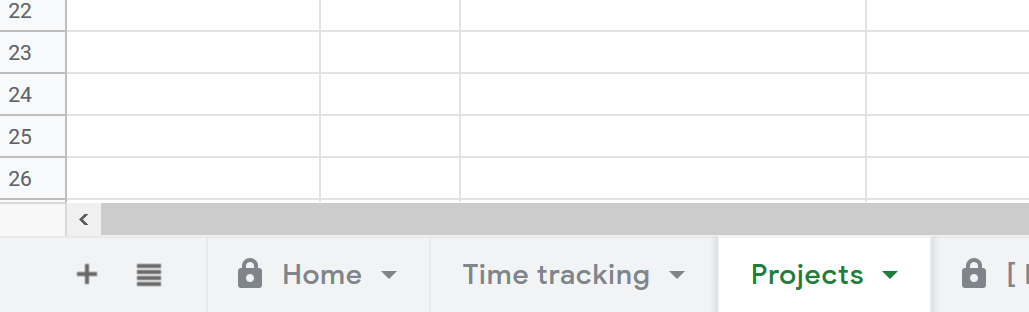
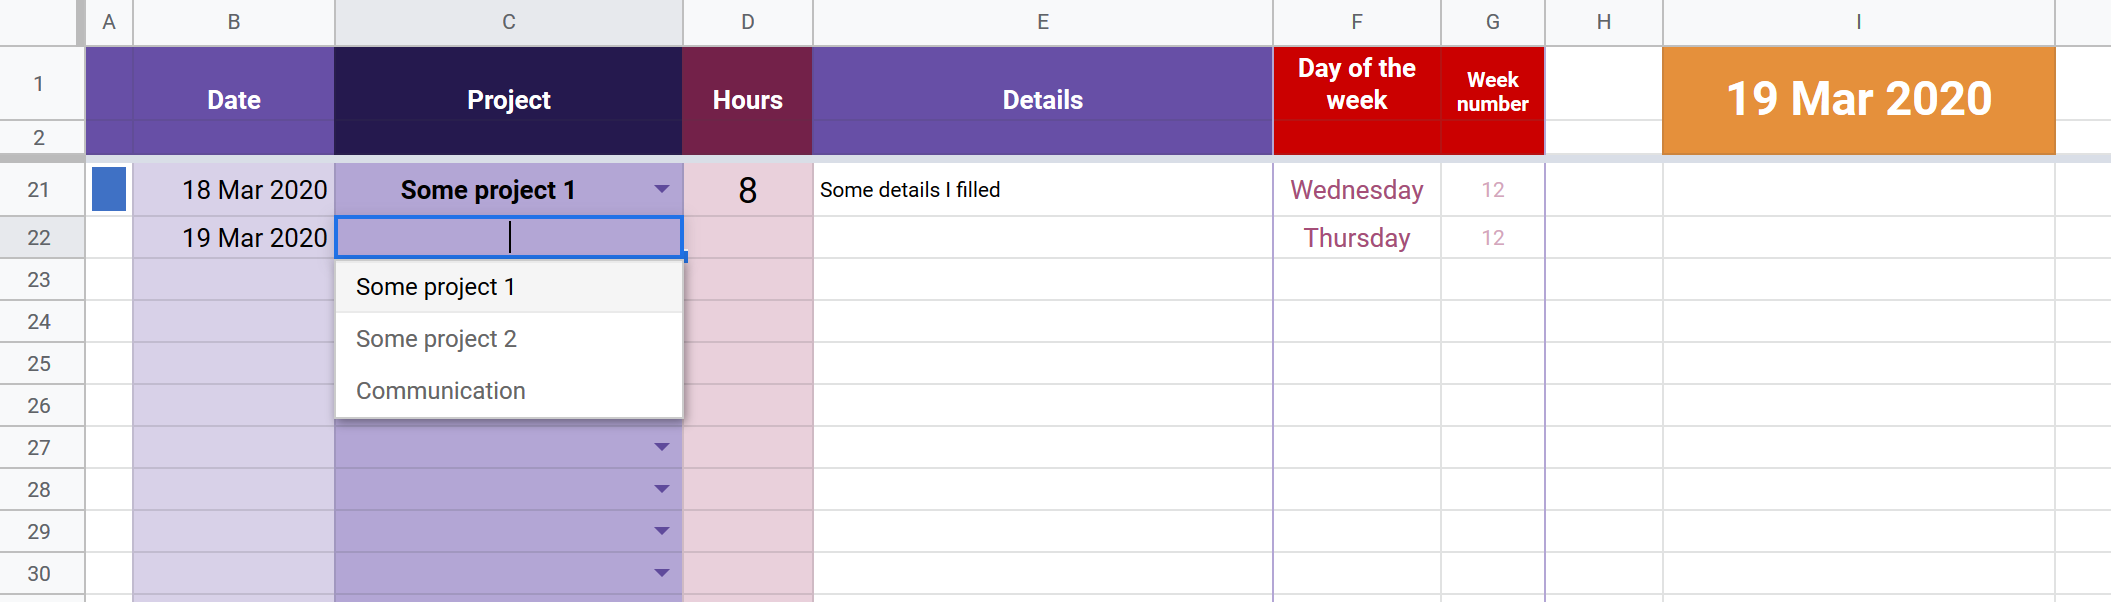
This Google spreadsheet will help you to keep track of time spent on your projects:
Single user oriented to keep it simple,
Easy to add projects,
Shows a clear summary of your current and previous week, and how you spent your time globally,
this time tracker is simple and does its job,
you can easily have all your data at your disposal,
it can be updated to your needs, if you know how to do Google Sheet formulas.
Being confined (thanks Covid19), I’ve spent some time making this tool for my own usage, to take care of my new indie career. Feel free to use, share or change it!
How to use it?
Make a copy of the spreadsheet on your own Google Drive (File > Make a copy)
Go in the Projects tab, fill this sheet with your own project names & colors.
Go in the Time Tracking tab, just enter a date (make sure to match the spreadsheet date format, see File -> Spreadsheet settings), pick a project from the list, and fill the hours column.
Every time I start working a new game, I use “GameBase” as a starting point. It uses the Haxe language and the Heaps.io engine.
GameBase offers a minimal set of classes and tools to get started quickly making your own game. It’s completely open source and easy to adapt to your needs. Oh, it’s also quite simple and not bloated with tons of useless classes or features.
Of course, you could also start from scratch, but that’s not something I’d recommend if your goal is to learn Haxe language + Heaps engine.
“Dead Cells”“Zero Volt X”“Full Metal Democracy”“Fort Loop”, a 48h game“Lost in Pandation”I used this base code for pretty much every games I’ve made
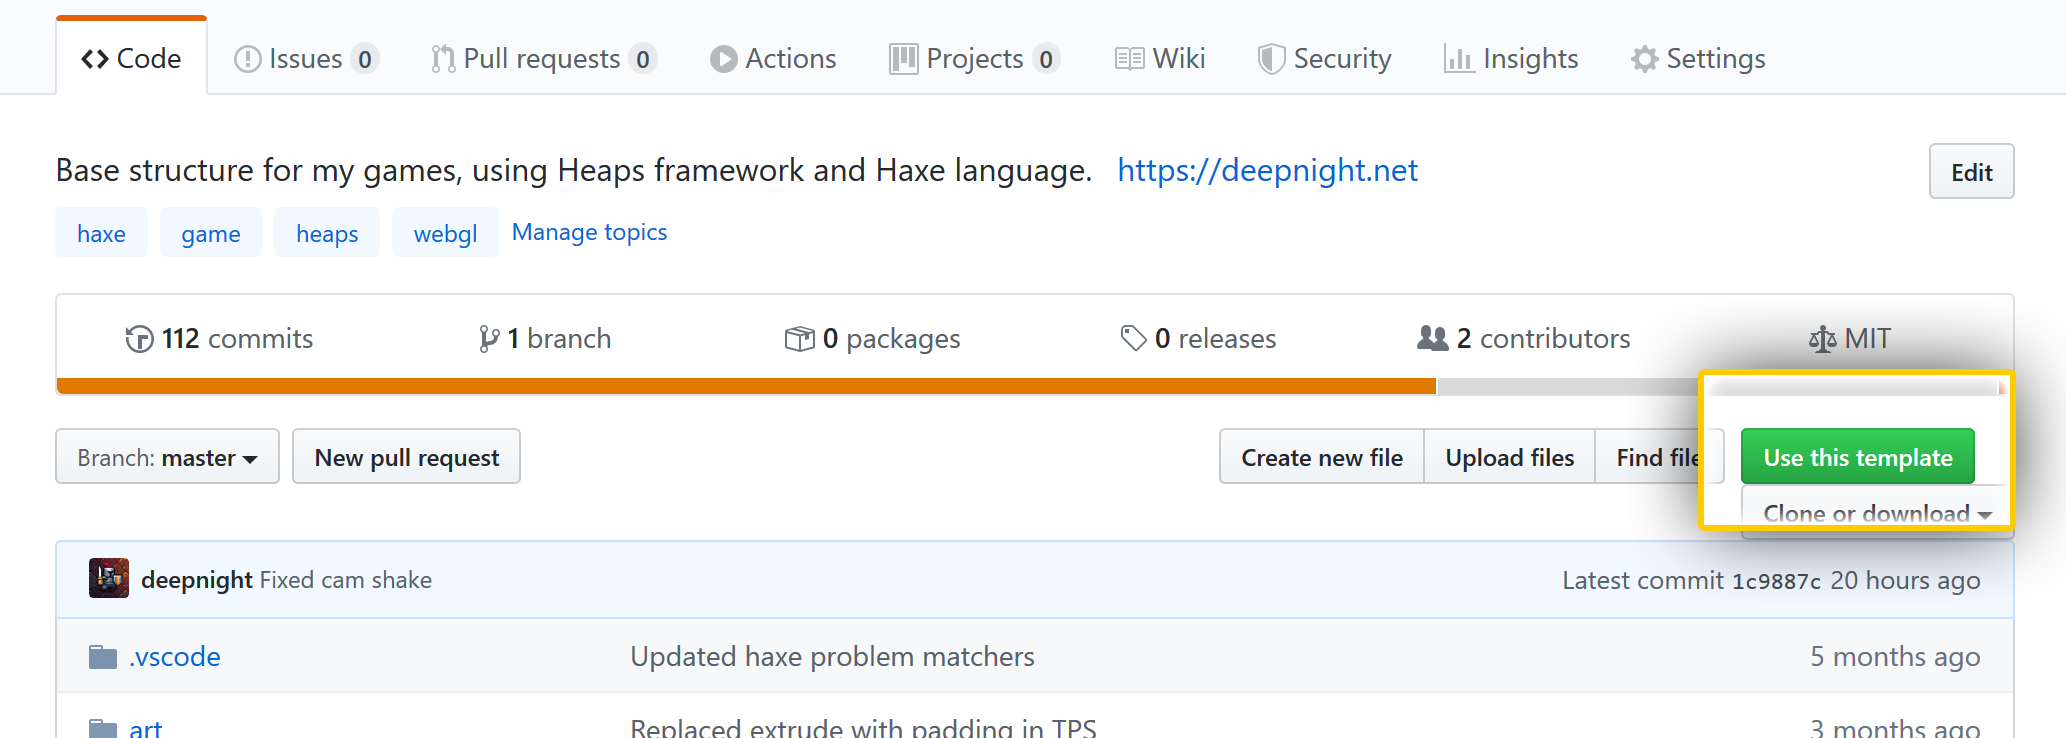
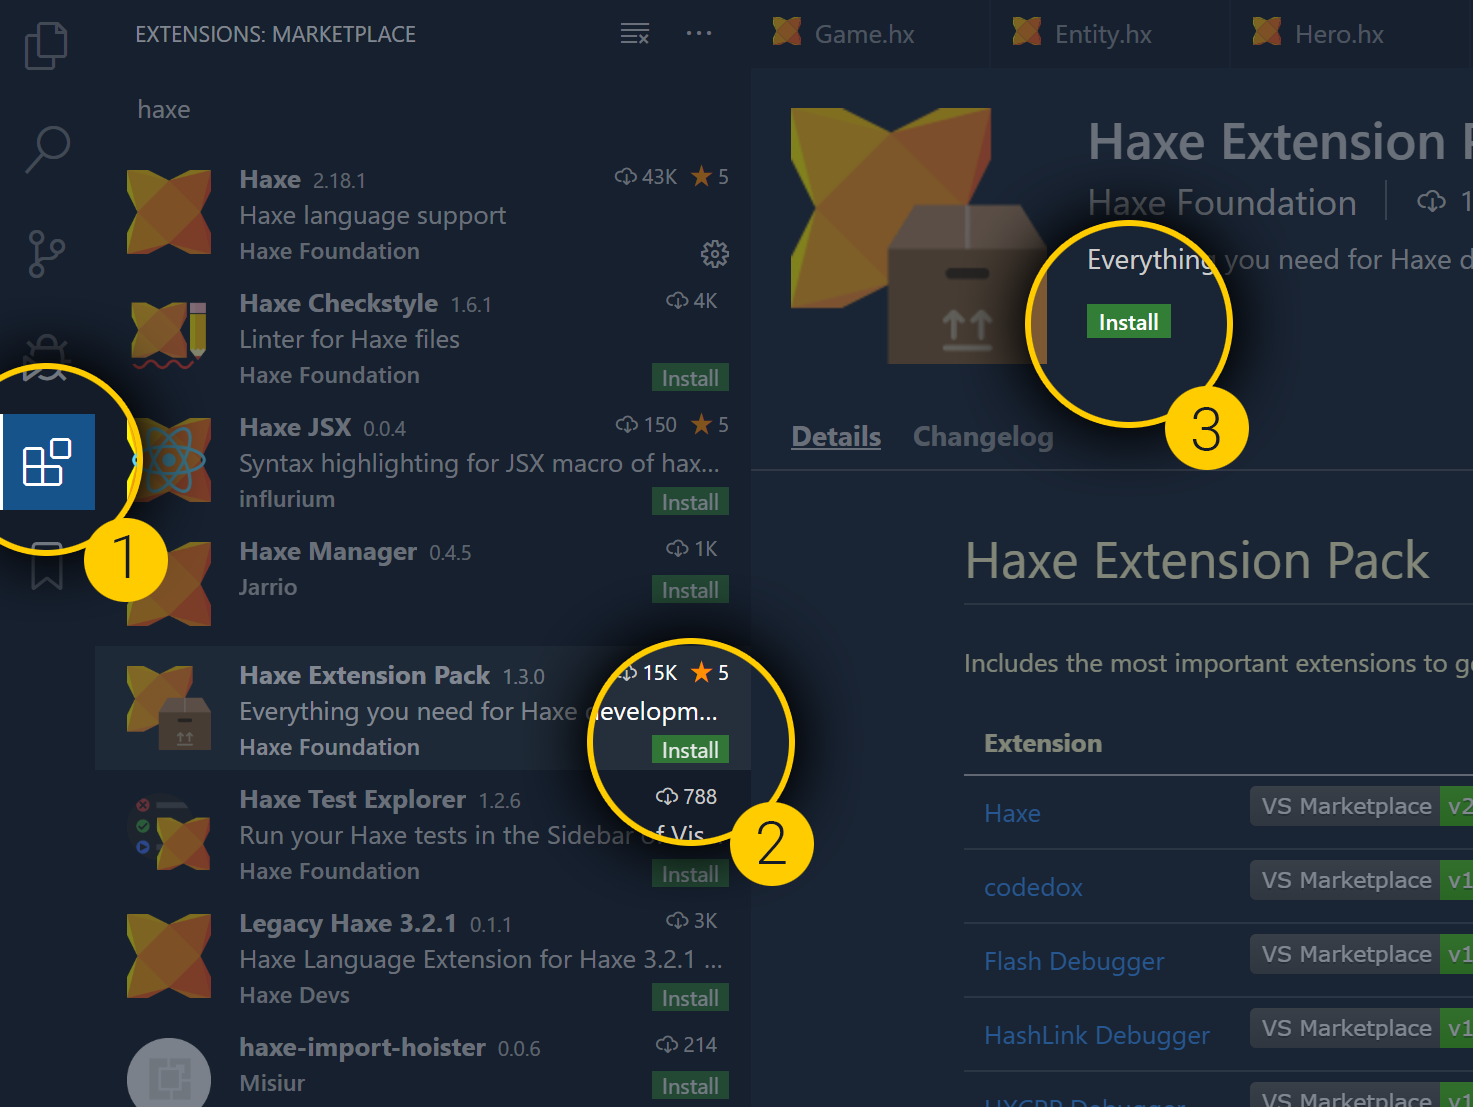
Getting GameBase
First thing first, here is the official GameBase repository on GitHub:
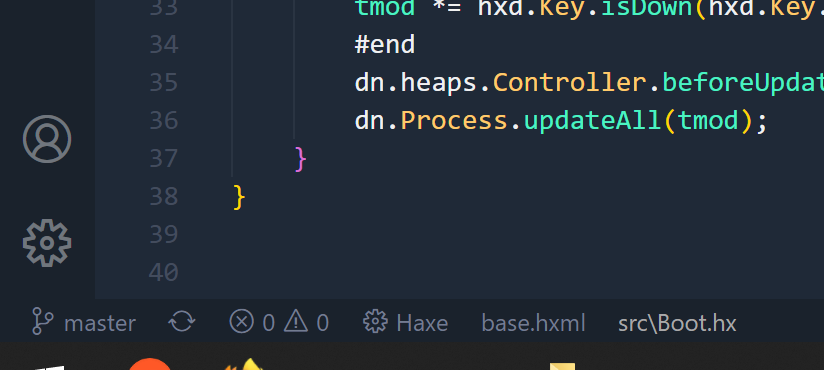
Don’t forget to change the HXML used for code completion before starting to code:
Check the bottom left corner of VS Code
Click on _base.hxml at the bottom of VS Code window.
Change it for whatever HXML you plan to use for building/testing your game (probably build.dev.hxml, which is Direct X with added “debug” flag).
This HXML will then be used for code completion
Making a game!
The hero we need
We’re now ready to make the very first any game needs: adding a playable character.
First step: create a Hero.hx in /src/en/Hero.hx. The “en” folder is the package for “Entity”-based classes.
This is our hero:
package en;

class Hero extends Entity {
	public function new(x,y) {
		super(x,y);

		// Some default rendering for our character
		var g = new h2d.Graphics(spr);
		g.beginFill(0xff0000);
		g.drawRect(0,0,16,16);
	}
}
In the Game.hx, you can create an instance of your Hero at the end of the new() constructor.
class Game extends Process {
	// [...]

	public function new() {
		super(Main.ME);
		// [...]

		new en.Hero(5,5);
	}
Controller
We now need a little bit of control. If you have a gamepad, you can use it easily. You can also still use a standard keyboard too.
We need the dn.heaps.Controller class:
class Hero extends Entity {
	var ca : dn.heaps.Controller.ControllerAccess;

	public function new(x,y) {
		super(x,y);
		// [...]

		ca = Main.ME.controller.createAccess("hero"); // creates an instance of controller
	}

	override function dispose() { // call on garbage collection
		super.dispose();
		ca.dispose(); // release on destruction
	}

	override function update() { // the Entity main loop
		super.update();

		if( ca.leftDown() || ca.isKeyboardDown(hxd.Key.LEFT) )
			dx -= 0.1*tmod;

		if( ca.rightDown() || ca.isKeyboardDown(hxd.Key.RIGHT) )
			dx += 0.1*tmod;
	}
}
Testing
Build & run the game (F5 with VScode) and test it. Your red hero should move left/right on key presses or gamepad.
That’s how any great hit actually started.
About “tmod”
tmod is a value connected to the duration of the frame, and more precisely, the time elapsed between two consecutive game frames.
on 60 FPS, tmod is 1.0 (the “normal” value)
on 30 FPS, tmod is 2.0
on 120 FPS, tmod is 0.5
tmod can be used to adjust values that are FPS dependent, such as velocities or accelerations.
The idea is:
if the game runs slower (ie. less than 60 FPS), all the movement increments should be higher, to compensate for the missing frames.
if the game runs faster (ie. more than 60 FPS), all the movement increments should be smaller to acknowledge the extra frames.
See Delta time to learn more about this classic concept.
Working without “tmod”
The dn.Process class has a fixedUpdate() which runs (or at least tries to run) at a fixed lower FPS, usually 30 or 24 FPS (check the fixedUpdateFps variable). The FPS of these fixed updates is guaranteed, within the realms of possibility.
The Entity class also has a similar fixedUpdate() which runs at the same fixed FPS as the Game.
A classic approach is to do every gameplay related things, like physics, or velocities inside the “fixed” updates, and do everything else (rendering, particles etc.) in “real FPS” updates.
This keeps the gameplay code quite simple, without having to rely on the tmod/delta time values.
You might think it would be an issue to have your gameplay code in a 30 FPS loop instead of 60 FPS or more, but bear with me: no one will notice. Dead Cells, which is known for its fast-paced action & gameplay actually uses 30 FPS loops for the gameplay elements. The render is done at 60 FPS.
Important: all the controller related checks should happen inside the real FPS updates, because that’s the only way to catch a user input at the exact moment it happens. The fixed updates won’t catch these events, because these fixed updates don’t occur on every single frame.
Classes & API
Boot.hx: where everything starts
The first thing called in your code is in the Boot.hx method main(). From here, we create a Main, which creates a Game.
Loops
All the updates are called in the following order:
Boot.hx has an update() which takes care of low-level stuff. You shouldn’t do much here, unless you have very specific needs.
Main.hx has an update() too, and is basically your global app main update. It also has a postUpdate() which happens after the update().
Game.hx also has an update(), a preUpdate(), a fixedUpdate() and a postUpdate(). This is where your game related code will happen.
Note that Boot extends hxd.App which is the top-level app class in Heaps. I use a different class for Main and Game: dn.Process.
My dn.Process class takes care of the updates, and each Process can have children processes, support pausing, have preUpdates, fixedUpdates, postUpdates and few other useful things.
The philosophy with GameBase is quite simple: all your future Processes should be either children of Main (any section of your app which is not the game, like an intro screen), or Game (if it’s part of the actual game).
Important classes
All code files are in /src folder.
Main.hx: the main app loop, see the update() method
Game.hx: created every time a game is started, it also has an update()
Entity.hx:: the most important thing after the Game. It’s the base class for everything that moves in the game (player, enemies, bullets, items etc.). Everything except particles (see Fx.hx). Read below for more explanations about the Entity class.
Level.hx: your world, level, room or whatever is your environment. Some games might have none of these, or multiple instances, it’s up to you.
Camera.hx: a basic camera which can optionally track an Entity (say, the player)
Fx.hx: a simple particle system
Lang.hx: a neat way to automatically extract your texts directly from your code to generate PO files compatible with the popular GetText translation ecosystem. Check the specific tutorial to see how it works.
Const.hx: contains a set of constant values I use to tweak my game, like the standard FPS, your starting health points or stuff like that.
Assets.hx: a single class to access assets like tilesets or sounds. All your assets (art, sound, other data files) that are meant to be loaded/used by the game should be put in the /res folder. You can access them in your code using the hxd.Res.myAsset API.
Misc classes
import.hx: note the lowercase format of this file name, it allows to have global imports for every classes of your app (see: https://haxe.org/blog/importhx-intro/). Neat.
tools/CPoint.hx: a simple Point class that supports grid-based coordinates.
ui/Hud.hx: a process of Game which can be used for any HUD (head-up-display, aka. interface) for your game, like: gold, life, ammo etc.
ui/Window.hx: a simple pop-up object.
ui/Modal.hx: same as Window, except it pauses the game while it’s open.
The Entity class
Philosophy
Entity.hx uses the same “grid-based” logic as described in my Simple 2D engine article.
Please note that it’s totally up to you to write a very different Entity system to suit all your needs. Basically, all the 2D grid-based logic is here. Everything else in GameBase should fit any kind of game, be it a platformer, a match-3 puzzle or an hidden object.
Features
Loops: preUpdate, update, fixedUpdate and postUpdate
Safe disposal mechanic: just call the destroy() of an Entity to mark it as destroyed. It won’t be destroyed instantly, but only at the end of the current frame (the onDispose() is then automatically called), to avoid any null value in the course of the loops.
Listing: access Entity.ALL static array for a dynamic list of all existing entities. Note that some might be flagged as “destroyed” (see previous point).
Coordinates: each entity uses a grid-based coordinate system. cx,cy are the grid coordinates, while xr,yr are the position inside a single cell. For example, cx=5 and xr=0.5 means “in column 5, at 50% of the cell“. More explanations about this approach in my Simple 2D engine article.
Velocities: dx,dy are the current x/y speeds of the entity (added to coordinates on each frame). They also use “grid-based” values. So having dx=0.5 means “moving 50% of a cell on each frame“. dx,dy are multiplied on each frame with frictions which slow them down (if friction<1).
Sprite: the visual representation of an Entity is the variable spr. It’s a dn.heaps.slib.HSprite class, which is a super-charged h2d.Bitmap. Please note that the coordinates of this sprite are only updated during the postUpdate(), it’s never updated nor manipulated outside of this loop. If you need the coordinates of the entity object, you should always refer to cx,cy + xr,yr.
During my time at Motion Twin, I’m was the Lead Designer on Dead Cells, a procedurally generated Metroidvania.
As you would expect, questions about the quality of our procedural generation pop up very regularly, with both players and other devs. After recent high profile procedural generation controversies, we can’t blame people for being sceptical. This is particularly obvious when talking about a genre that relies on meticulous level design at its core. So we’d like to acknowledge these concerns and take a deep dive into how we’re planning to bring rogue-lite re-playability to a metroidvania. If you’re more a video guy, we also released a “lighter” version (still rather technical (read “boring”) though) of this dev diary on youtube.
Before looking at the how of the matter, let’s discuss the why, the reasons we chose to involve procedural generation in a genre known for painstaking level design.
At first, about two years ago when we began to design and build a prototype for Dead Cells, we went for the traditional, handmade way of doing things. Unfortunately, we quickly realised that we wouldn’t have the time to do it properly, considering the modest size of our team.
From there, we knew we had to find alternatives. Before Dead Cells, we had already done quite a lot of browser games, most of them involving randomized elements and procedural generation so we were already quite familiar with the core concepts of procedural generation. On top of this, great use of procedural generation was being shown off by a bunch of critically and commercially successful games: Isaac, Minecraft, Starbound, etc. In light of this, it seemed like an obvious choice to at least build a prototype to test out the idea for Dead Cells.
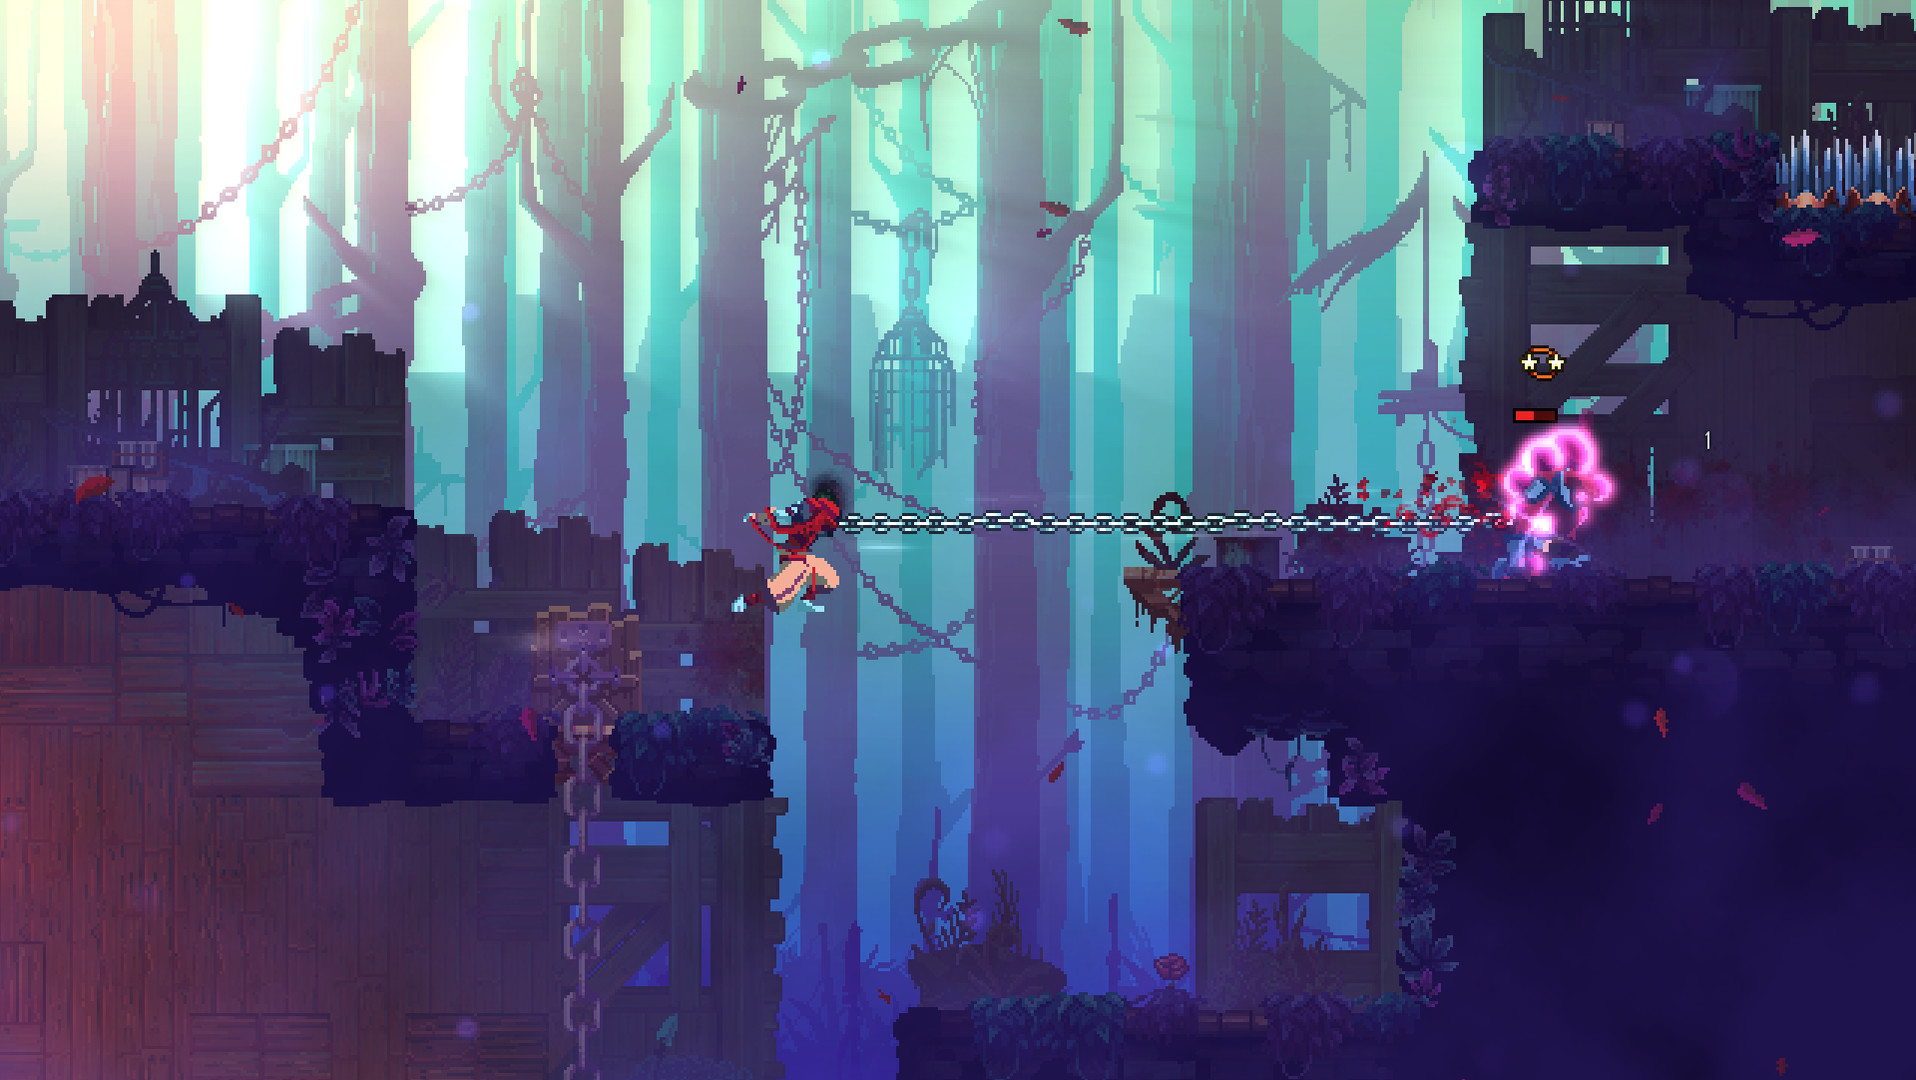
And it worked well, bringing more replay value, a significant improvement for a game with any type of permadeath mechanic. Even better, we found that it fundamentally altered the feeling of the combat of the game, placing the emphasis on the player’s instincts and reflexes rather than relying on rote learning a level in order to progress. Overall, it felt really good.
There was of course a catch. While the core gameplay feeling was improved by the freshness of new enemy placement, the level design took a great big hit. In short it was illogical, chaotic and left you with no feeling of consistency or immersion in the world.
Not satisfied with either full handcrafting or full procedural generation, we could feel that there was a way to find a middle ground that would work.
Here, we’d like to thank the guys behind Spelunky, who came up with some interesting solutions to the same problem. You can find a brief explanation of how that works here, if you’re interested. But to sum it up, they used a hybrid approach between procedural generation and handmade levels, giving them that consistent feeling while maintaining a lot of diversity.
Before we get into the technical details of how this hybrid approach is implemented in our game, I want to mention two other sources of inspiration for Dead Cells.
The first one is Faster Than Light, which we regard as a model when it comes to a game allying procedural generation with a well orchestrated plot and a very consistent universe.
The second one is Left For Dead. Unexpected right? Well, it’s something of a trace left over from “that time Dead Cells was a zombie tower defense game” but we definitely took some lessons from their underlying ideas. In LFD, Valve designed the levels to be dynamically modified through its “AI Director” system. Have a look over here for the basic explanation of the concept, it’s really quite interesting.
At the time, we began to develop our own “AI Director”, adapted for Dead Cells. While there is very little of that AID in the current version, we kept the underlying philosophy: building the level’s generation system around dramatic peaks and relaxing “breaks” to ensure an interesting game pacing and keep the player enthralled.
So to sum up, the challenge was to build a partially procedurally generated world to create a feeling of change and diversity, excellent replay value and difficulty which is based on the players reaction to an evolving situation rather than rote learning. And we had to do this while keeping a feeling of consistency between runs and levels. Learning from previous games, and after many trials, errors, adjustments and a stack of tweaking, we’ve got six steps that we hope will help you approach procedural generation with quality level design as the underpinning rule.
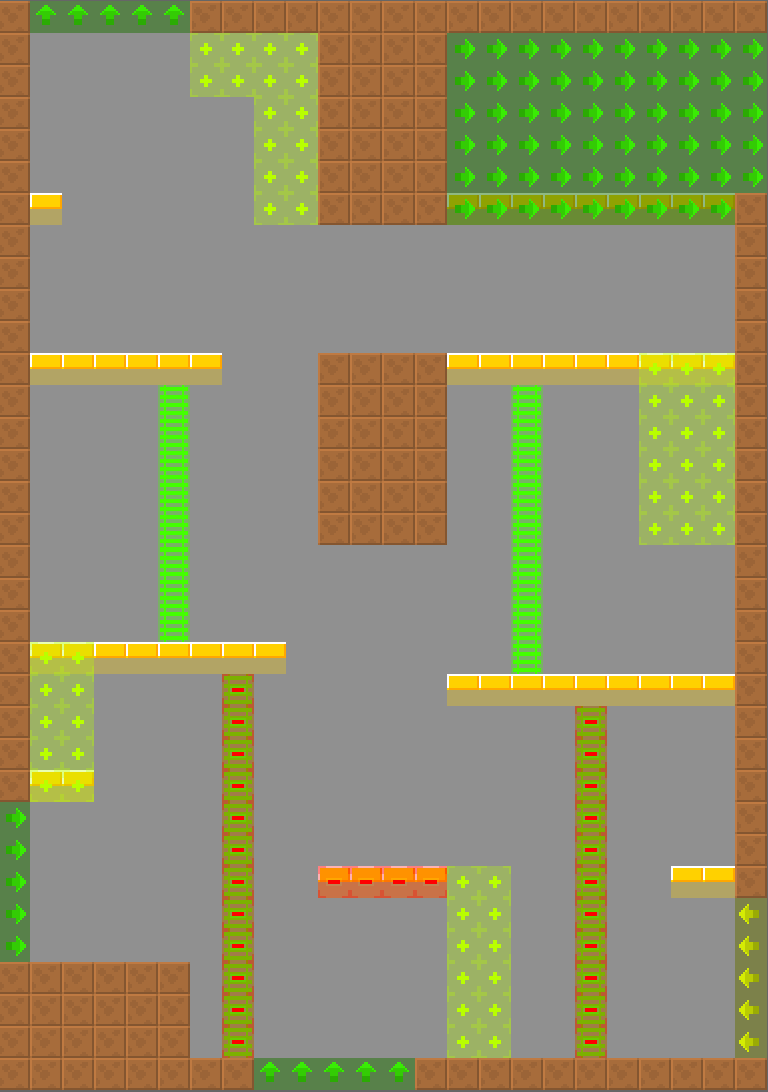
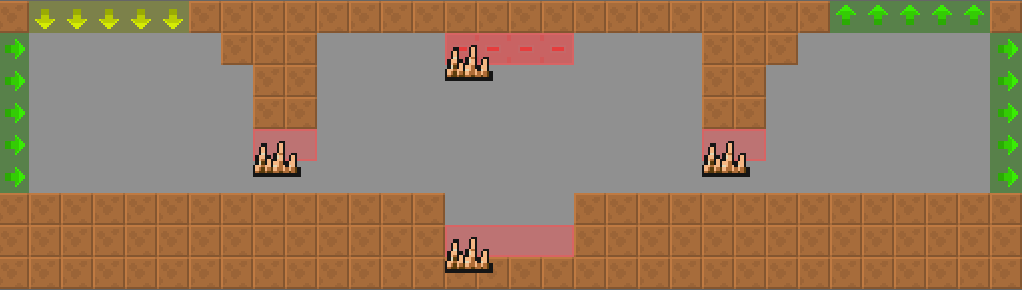
1. First, we place the fixed elements, acting a bit like a frame in which the procedural generation can express itself. The overall design of the map of the island, how the different levels are interconnected, where the keys to unlock new paths for your future runs are located etc. All of this never changes no matter the loaded variant (seed) of the game. In short the overall world layout is fixed and designed by hand.
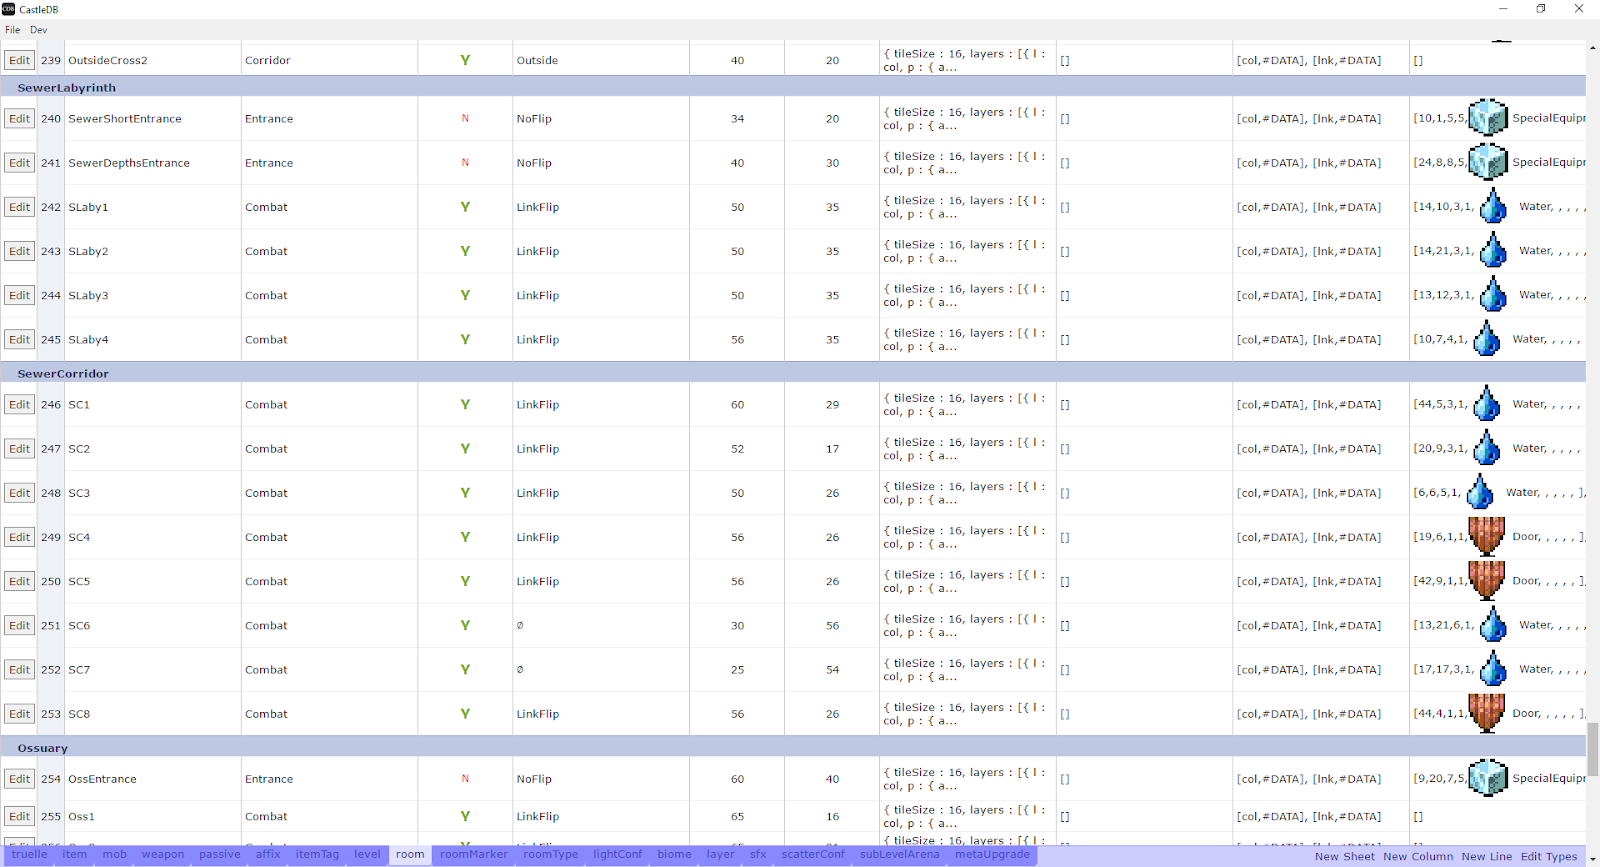
2. Then we hand design a bunch of level “tiles” chunks of carefully designed rooms with a certain amount of variations possible in each of them depending on their configuration. Here’s some examples of the CastleDB software we use to create the tiles:
In practice, each tile has a specific layout of platforms designed for a specific purpose. A room designed to host a hidden treasure won’t be the same as another hosting a merchant, and both will be very different from the rooms designed around combat. As mentioned there are variations possible in the handmade tiles. These are defined by a handful of parameters, mainly the numbers of entrances and exits available and the room’s purpose.
Each room also pertains to a specific biome: for instance rooms used in the prison aren’t reused in the sewers. This allows us to give each level its own strongly defined identity. For example the sewers are very tight, restricting the ability to jump and dodge and forcing the player to think about their mob management.
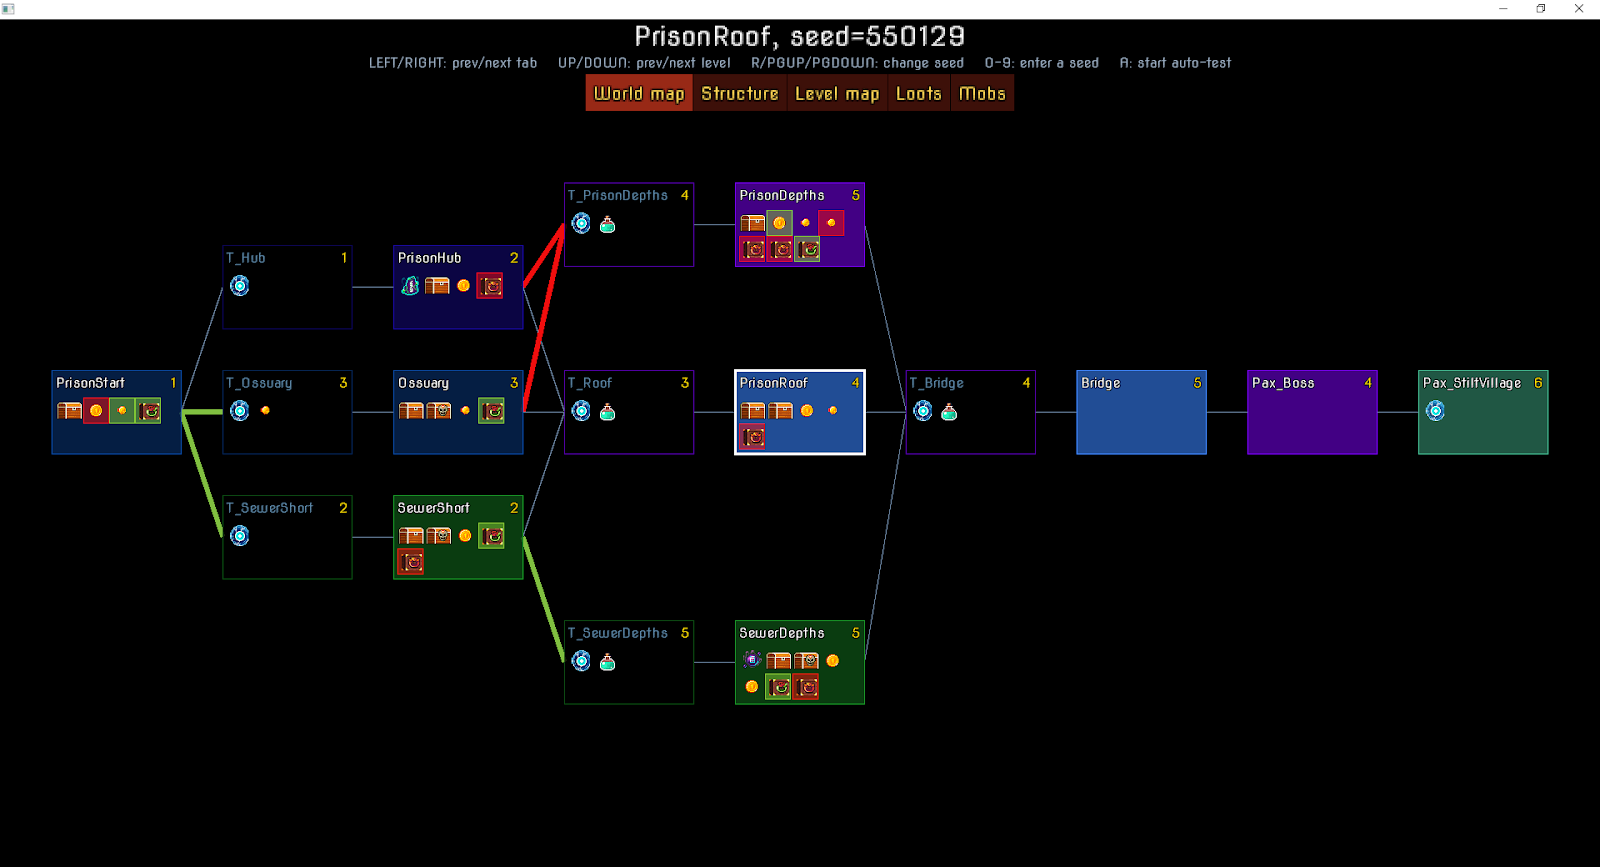
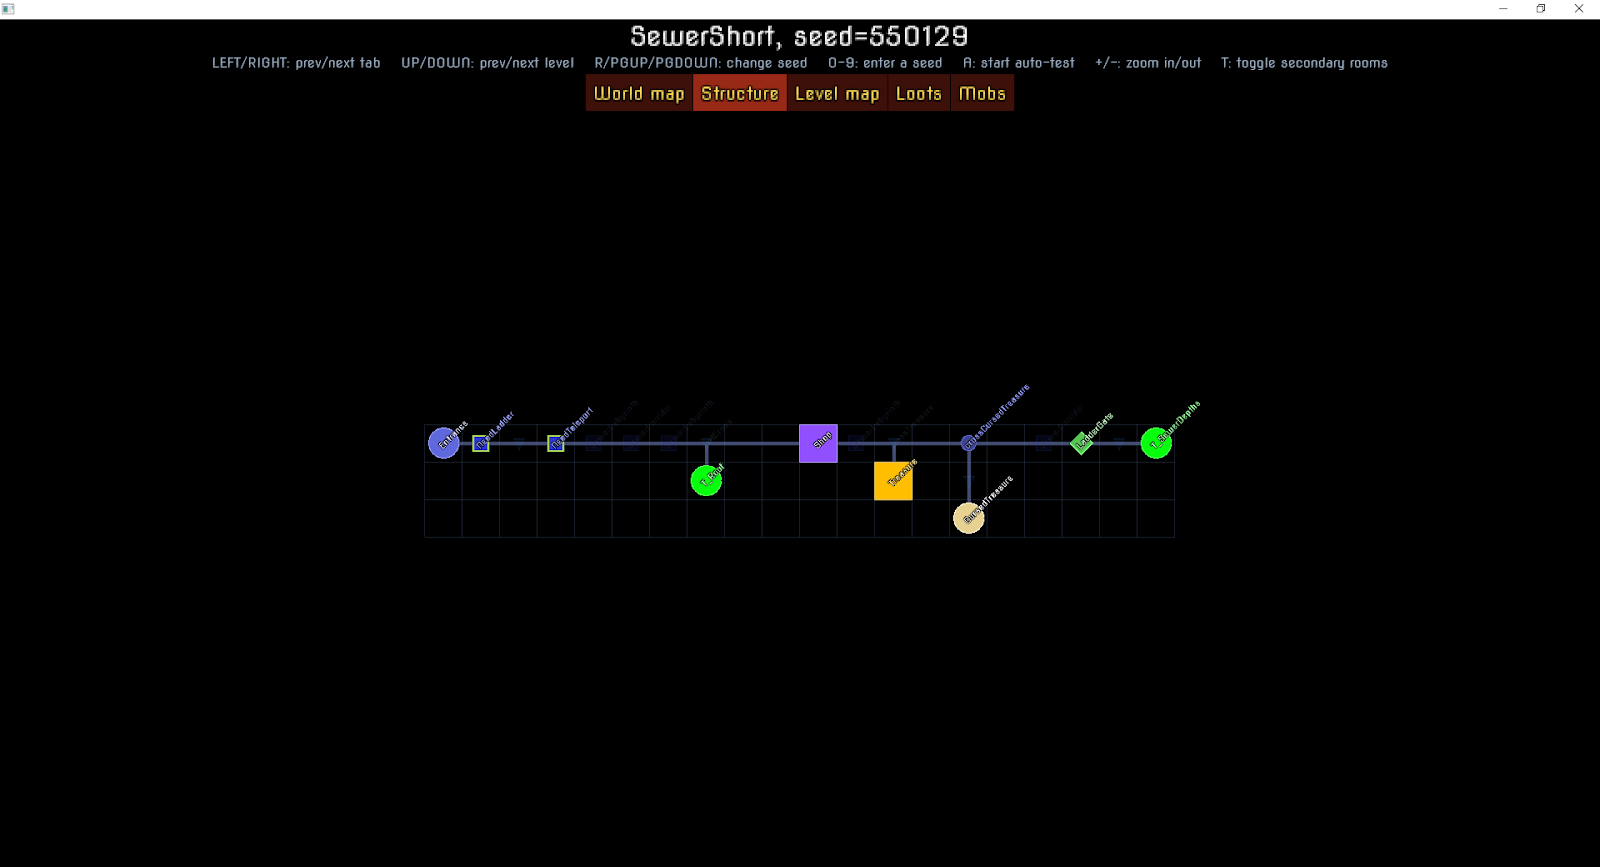
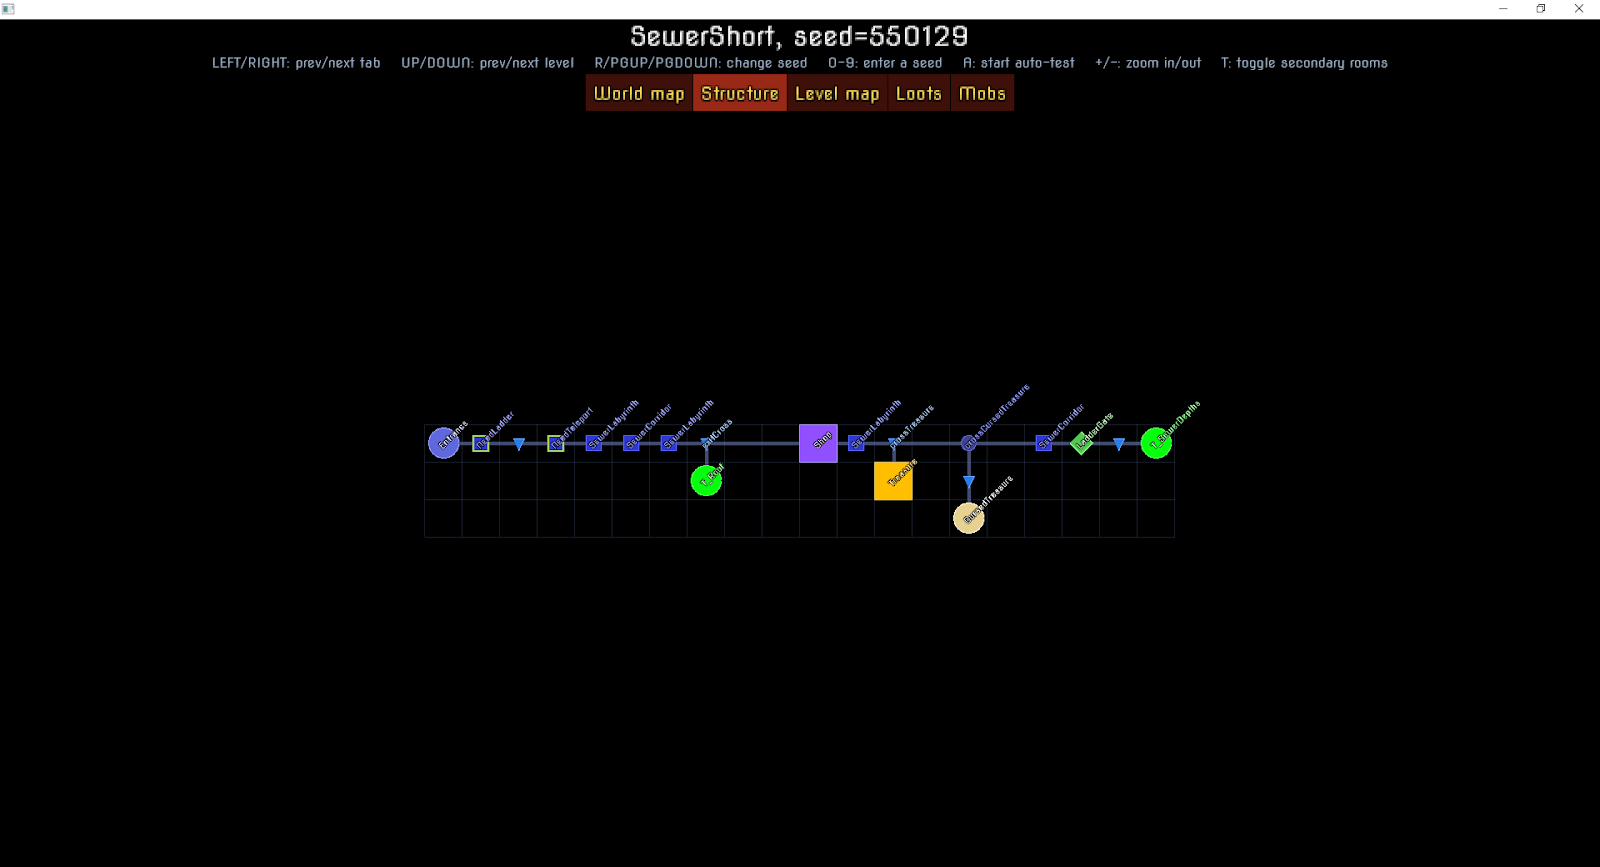
3. Ok so we’ve got a bunch of tiles that are fun to play, now we need to arrange them in a logical, interesting way. So we create a concept graph for each level (our “biomes”). A graph is a schematic visual display of the layout of the tiles inside a biome, represented here by nodes. We start by placing the entrance and exit of the level, then we add the special rooms (treasure, merchants, etc.) and finally the tiles in between where you fight and explore.
This graph acts like a set of instruction to the procedural generation algorithm describing the: length of the level, number of specials tiles, how much of the biome will be a labyrinthine, how many tiles separate the entrance from the nearest exit, etc. Again, each biome has a different graph to make it consistent with the part of the island it’s supposed to represent. For instance, we made the ramparts much more straightforward and linear than the sewers.
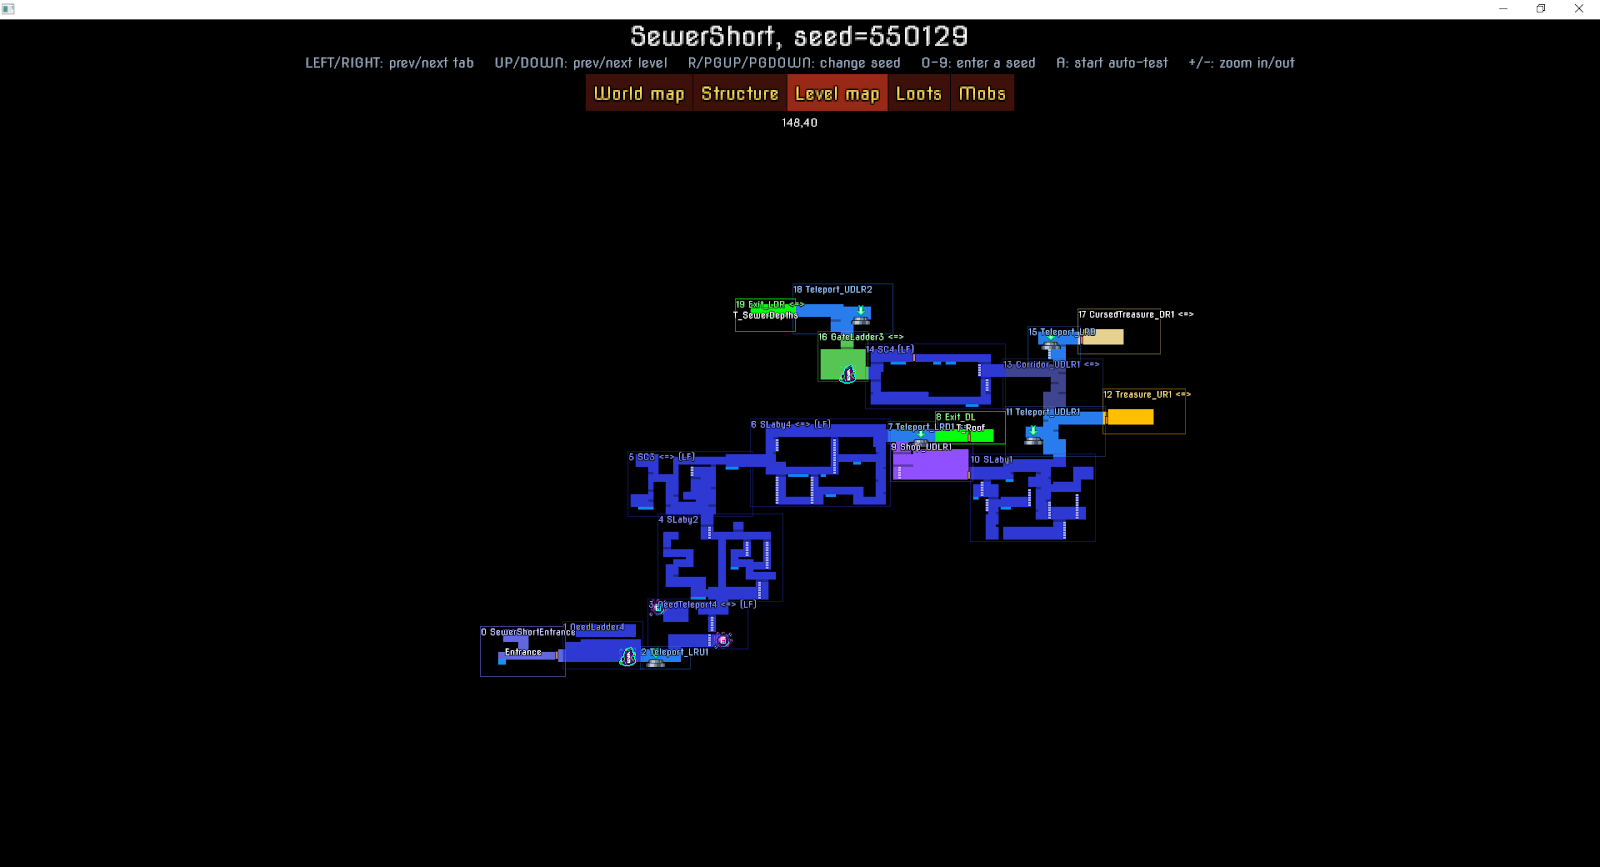
4. Only once we’ve laid down all of these constraints and set out the overall level design do we let the procedural generation algorithm loose… For each node, the algorithm tries a random room, among the ones dedicated for this particular biome, and tests to see if it complies with the instructions given by the graph (location and number of entrances, type, etc). If it doesn’t match, the algorithm tries another room until it finds one. And voilà! But wait… there’s more.
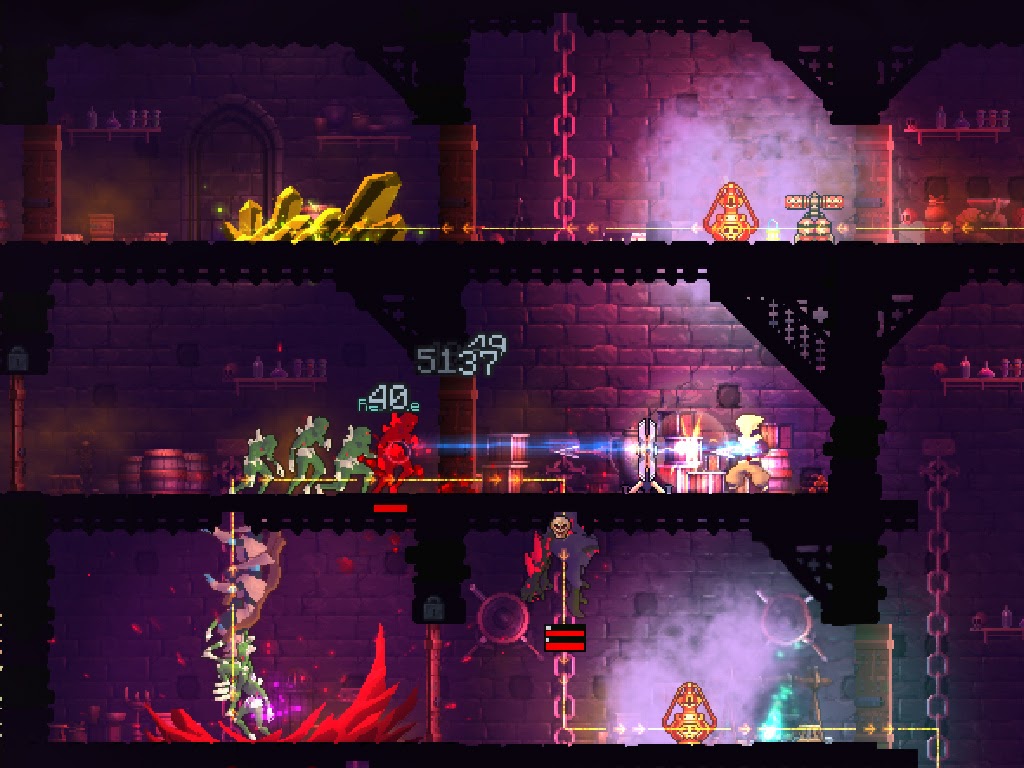
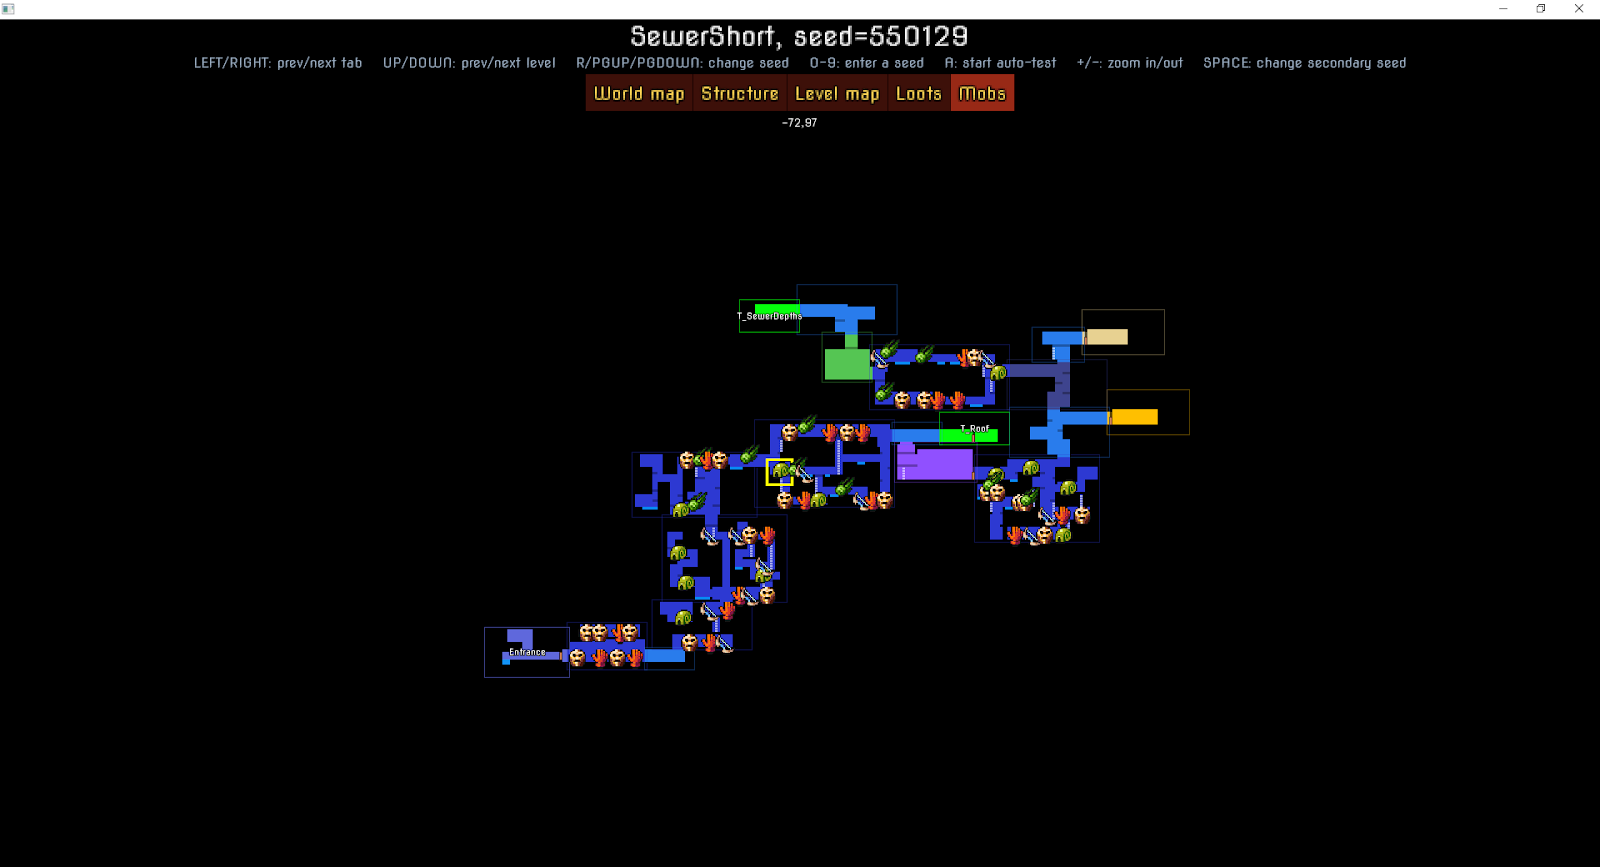
5. Next comes the reason to keep looking around. You need something to fight. The number of monsters in one level is defined by the total length of the combat based tiles in the level. Taking some random numbers, let’s say we have 250 combat based tiles in a procedurally generated sewers level. We then define the number of monsters that should appear per combat tiles, so say for example it’s 1 monster for every 5 tiles, you’ll have 50 monsters to place in the level.
Each type of monster has its own constraints and parameters: for instance, some monsters being more dangerous than the others will count for 10 tiles, some can’t be used more than once per tile or level, some can’t be with other monsters on the same platform, some are placed where there is a lot of space to move and fight, etc.
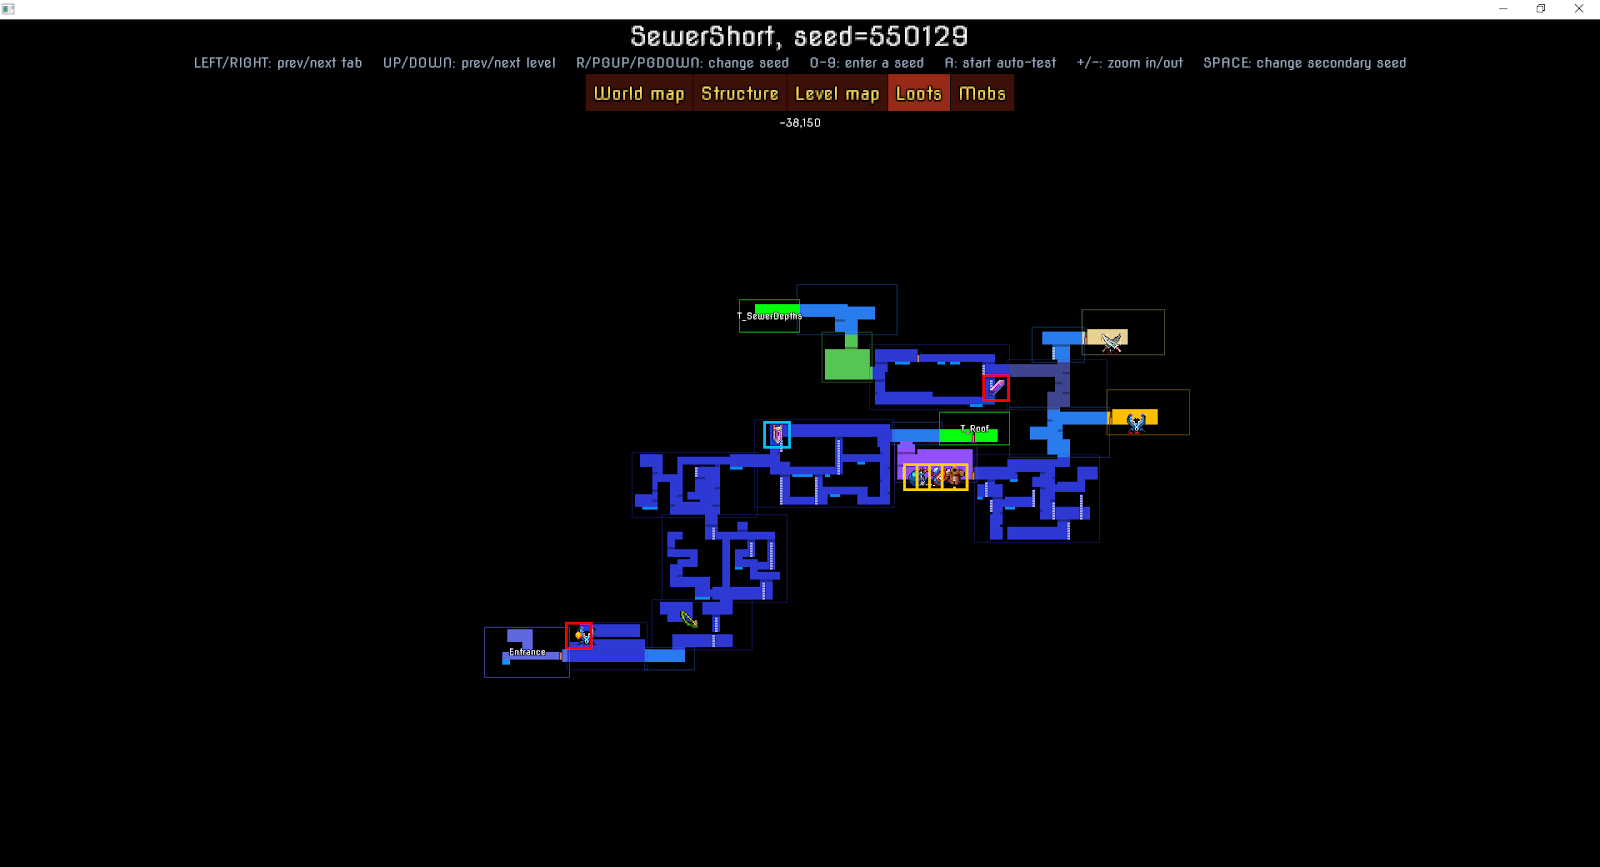
6. The final step is to generate the gold, cells and loot, but the recipe for that is kept secret. Legend has it that each dev only has access to one file controlling one loot in order to avoid abuse…
Well, congratulations for making it through the wall of text trial! We shared our method here, in the hope that someone else will be able to get something out of our take on procedural generation. I’m also hoping to encourage others devs to take risks – like wedding two seemingly incompatible ideas. Sometimes, it might just work.
If you have any questions or ideas, just leave me a comment and I’ll be glad to get back to you as soon as I can.
For this guide, I will presume that all Haxe related files will be installed in the c:\HaxeToolkit\ directory. Make sure to update the paths if you install your files somewhere else!
Haxe
Installing
Haxe is a cool programming language that can compile to multiple platforms. It’s free and open-source.
we won’t use the default haxelib install heaps command here, because the GIT version is much more up-to-date than the haxelib repo (don’t ask me why)
we also don’t use the official Heaps latest GIT because it’s often unstable. My version is the same as the official, but a few commits late, where it should be stable.
Installing other important Haxe libs
From a command line, for DirectX support in HashLink:
haxelib install hldx
For OpenGL/SDL support in HashLink:
haxelib install hlsdl
You can check the installed libs by typing:
haxelib list
Working with VSCode (recommended)
VScode is a nice IDE that features full Haxe integration if you install the dedicated extension. Out of the box, you’ll get code completion, easier project setup, debugging & much more.
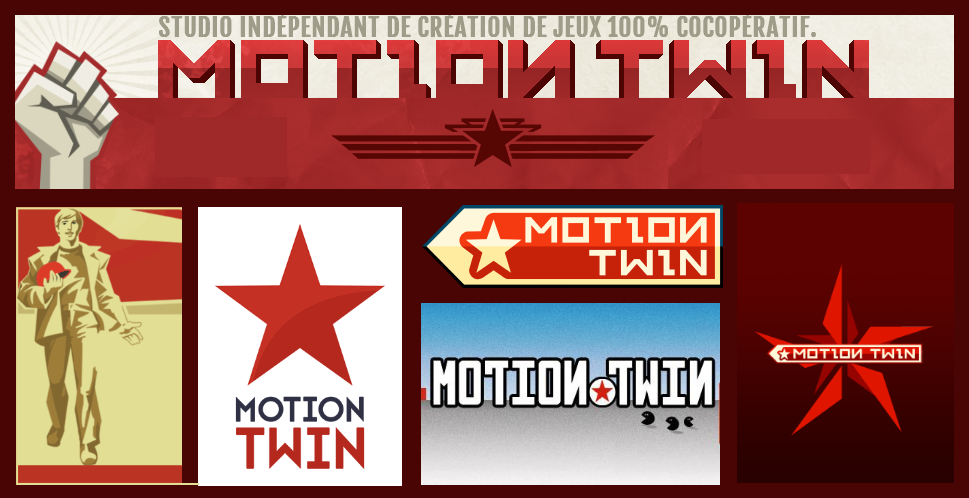
A little bit of history: the F2P era at Motion Twin
Different Motion Twin logos from the last 18 years
I started working at Motion Twin in 2001: I was hired as a graphic artist to update the art of existing games. But being a coder first, my art wasn’t that great (sic), so I quickly switched back to development, and we hired an actual 2D artist.
The company was new: we barely existed for only a few months. So we spent a few years trying things, without great success, until we met the CEO of Prizee.com, a quite notorious French website specializing on virtual scratchcards.
Long story short, we discovered the free-to-play (F2P) model with them, and kind-of imported it in France. Prizee and this new business model helped us in gaining a financial independence: for the first time, we were earning our living from making games, and were paid by players instead of publishers or pro clients.
We spent the next ~10 years creating tons of web games, from simple match-3 titles (Swapou), or pokemon-like titles (DinoRPG) to more hardcore things like Hordes, Intrusion or Alphabounce DSi.
But the web as we knew it was about to collapse with the arrival of the first iPhone.
We tried to make a few mobile games (Uppercup Football, Monster Hotel) but we quickly realized that creating F2P games on mobile was waaaay different from making F2P for the web.
Hey, please note I don’t want to sound like the old guy bragging about how better the good’ol times were, but… Seriously, web F2P was pretty much all about gameplay & making an actual good game, mostly because you had some level of control on traffic sources & user acquisition. Mobile F2P on the other hand was (and still is) all about data: ARPU, user-optimizations, funnels, retention, and basically, any stupid idea to make players pay on a daily basis. If you know what a “daily quest” is, you certainly know what I’m talking about.
Damn, I think I sounded like an old guy bragging.
Dead Cells
I already talked a little bit about the story behind the game before, so let’s just say that this project was a real game-changer for Motion Twin and saved our asses from the F2P shift.
I was the lead on this project, and honestly by this time, I couldn’t have imagined what the success of this game would be.
For us, making a PC game wasn’t the easiest way to leave the web market. The name “Motion Twin” didn’t mean anything to people outside of France, and Dead Cells was our very first Steam title.
Furthermore, the early access thing was a really intimidating experience for us. You know, it was Indiepocalypse everywhere, and Steam was over-crowded and dying, according to everyone. So, going all-in on this platform sounded like a very risky move to many people. Including us. The company was in a very bad shape, and failure would have probably let to destruction.
At first, our sales expectations were around something like ~20k units during the first few months. We actually sold ~100k units on the first week. As of today, the game sold more than 2.5M units across all platforms. These results were absolutely crazy…
To me, working on Dead Cells was probably the best time I ever had at Motion Twin: we were a dream team, players loved the game and Dead Cells was trusting the top charts.
Dealing with the early access
This success put higher expectations on us. We wanted to deliver the best possible game: that meant giving everything to it.
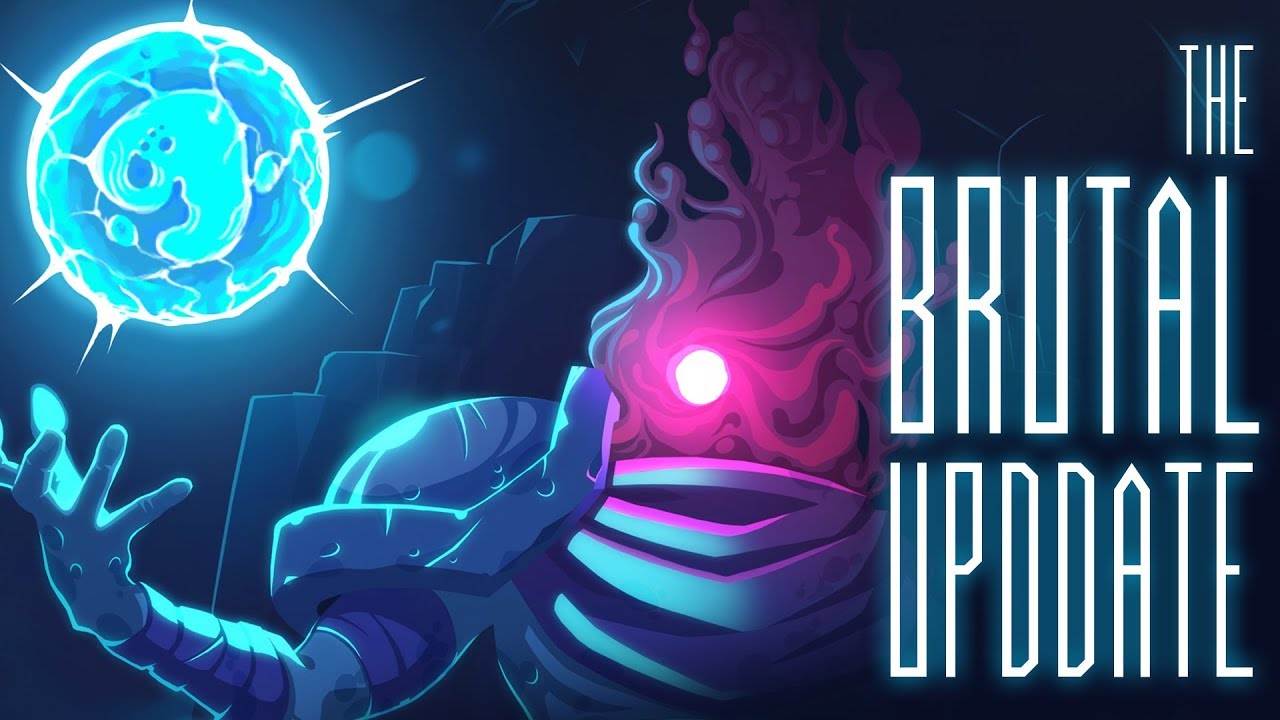
This update was called The Brutal one for good reasons: it was probably one of the most ambitious change of Dead Cells.
To meet these expectations, we planned monthly major updates during the early access, which meant “make big changes but don’t change things too much”, from a marketing perspective. So to me, everyday was a delicate balance between fixing the gameplay, following the vision and listening to the community.
And boy, that was a complicated task!
We didn’t crunch a lot, though ; maybe a few weekends by the end of the early access, but that was it. But I was basically thinking about Dead Cells all the time. During work hours, evenings, weekends and holidays. Every time I wanted to make a major gameplay change, I knew that the other devs would be waiting for me. So I kept myself under-pressure to deliver a good game while sticking to the deadline. That was pretty intense for everyone. Maybe too much.
“Next project 2019”
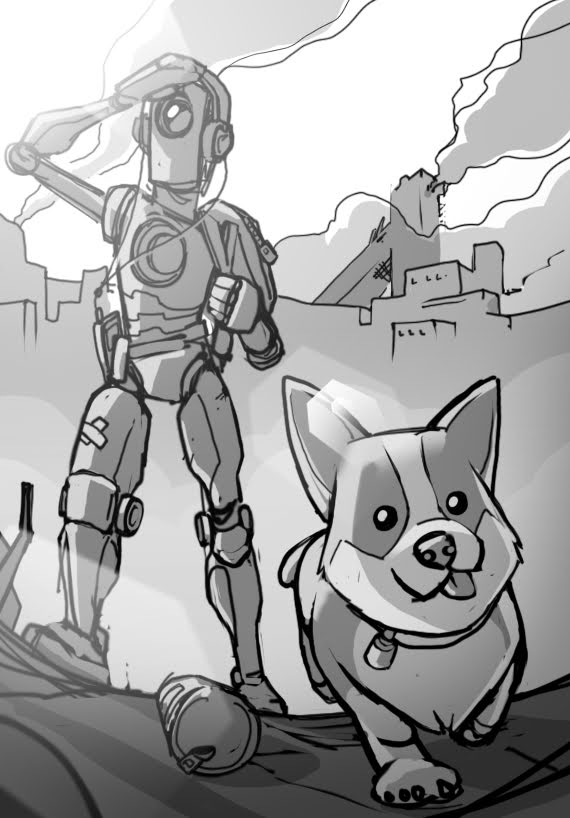
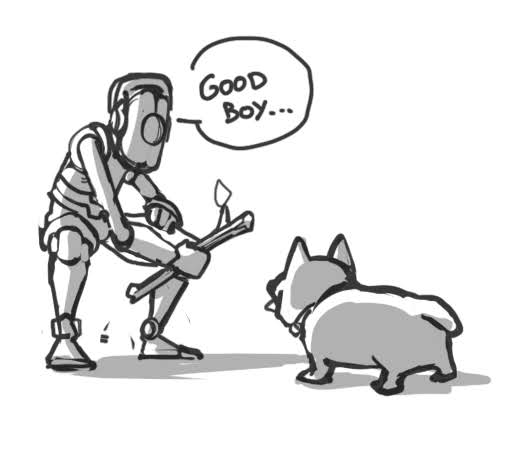
Concepts for the “Dog & Bot” project I was working on, before leaving Motion Twin. The project is now canceled. Artworks are copyright 2019, Motion Twin
After the release of Dead Cells in 2018, we kept working on a few big free DLCs and updates for about 1 year. We then decided to give the baby to a (kind of) new company, Evil Empire, created by a former Motion Twin member, Steve Filby. You can read the announcement on Steam.
We then decided to switch the main team (aka. Motion Twin) to a “Next Project” research phase. The broad idea was to create multiple small prototypes, in game jam way, to find an unifying idea. Things didn’t go as expected: designing all together a new large project from scratch proved to be a huge challenge.
The unique cooperative approach of Motion Twin is, in my opinion, the perfect tool to make people work together in a human centred environment and raise the overall final product quality. But it was clearly not the best tool when all we needed was to define a robust creative vision that would serve as a base for a large project.
Actually, before Dead Cells, all our previous games were actually small projects initiated by 1 or 2 people in the team, that grew larger as they left pre-production phases. Even Dead Cells started like that: I created the core concepts, Thomas Vasseur was experimenting with the art & rendering, and we basically started this roguevania as team of 2. Then the rest of the team started to join, driven by production needs.
After Dead Cells, the team wanted to create the next game all together: we wanted to try to have a global vision by making 8 people getting in tune with each others. Seemed like a complicated task, if you asked me back then, and, damn. It was.
During this “Next Project” period, I built about a dozen prototypes (game design, code & animations, while the background art was mostly bought from Itch.io), but none was validated to turn into an actual Motion Twin game. Of course, I wasn’t the only one to create prototypes, but nothing was promoted to an actual global project.
As months passed by, and nothing happened, my relations with the team became more and more complicated. So complicated, actually, that it ultimately led to my forced departure, as I was asked to leave in December 2019.
Pet managementSide scrolling combatA very basic platformer & exploration gameTop down exploration prototypeAn extended version of my Ludum Dare entry “Nightclub Showdown”A full featured exploration & action game
Trying to create the post-“Dead Cells” game was a very stressful task, and it now feels incredibly great to be able to think about smaller scope projects. “Smaller” doesn’t mean I plan to work on very small experimental games though: I still want to release complete titles and I still plan to sell them on Steam, or other markets ;)
Right now, I’m eager to start working on 2 game projects I’ve been thinking about a lot. I also plan to update RPG Map, including a possible Steam release, if it’s accepted on the store. And of course, I have Ludum Dare and other game jams :)
I also updated the games page to list all projects I’ve worked on at Motion Twin and, before that, on Atari ST. It was a very interesting introspective thing to do: good to look where you’ve been, to decide where you’ll go next.
Last but not least, I want to come back to things I left years go: taking active part in open communities. Being a Haxe developer, my first focus will probably be the game dev community gathering around this language, by helping newcomers getting onboard.
I honestly feel great today. The success of Dead Cells gave me some legitimacy which will certainly be useful in the near future and I’m super excited to start working on personal stuff.
So, expect new things in the next few months, I’ll keep you updated on my Twitter :)
You are the Supreme Lord Commander of the Heavens, which is kind of cool.
Hell is on Earth, and you were sent down there to save your fellow worshipers. Well, actually, your contract says you should at least save ONE worshiper in each area.
The other might be sacrificed for the greater good.
HOW TO PLAY
Play using keyboard or a compatible gamepad (xbox controller recommended).
I created Dead Cells, as lead game designer and lead developer.
More specifically, I was in charge of all the game design, level design (not the environment visuals), most enemies, all weapons & skills and all visual effects & particles. The game was developed using my GameBase codebase with the Haxe language and the HeapsIO engine.
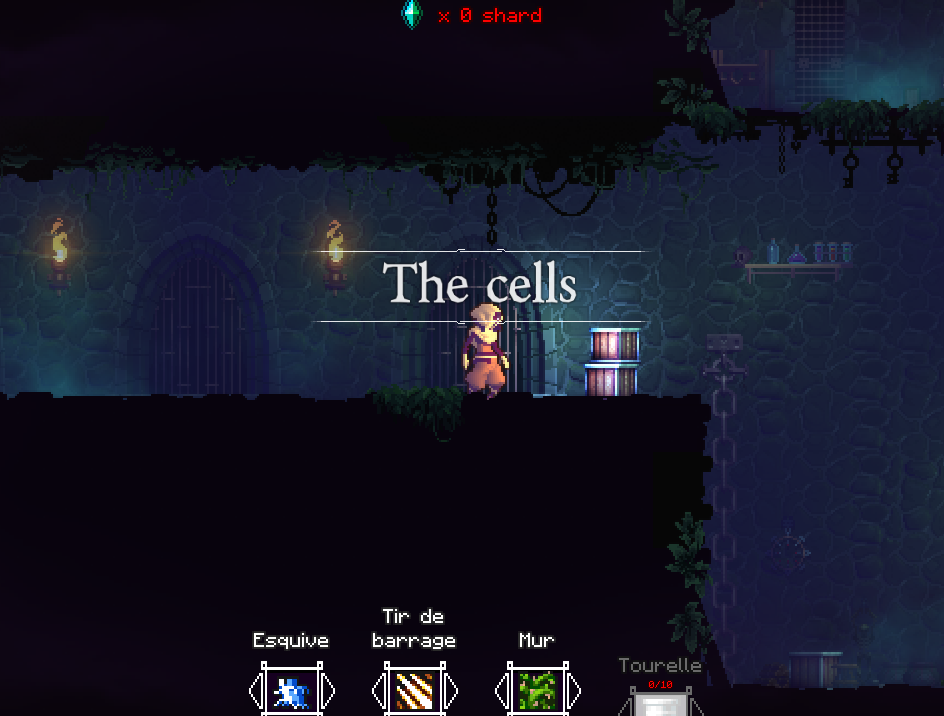
The concept is born from the ashes of Hordes Zero, a multiplayer tower defense game for web & mobile, featuring coopetition (play together, but only the last survivor gets a reward). This early project even had a public Alpha version, but it proved to be a really big failure: not fun, no clear vision and tons of gameplay & balance issues.
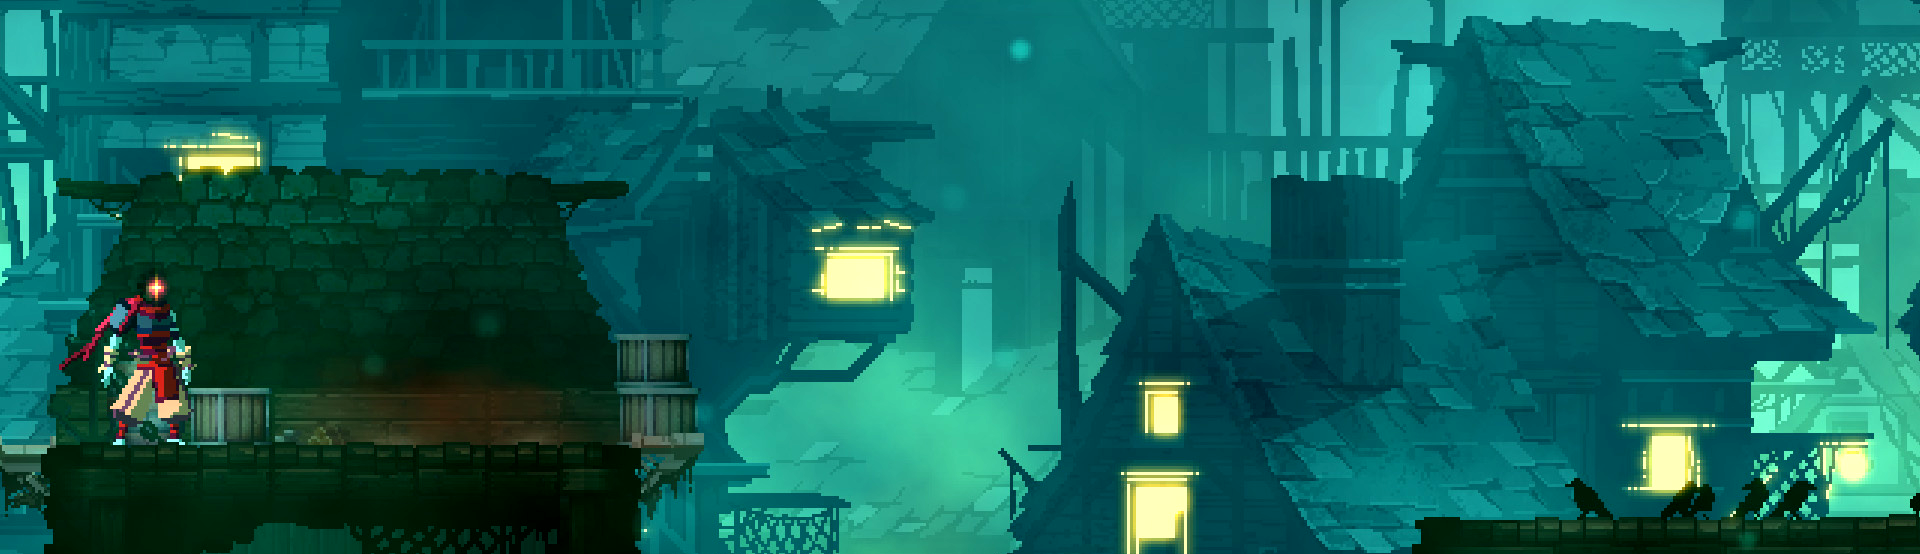
An ingame screenshot of the last “tower defense” version of the game, before it was sliced down to a single player Castlevaniesque adventure.
We basically decided to cut every single aspect of the project that we were not confident with: mobile, cross-platform, multiplayer and last but not least, tower-defense.
This was a “last chance” move to save the project (and the company, we were not in a great shape) from obliteration. It was also the moment we decided to go “all-in” on Steam & PC, which was something completely new for us.
The final product is quite different from the original idea as you can see ;) We decided to call it a Roguevania, because it sounded cool, it was quite close to the actual game concept and because no one could stop us from doing stupid things.
One would say this change from Tower Defense to Roguevania was a good move, as the final game sold more than 5M units on all platforms and won the Best Action Game award, during the Game Awards in 2018.
A very early mockup of the game, when it was still a top-down tower defense in a modern world.
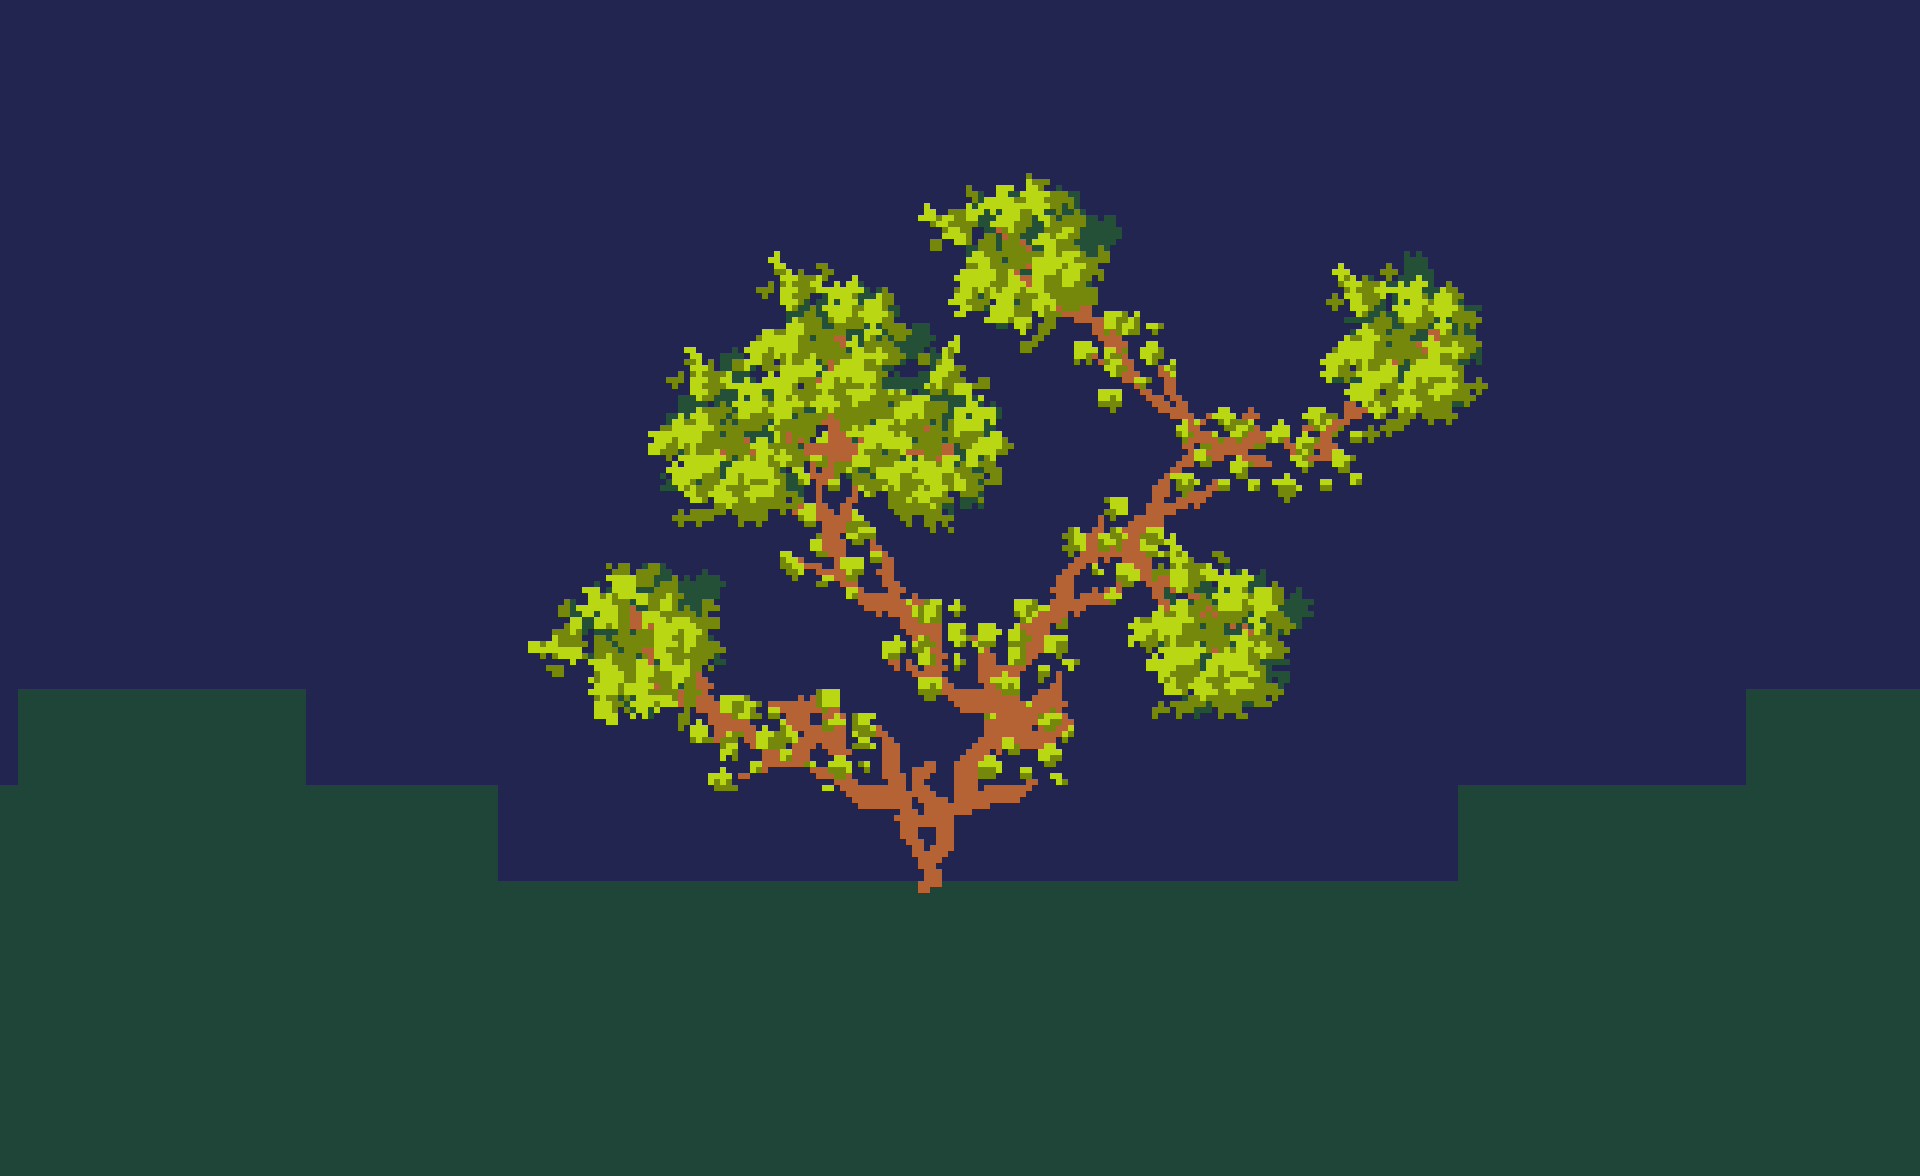
This is my Ludum Dare 42 entry! You are a tree. Try to escape pollution by growing away, planting seed and picking magic stars that will clean up some dirt.
Please note that I made it in about 9h, and partially during a flight between Taipei and Paris. So don’t expect much here: